44
Hardware
14 x #8 x 2-1/2” Wood Screw
S3
9460
9460
9460
4 x Wall Support 1-1/2 x 1-1/2 x 56-1/8”
Wood Parts
9460
9214
9248
9248
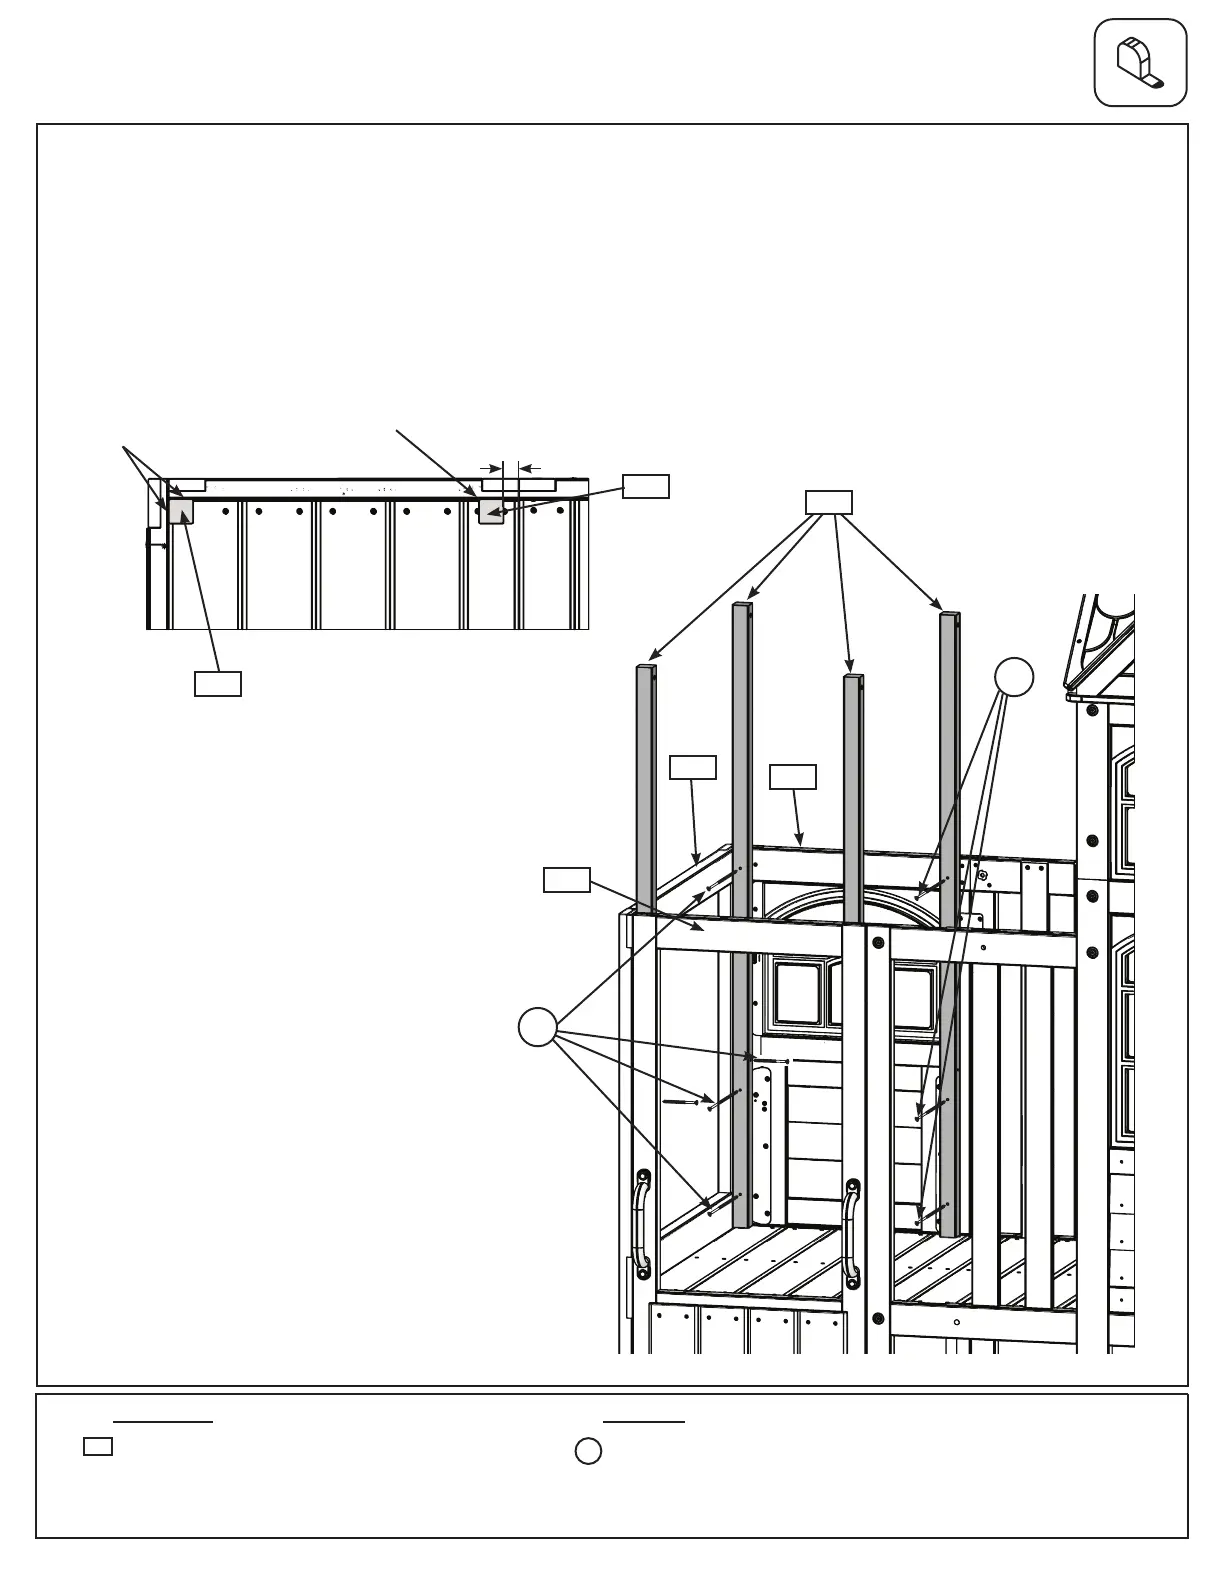
A: In the upper level of the unit place 1 (9460) Wall Support in each corner so that they are tight to (9214) End
Slide Panel and the (9248) Narrow Panels. Attach 9460 Wall Supports to 9248 Narrow Panels using 3 (S3) #8
x 2-1/2 Wood Screws per support, making sure to note the hole orientation. Then attach 9460 Wall Supports to
9214 End Slide Panel using 1 (S3) #8 x 2-1/2 Wood Screw per support, making sure to note the hole orientation.
(g. 13.1)
B: Place 2 more (9460) Wall Supports on the fort side so each one is ush to the (9248) Narrow Panel. There
should be a 1” gap between the Supports and the edge of the (9248) Narrow Panels as shown in g 13.2. Attach
using 3 (S3) #8 x 2- 1/2” Wood Screws per support, making sure to note the hole orientation. (g. 13.1)
Step 13: Attach Wall Supports
Fig. 13.1
Fig. 13.2
1”
25mm
Slide
Side
Flush
Flush
x 3 per
Support
x 4 per
Support
S3
S3
Fort
Side