Issue: 08/2012
• Put the full reel on the upper reel shaft or prepare
the platter system.
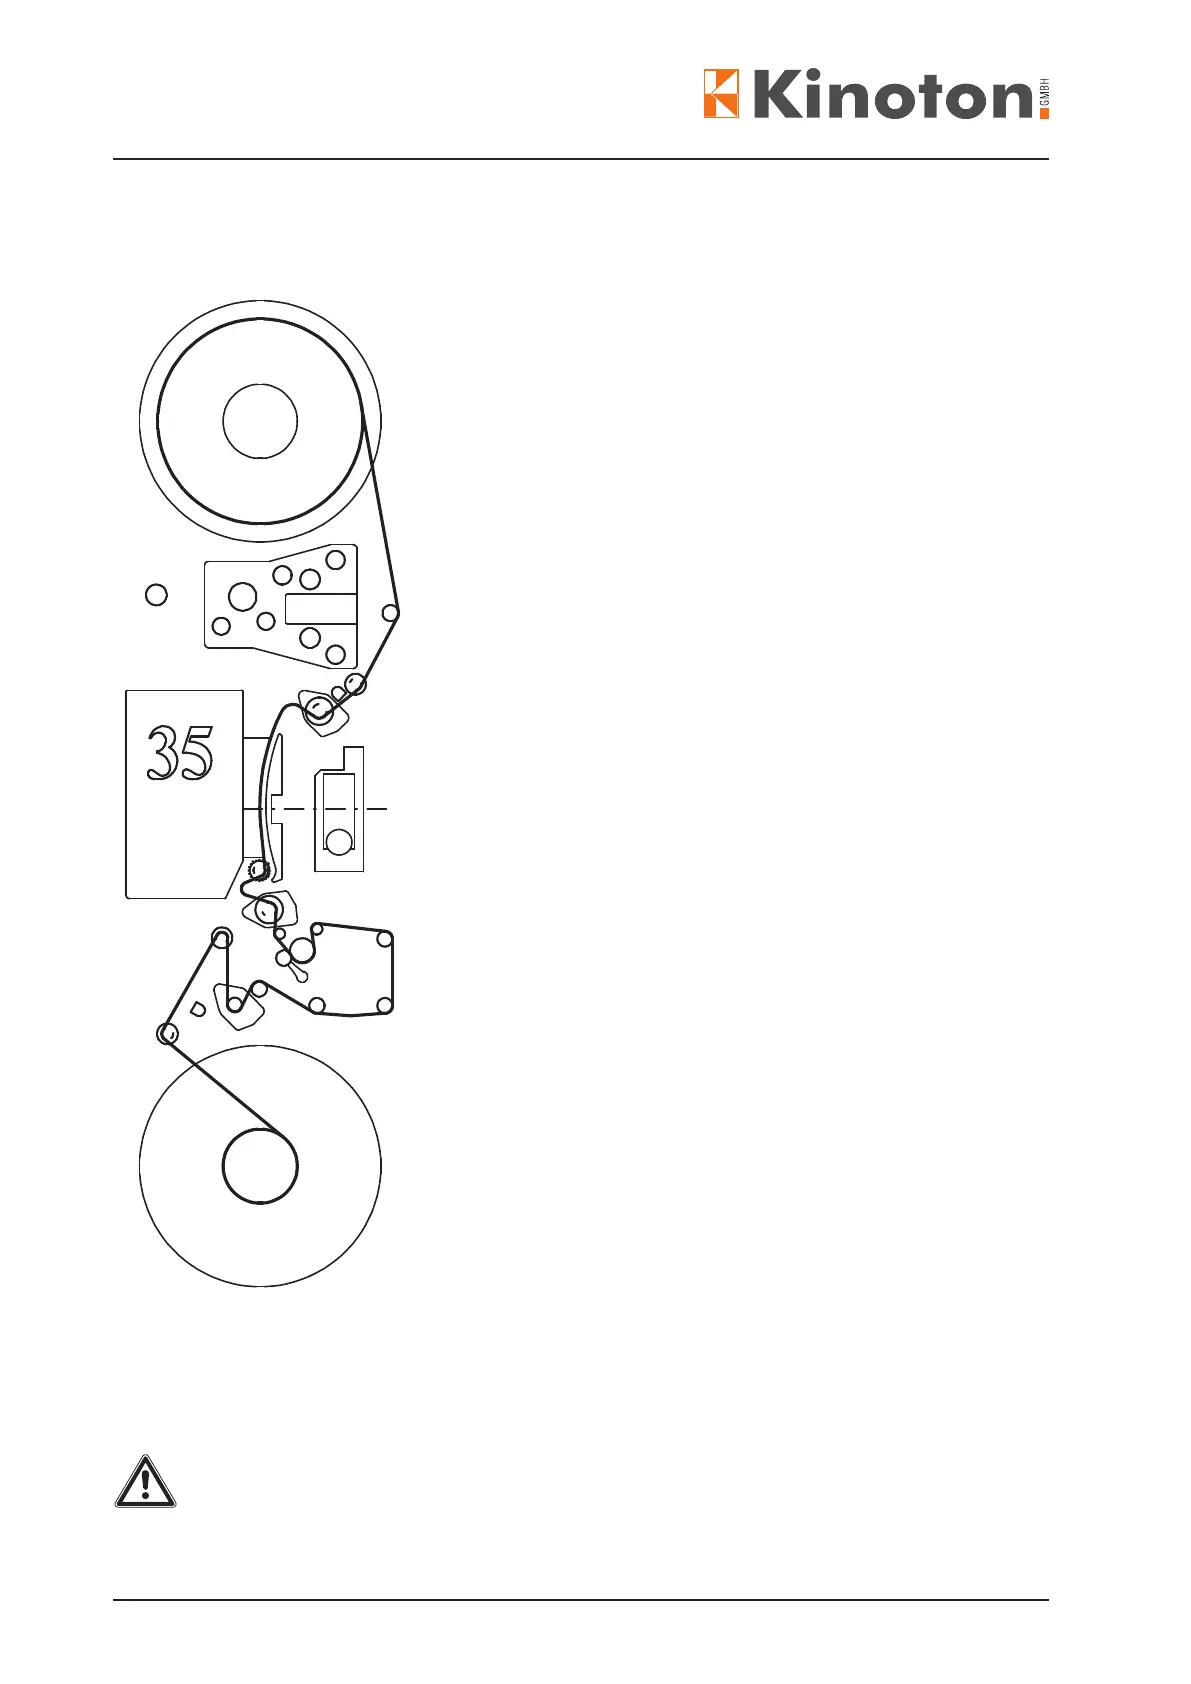
• - Open the sprocket pad shoe.
- Thread the lm in the combined feed sprocket
(all perforations engage in the sprocket teeth).
- Close the pad shoe.
• Thread the lm into the lm gate and close the
lm pressure skate.
One whole frame must be centered vertically in
front of the aperture opening.
There is a small light inside the aperture to assist
in centring.
Assure the lm is centered horizontally between
the ceramic discs.
• - Open the sprocket pad shoe.
- Thread the lm into the combined holdback/
bottom sprocket (all perforations engage in the
sprocket teeth).
- Close the pad shoe.
- Verify the loop below gate is still OK.
• Thread the lm through the guide rollers to the
sound head (35 mm lm), the sound pressure
roller may be lifted to ease threading
• - Open the 35 mm sprocket pad shoe.
- Thread the lm into the holdback/bottom
sprocket (all perforations engage in the
sprocket teeth).
- Close the pad shoe.
- Verify the loop below the gate is still OK.
• Thread the lm via the guide rollers to the take-up
friction and wind-up the lm several times around
the take-up reel or lead the lm to “take-up” level
of platter system.
If the projector was switched off with a threaded lm the lm loops and the lm position
must be checked again.