CVS-842/852/843 Chapter 5
Operation Manual Basic Operation
5.3.5 Setting the partial zoom position in NORM/ZOOM mode
(1) Select ZOOM in NORM/ZOOM mode. To do so proceed as follows:
Menu -> Display -> Zoom Type -> ZOOM
(2) Select Zoom Range. To do so proceed; Menu -> Display -> Zoom Range and then select the
zoom range out of the following depth selections.
Range selections: 2.5,5,7.5,10,15,20,25,30,35,40,45,50,55,60,65,70,75,80,90,100,110,120,130,
140,150,160,180,200(meter/hiro/fathom/Italian fathom)
10,15,20,30,40,50,60,80,100,120,140,160,180,200,220,240,260,280,320,360,
400,450,500,550,600,650/(feet)
(3) To display Hi Frequency NORM/ZOOM image select H ZOOM, to display the Lo Frequency
NORM/ZOOM image select L ZOOM.
(4) Press the VRM key. The digital VRM display in green will be highlighted.
NOTE: In case the digital display is shown in yellow, press the VRM key to change the display green.
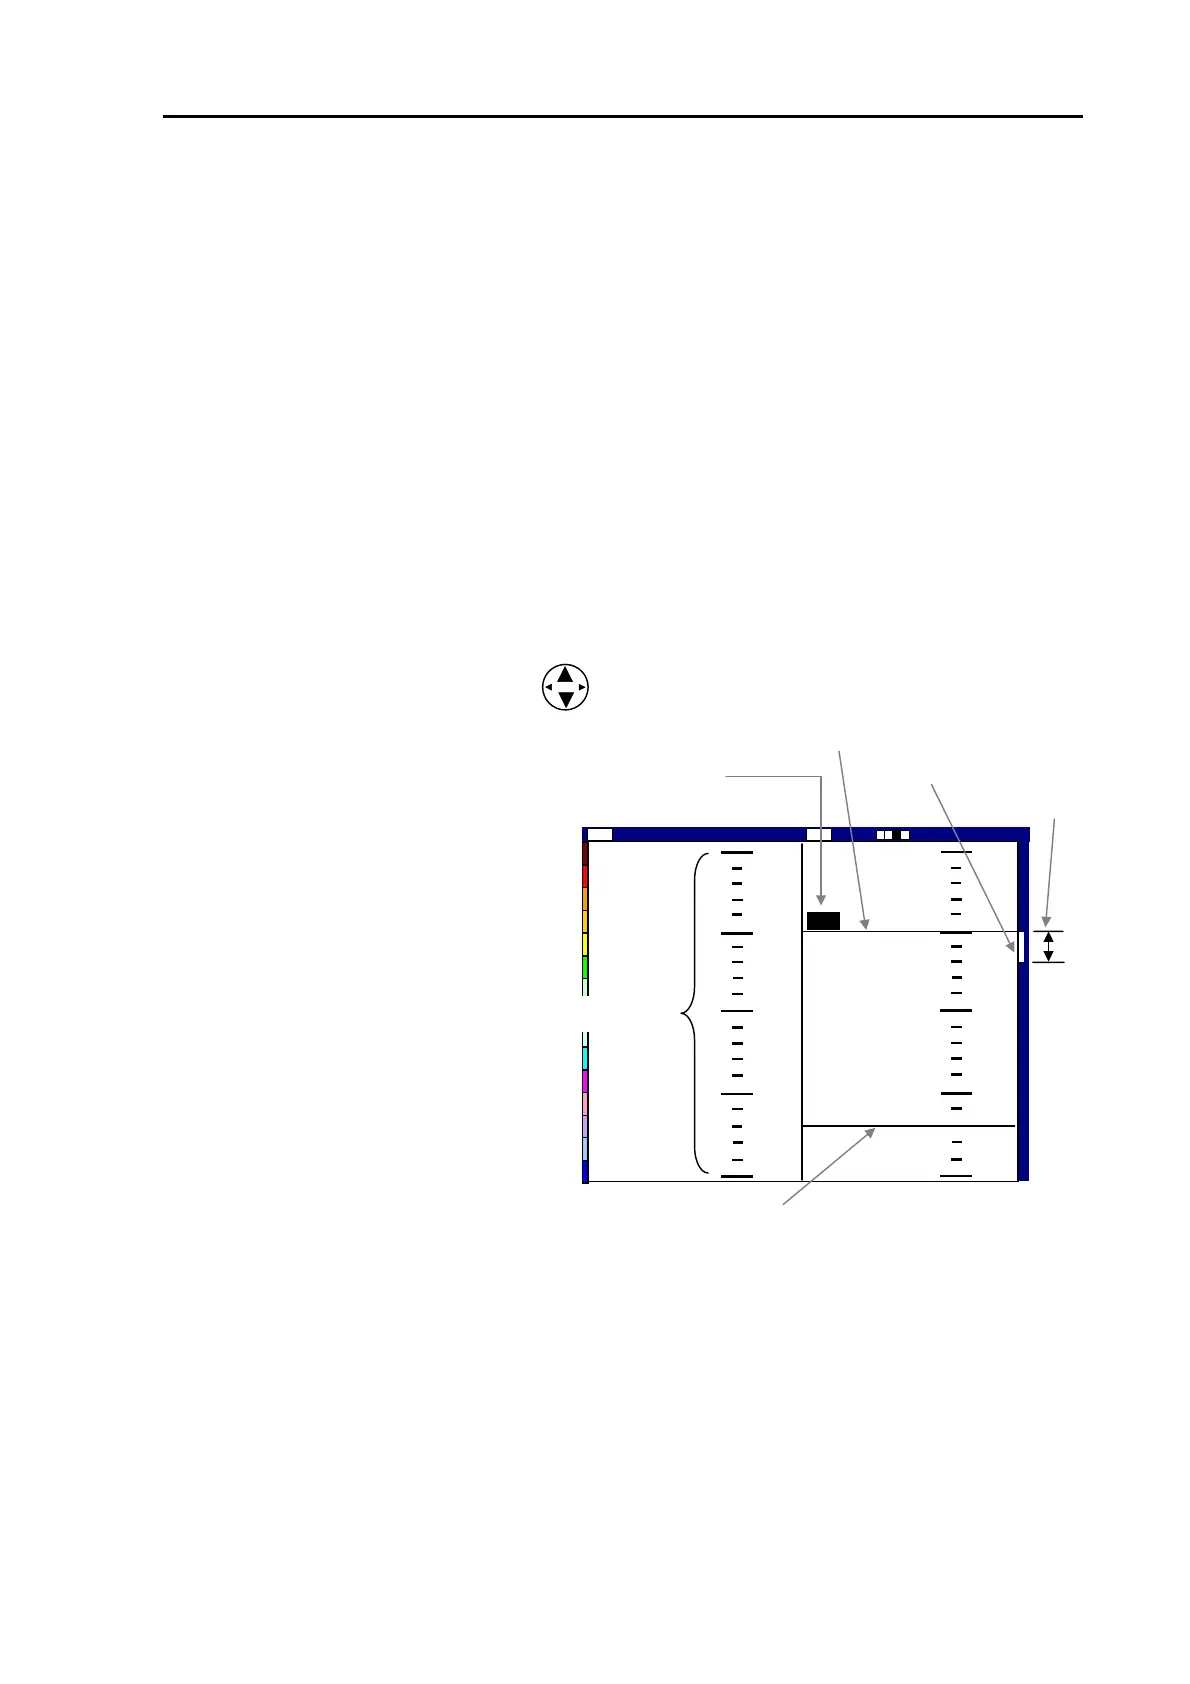
(5) Press either the up or down arrow key to set an upper limit depth.
Zoom starting depth marker (green)
VRM
The picture on the right shows the
display set up in this procedure,
Normal Low Frequency range on
the right and Zoomed range on the
left with zoom starting depth at 50
and zooming range set to 20.
A zoom starting depth is shown here in green
Zoom range
0
50
100
150
200
50
55
60
65
70
50
Low
2001/05/23(Wed)
Image Speed 1/1
14:22:56
Shift
000 0
ZM
Zoom range marker
Zoomed range
Figure 5.17 Layout of NORM/ZOOM mode display
93132692-00 5-11