60
Cue List
A cue list allows you to playback multiple songs in
succession. This instrument allows you to create 20 cue
lists. Each cue list allows you to connect a maximum of
99 songs in any order, and to specify the number of
times that each song will repeat.
Each unit in a cue list is called a “step,” and each step
contains a song number and the number of repeats.
For example, a song consisting of an introduction, mel-
ody A, melody B, bridge, solo backing, and ending
could be created using a separate song for each unit.
Then you could use a cue list to play the introduction
twice, melody A four times, melody B four times, the
break twice, melody A four times, ... etc. to create the
completed song. When you will need to change the
structure of the song, the cue list function provides an
efficient way to do so.
The page menu command “Convert to Song” lets you
convert the two or more songs in a cue list into a single
song. This allows you to use a cue list to create the
backing, then convert the cue list into a song and add
solo phrases on unused tracks.
Playback
Playing a song (Play)
When you wish to playback song data on the
sequencer, you must first record song data, or load or
dump song data into this instrument.
To load song data from a floppy disk etc., use Disk
mode.
1 In Sequencer mode, Select SEQ 1.1: Play/REC,
Play/REC page.
2 Use “Song Select” to select the desired song
(☞p.62).
3 Press the [START/STOP] key.
The song you selected in step 2 will begin playing.
Pressing the [START/STOP] key in pages other
than Sequencer mode SEQ 2.1: Cue List or SEQ 5.1:
Pattern will start song playback. When the
[START/STOP] key is pressed in SEQ 2.1: Cue List,
the currently selected cue list will begin playing.
When the [START/STOP] key is pressed in SEQ
5.1: Pattern, the currently selected pattern will
begin playing.
4 If you press the [START/STOP] key during play-
back, the playback will stop.
Press the [START/STOP] key once again, and play-
back will resume from where it had been stopped.
• Pressing the [LOCATE] key will move to the
specified location.
• Pressing the [PAUSE] key will resume playback.
Press [PAUSE] once again, and playback will
resume.
• Pressing the [ REW], [FF ] keys will rewind
or fast-forward.
These can be used during playback or when paused.
The speed of rewind and fast-forward is set by the
utility menu command “FF/REW Speed”.
Mute/Solo function
You can use the “PLAY/MUTE/REC” and “SOLO On/
Off” in the Program page of SEQ 1.1: Play/REC to hear
or mute a desired individual track 1–16. For example,
this can be used when you wish to record new tracks
while listening only to the rhythm section of the previ-
ously recorded tracks.
You can use the utility menu command “Solo Selected
Track” to hear only the currently selected tracks. It is
convenient to use this while setting track parameters or
effect settings (☞PG p.71).
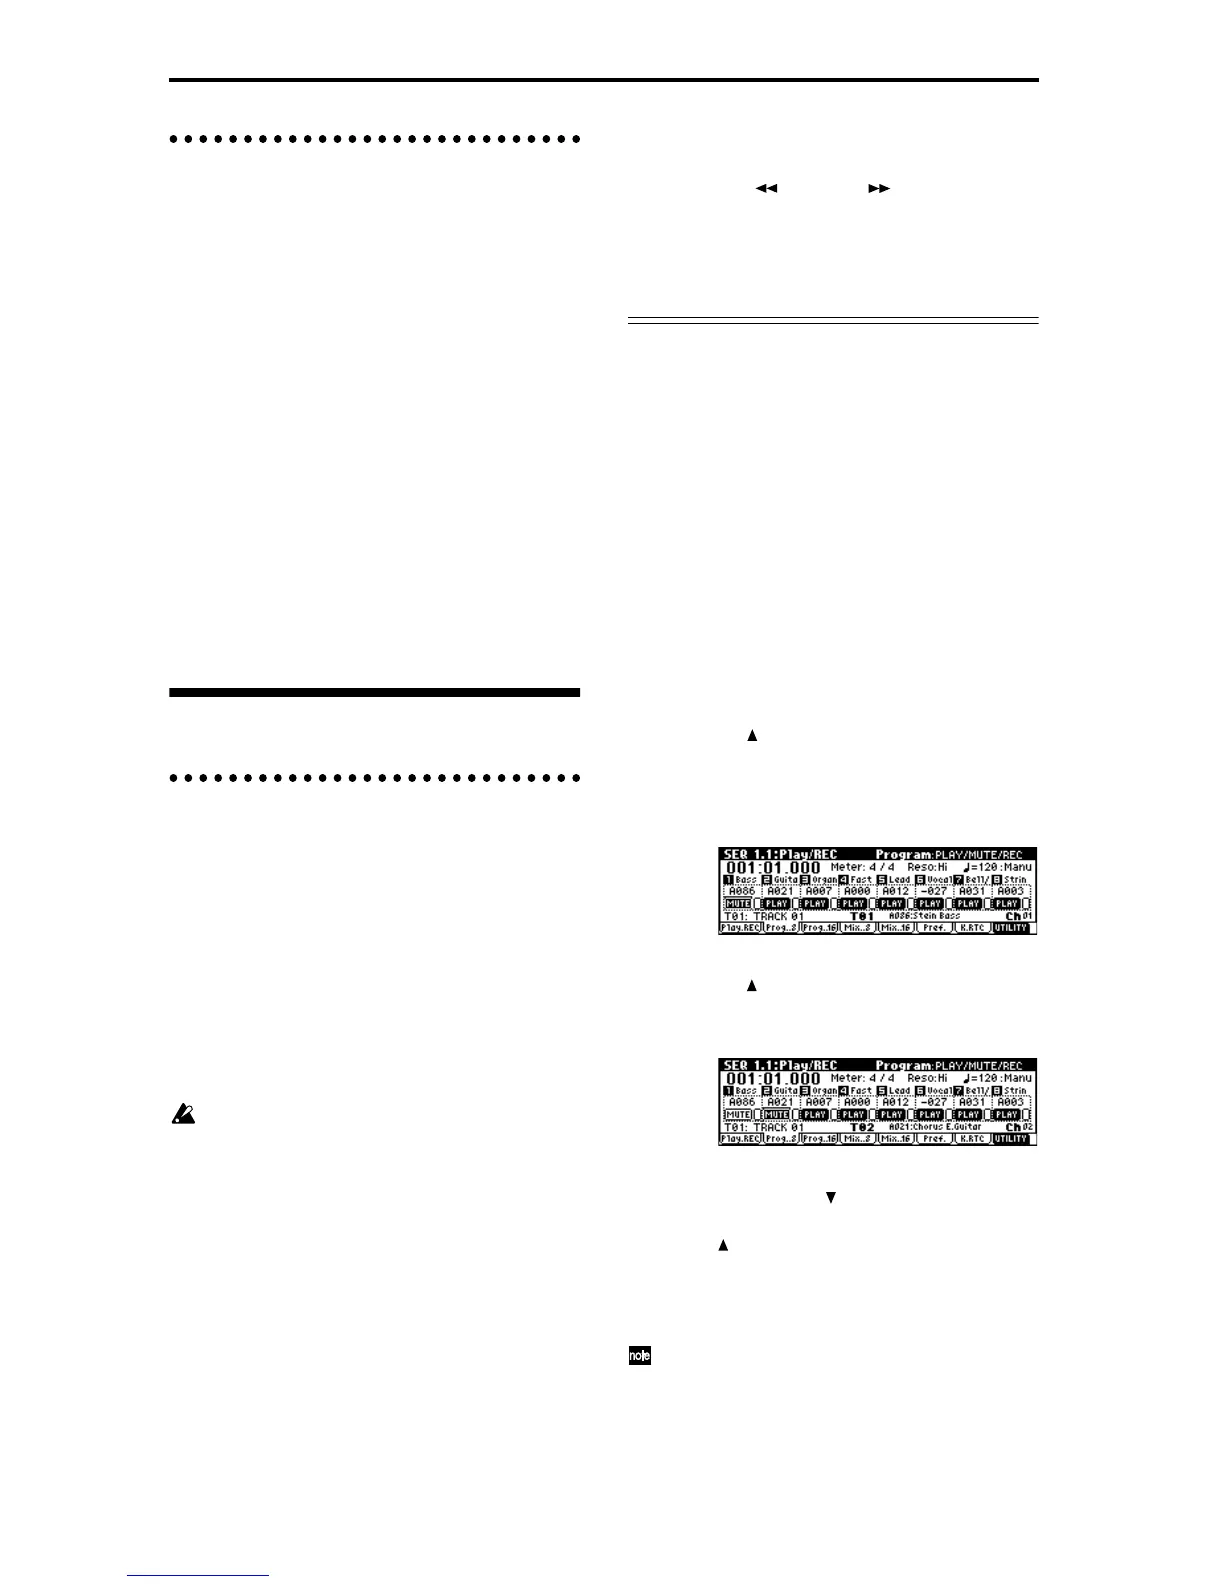
Here’s how to hear the result of the “PLAY/MUTE/
REC” and “SOLO On/Off” settings. Make sure that
one of the SEQ 1.1: Play/Rec pages is selected.
1 Press the [START/STOP] key to playback the song.
2 Press the [F2]“Prog. 8 ”) key.
3 Select the track 1 “PLAY/MUTE/REC, ” and press
the VALUE [ ] key once.
The display will change to “MUTE,” and the play-
back of track 1 will no longer be heard. In this way,
the “mute” function allows you to silence a speci-
fied track.
Select the track 2 “PLAY/MUTE/REC” and press
the VALUE [] key once.
The display will change, and the playback of track 2
will also be muted.
To cancel muting, press the “PLAY/MUTE/REC”
and press the VALUE [ ] key.
4 Next select the track 1 “SOLO” and press the
VALUE [ ] key once.
The display will change, and now only the track 1
playback will be heard. In this way, the Solo func-
tion lets you hear only a specified track.
If both Mute and Solo are used, the Solo function
will be given priority.)

 Loading...


