5
15
15
7
8
13
14
12
11
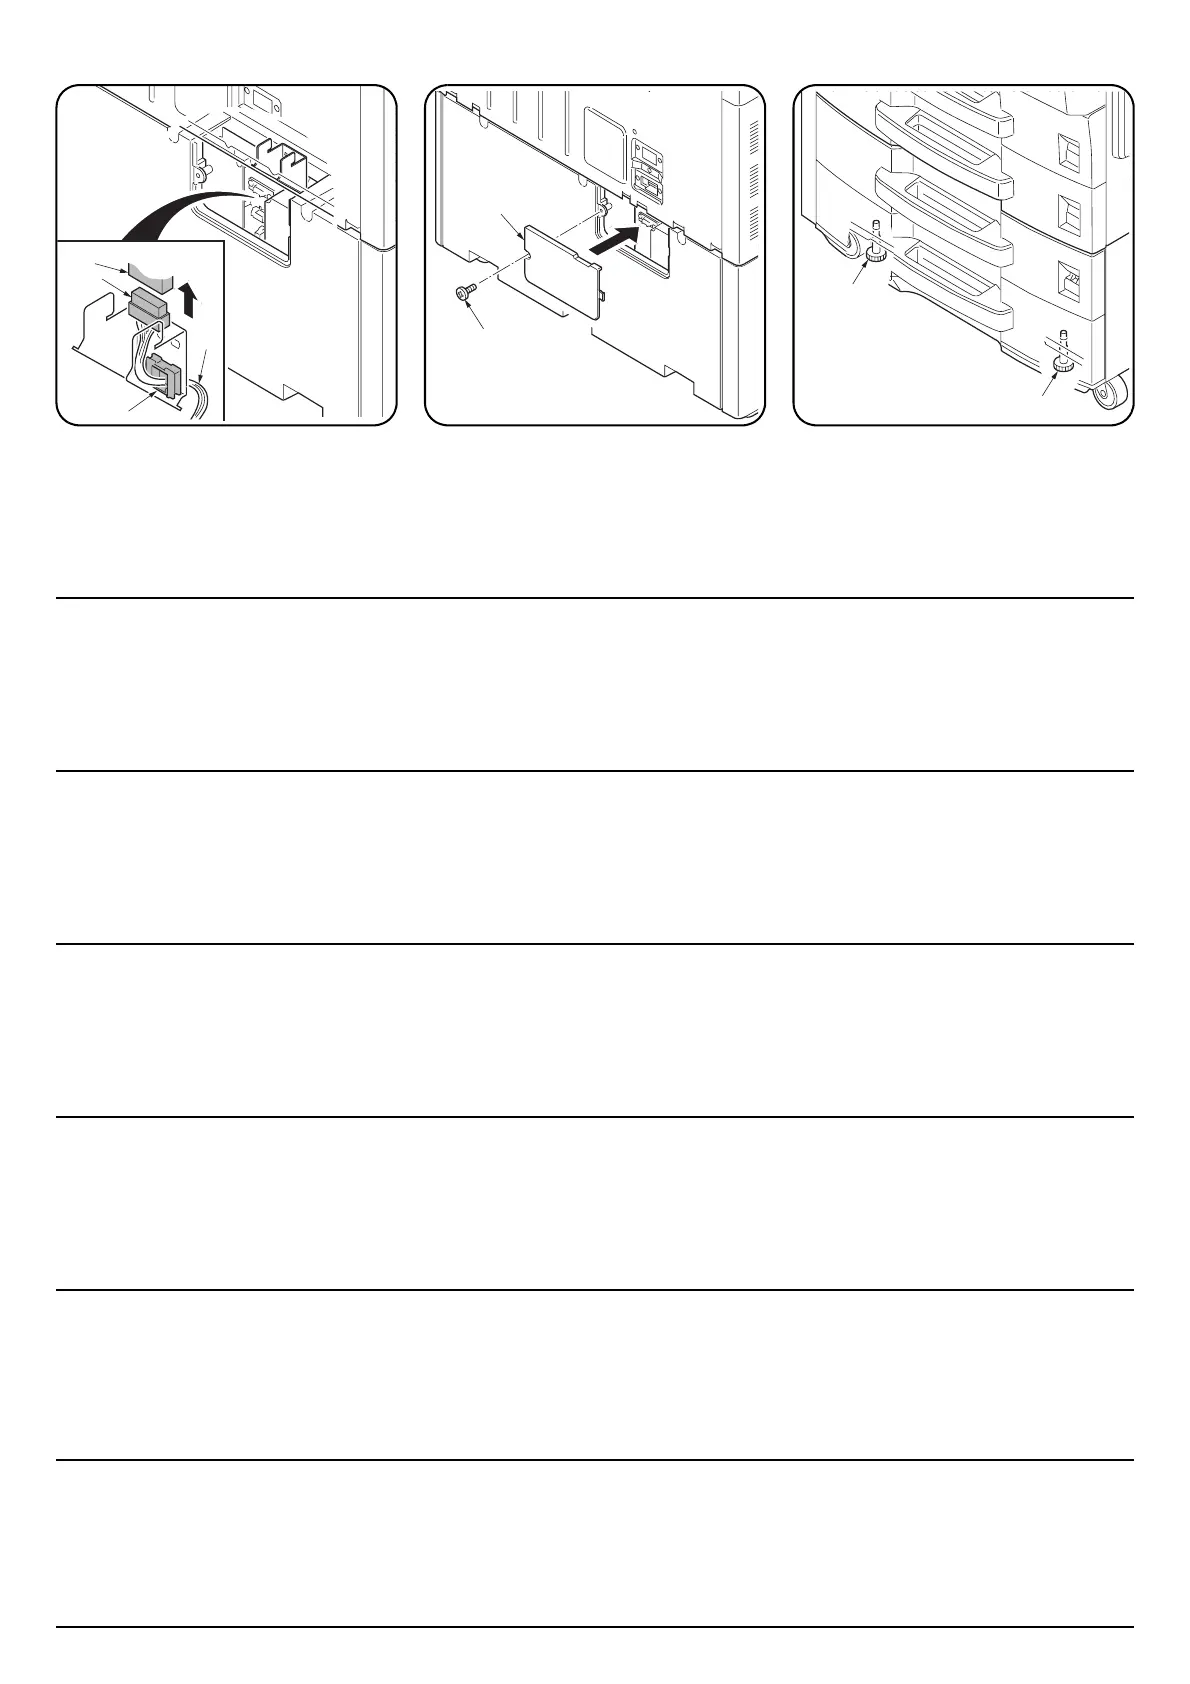
10.Insert the 12-P connector (11) of the paper
feeder into the connector (12) on the MFP.
11. Route the harness (13) through the clamp (14)
on the retainer (C).
12.Refit the cover (8) using the screw (7)
removed in step 7.
13.Turn the adjusters on each corner (15) until
they reach the floor and then secure the
paper feeder.
10.Insérer le connecteur à douze broches (11)
du bureau papier dans le connecteur (12) du
MFP.
11. Faire passer le faisceau de câbles (13) par le
collier (14) de l’élément de retenue (C).
12.Remettre le couvercle (8) en place à l’aide
de la vis (7) retirée auparavant à l’étape 7.
13.Faire tourner les dispositifs de réglage de
chacun des coins (15) jusqu'à ce qu'ils
touchent le sol et fixer ensuite le bureau
papier.
10.Inserte el conector de 12 clavijas (11) del
alimentador de papel en el conector (12) del
MFP.
11. Inserte el soporte (13) a través del sujetador
(14) del retén (C).
12.Vuelva a colocar la tapa (8) usando el tornillo
(7) quitado en el paso 7.
13.Gire los reguladores en cada esquina (15)
hasta que lleguen al piso y, a continuación,
asegure el alimentador de papel.
10. Stecken Sie den 12poligen Steckverbinder
(11) des Papiereinzugs in die Buchse am
MFP.
11. Führen Sie den Kabelbaum (13) durch die
Klemme (14) auf der Halterung (C).
12.Bringen Sie die Abdeckung (8) wieder mit
der in Schritt (7) entfernten Schraube 7 an.
13.Die Einsteller an jeder Ecke (15) drehen, bis
sie den Boden berühren, und dann den
Papiereinzug sichern.
10.Inserire il connettore a 12 piedini (11)
dell’unità di alimentazione della carta nel
connettore (12) situato sull’MFP.
11. Far passare i cavi (13) attraverso il morsetto
(14) sul fermo (C).
12.Inserire il pannello posteriore (8) usando le
viti (7) rimosse al punto 7.
13.Ruotare i regolatori (15) presenti su ciascun
angolo finché vengano a contatto con il
pavimento, e quindi fissare l’unità di
alimentazione della carta.
10.ペーパフィーダの 12P コネクタ (11) を MFP
本体のコネクタ (12) に接続する。
11.電線 (13) を取付板 (C) に付いているクラン
プ (14) に挿入し、電線処理をおこなう。
12.手順 7 で取り外したビス (7)1 本でカバー
(8) を元通りに取り付ける。
13.4 隅のアジャスタ (15) を床に接触する位置
まで回し、ペーパーフィーダを固定する。
10.将供纸盒的 12 脚接头 (11) 接于 MFP 主机上
的接口 (12)。
11.将电线 (13) 插入安装板 (C) 上的夹钳 (14)
中而进行电线处理。
12.用步骤 7 拆除的 1 个螺丝 (7) 将盖板 (8) 装
回原来的位置。
13.转动四角 (15) 上的调节器直至与地面接触,
然后再固定供纸盒。

 Loading...
