Replacing an IOM 127
Replacing a dummy drive carrier
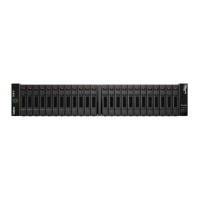
A dummy drive carrier module is removed from the 2U enclosure simply by pulling the module out of the drive
slot. A dummy drive carrier module is installed in the enclosure by properly aligning it and inserting it into the
drive slot, followed by pushing it securely into place.
CAUTION: To ensure optimal cooling throughout the 2U enclosure, dummy drive carrier modules must be
fitted to all unused drive slots. See also Figure 47 (page 55).
Replacing an IOM
IMPORTANT: The DS Series and DS EXP/D3284
storage enclosures
support dual-controller configuration only.
If a partner controller fails, the storage system will fail over and run on a single controller module until the
redundancy is restored. For RBODs and EBODs, an IOM must be installed in each IOM slot to ensure sufficient air
flow through the enclosure during operation.
I/O module (IOM) denotes either a controller module (RAID canister) or an expansion module (expansion
canister). In a dual-controller configuration, controller and expansion modules are hot-swappable, which means
you can replace one module without halting I/O to disk groups, or powering off the enclosure. In this case, the
second module takes over operation of the storage system until you install the new module.
You may need to replace a controller module or an expansion module when:
• The Fault LED is illuminated
• Health status reporting in the SMC indicates a problem with the module
• Events in the SMC indicate a problem with the module
• Troubleshooting indicates a problem with the module
TIP: The illustrations show IOM module replacement within the top slot (A) as you view the enclosure rear
panel. To replace an IOM in the bottom slot (B), you would first rotate the module 180º about its longitudinal axis,
so that it properly aligns with its connectors on the back of the midplane. See also Figure 16 (page 27).
Before you begin
Removing a controller or expansion module from an operational enclosure significantly changes air flow within the
enclosure. Openings must be populated for the enclosure to cool properly. Leave modules in the enclosure until
ready to install a replacement. If replacing both controllers in a dual-controller enclosure, use the SMC to record
configuration settings before installing the new controller modules. See “Removing an IOM” (page 130), and
“Installing an IOM” (page 131) for instructions on installing an additional controller module.
CAUTION: When replacing a controller module, ensure that less than 10 seconds elapse between inserting it
into a slot and fully latching it in place. Not doing so might cause the controller to fail. If it is not latched within 10
seconds, remove the controller module from the slot, and repeat the process.
When two controller modules are installed in the enclosure, they must be of the same model type. When replacing
both controller modules in an operational enclosure, follow these guidelines:
1. Replace one controller as described in these instructions.
2. Wait 30 minutes: this pause ensures that the controller and its ownership of disk groups has sufficient time to
stabilize. See also “Verifying component operation” (page 132).
 Loading...


