NR800 Series Hard Drive Installation
22
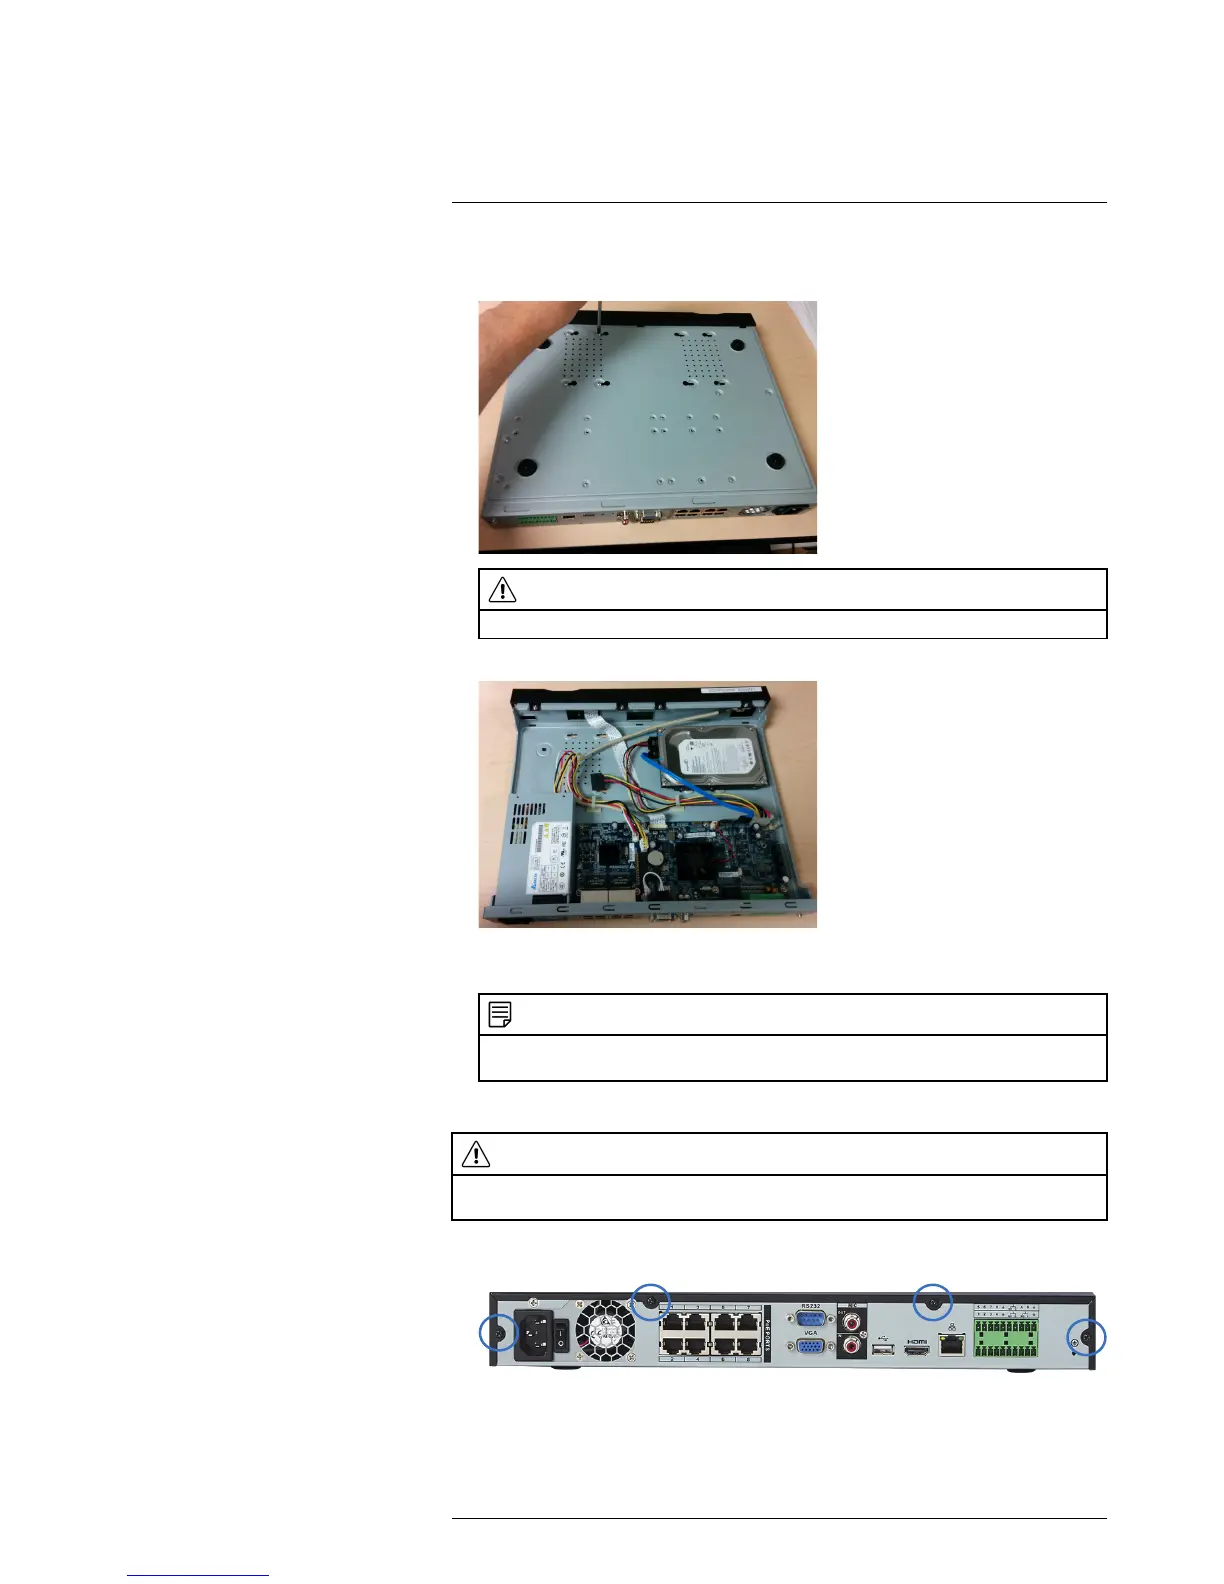
5. Turn the system over carefully. Tighten the hard drive screws (4x) to secure the hard
drive.
CAUTION
Hold the hard drive in place when turning the system over to prevent damage to the system.
6. Connect the SATA power and data cable to the hard drive.
7. Replace the cover and cover screws (4x).
NOTE
After installation, you must format the hard drive in order to use it with the system. See 22.3 Format-
ting Hard Drives, page 158.
22.2 Removing the Hard Drive
CAUTION
Make sure that the system is OFF and ALL power adapters have been disconnected before removing/
installing the hard drive.
1. Power off the system, and unplug all cabling from the system.
2. Remove the rear panel screws (4x). Remove the cover.
#LX400021; r. 4.0/30344/30494; en-US
157
 Loading...