NR800 Series Hard Drive
Installation
22
The models listed below come pre-installed with the following:
• NR8081 (8–channel): This system comes with a pre-installed 3.5” SATA hard drive.
You can install up to two hard drives up to a maximum size of 4TB
each.
• NR8163 (16–channel): This system comes with a pre-installed 3.5” SATA hard drive.
You can install up to four hard drives up to a maximum size of 4TB
each.
• NR8326 (32–channel): This system comes with two (2) pre-installed 3.5” SATA hard
drives. You can install up to four hard drives up to a maximum size of 4TB
each.
22.1 Installing a Hard Drive
CAUTION
Make sure that the system is OFF and the power cable is disconnected before removing/installing the
hard drive.
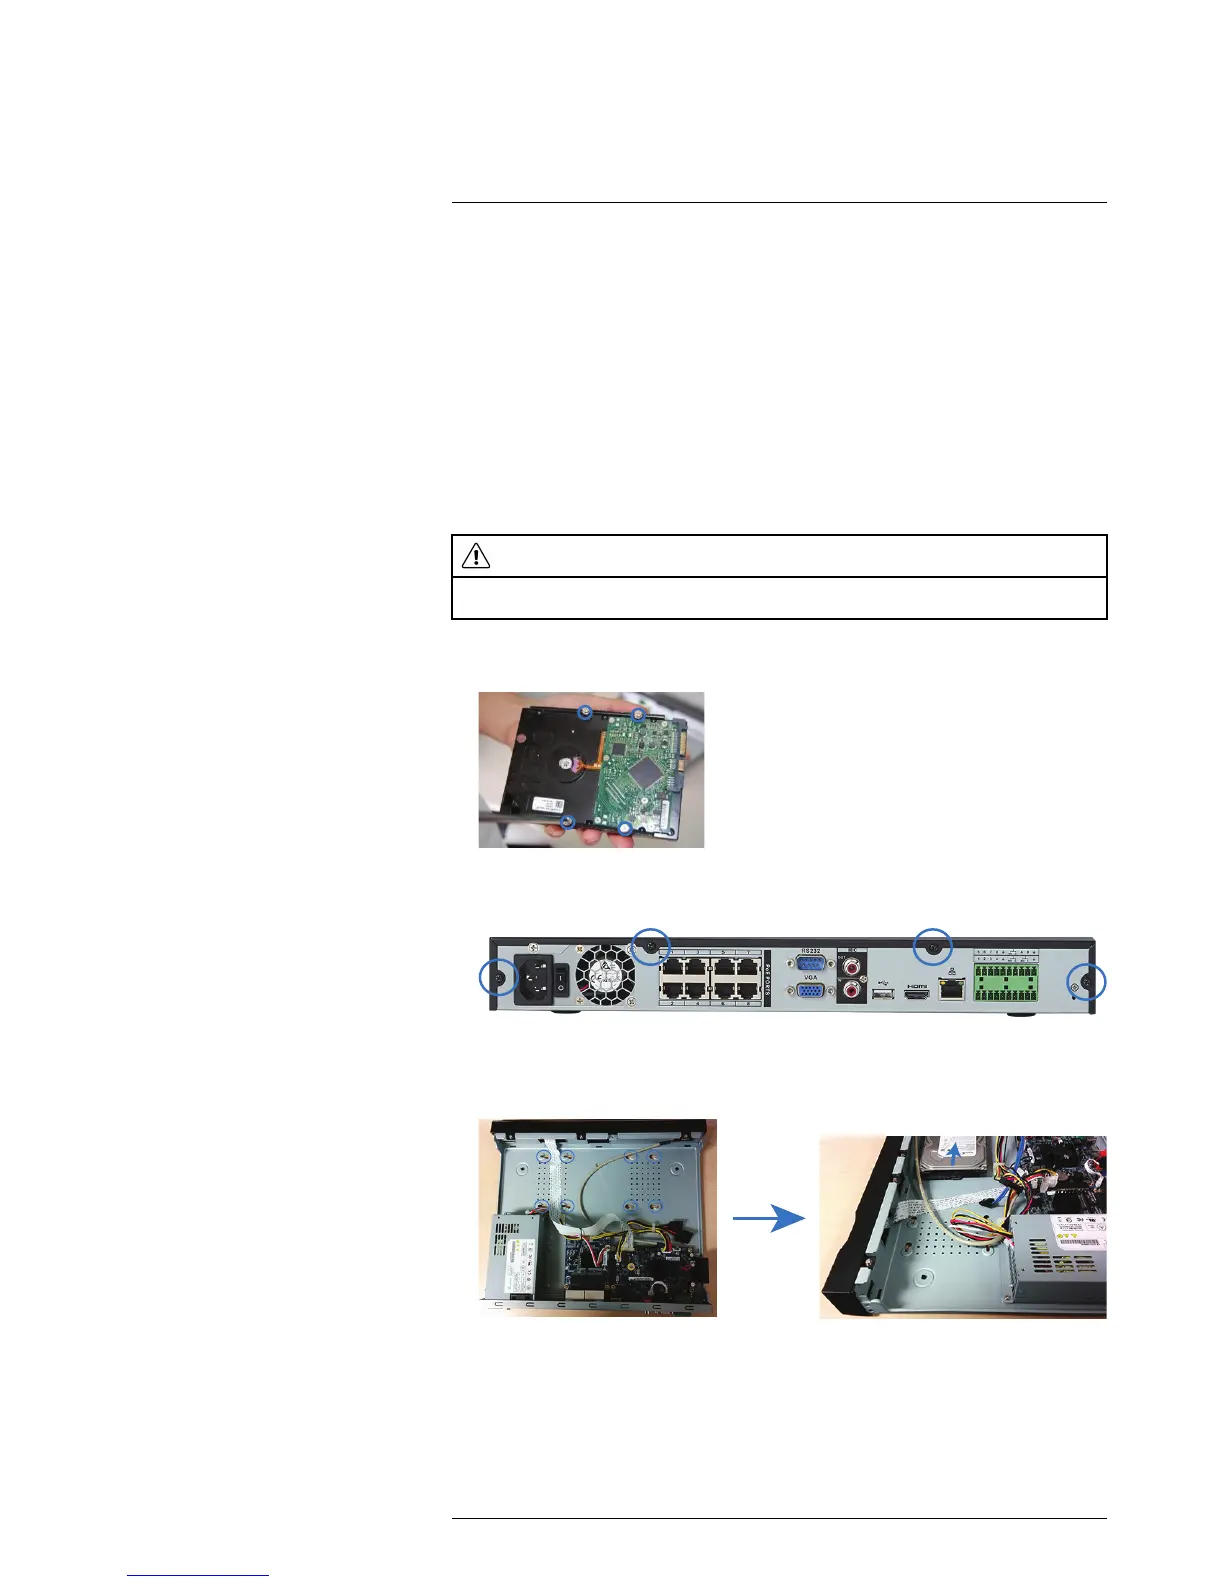
To install the hard drive:
1. Insert hard drive screws (4x) on the hard drive and tighten them half way.
2. Power off the system, and unplug all cabling from the system.
3. Remove the rear panel screws (4x). Remove the cover.
4. Place the hard drive over one of the sets of screw slots on the bottom of the system
and then slide the hard drive into place. The SATA connectors on the hard drive
should face the center of the unit.
#LX400021; r. 4.0/30344/30494; en-US
156