34
Marking
a
Position
using
the
Map
Cursor
This gives
you
a way of marking a position, other than your present position,
by
moving the
cursor around the map to a place where
you
want to create a POI.
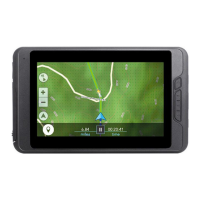
1. While viewing the
Map screen, use the
Arrow
joystick to put the eXplorist into
Cursor mode.
2. Continue moving the crosshair cursor until you are over the location where
you
want
to add a POI.
3. Press
MARK.
4. [Optional] Use the
Arrow
joystick to highlight fields (icon, name, etc.) of the
POI
that
you
want
to
edit. When
you
are done editing the field, press
ENTER.
5. With Save highlighted, press
ENTER.
6. Select the
file
to
save
the
POI
in
and press
ENTER.
7. Press
ESC
to exit the Cursor mode and return to the Position mode.
Ma.rking
a
Position
from
a.
Map
Object
Another method of marking a position while
in
the Cursor mode is to
use
the crosshair cursor
to mark a map object (road, city, etc.).
1. While viewing the Map screen,
use
the
Arrow
joystick to put the eXplorist into
Cursor mode.
2. Continue moving the crosshair cursor until
you
are
·over
a map object
that
you want
to add
as
a POI. (The information about the map object will
be
displayed at the
bottom
of
the display.)
3. Press
ENTER.
4.
Use
the
Arrow
joystick to select, from the list of map objects for
that
location, the
one you want to
use
as
the basel i
ne
for the new
PO
I.
5. Press
ENTER.
6. The Save option will
be
highlighted.
7.
Press
ENTER.
8.
[Optional] Use the
Arrow
joystick to highlight fields (icon, name, etc.) of the
POI
that you want to edit. When
you
are done editing the field, press
ENTER.
9. With Save highlighted, press
ENTER.
10.
Select the
file
to
save
the
POI
in
and press
ENTER.
11.
Press
ESC
to exit the Cursor mode and return to the Position mode.