Series F Test Frames + IntelliMESUR
®
Software User’s Guide
3.10 Installing the IntelliMESUR control panel
For test frame part numbers ending in “-IMT”, for example Model F305-IMT, a Windows tablet with
attached ball mount and mounting bracket are included, packaged separately.
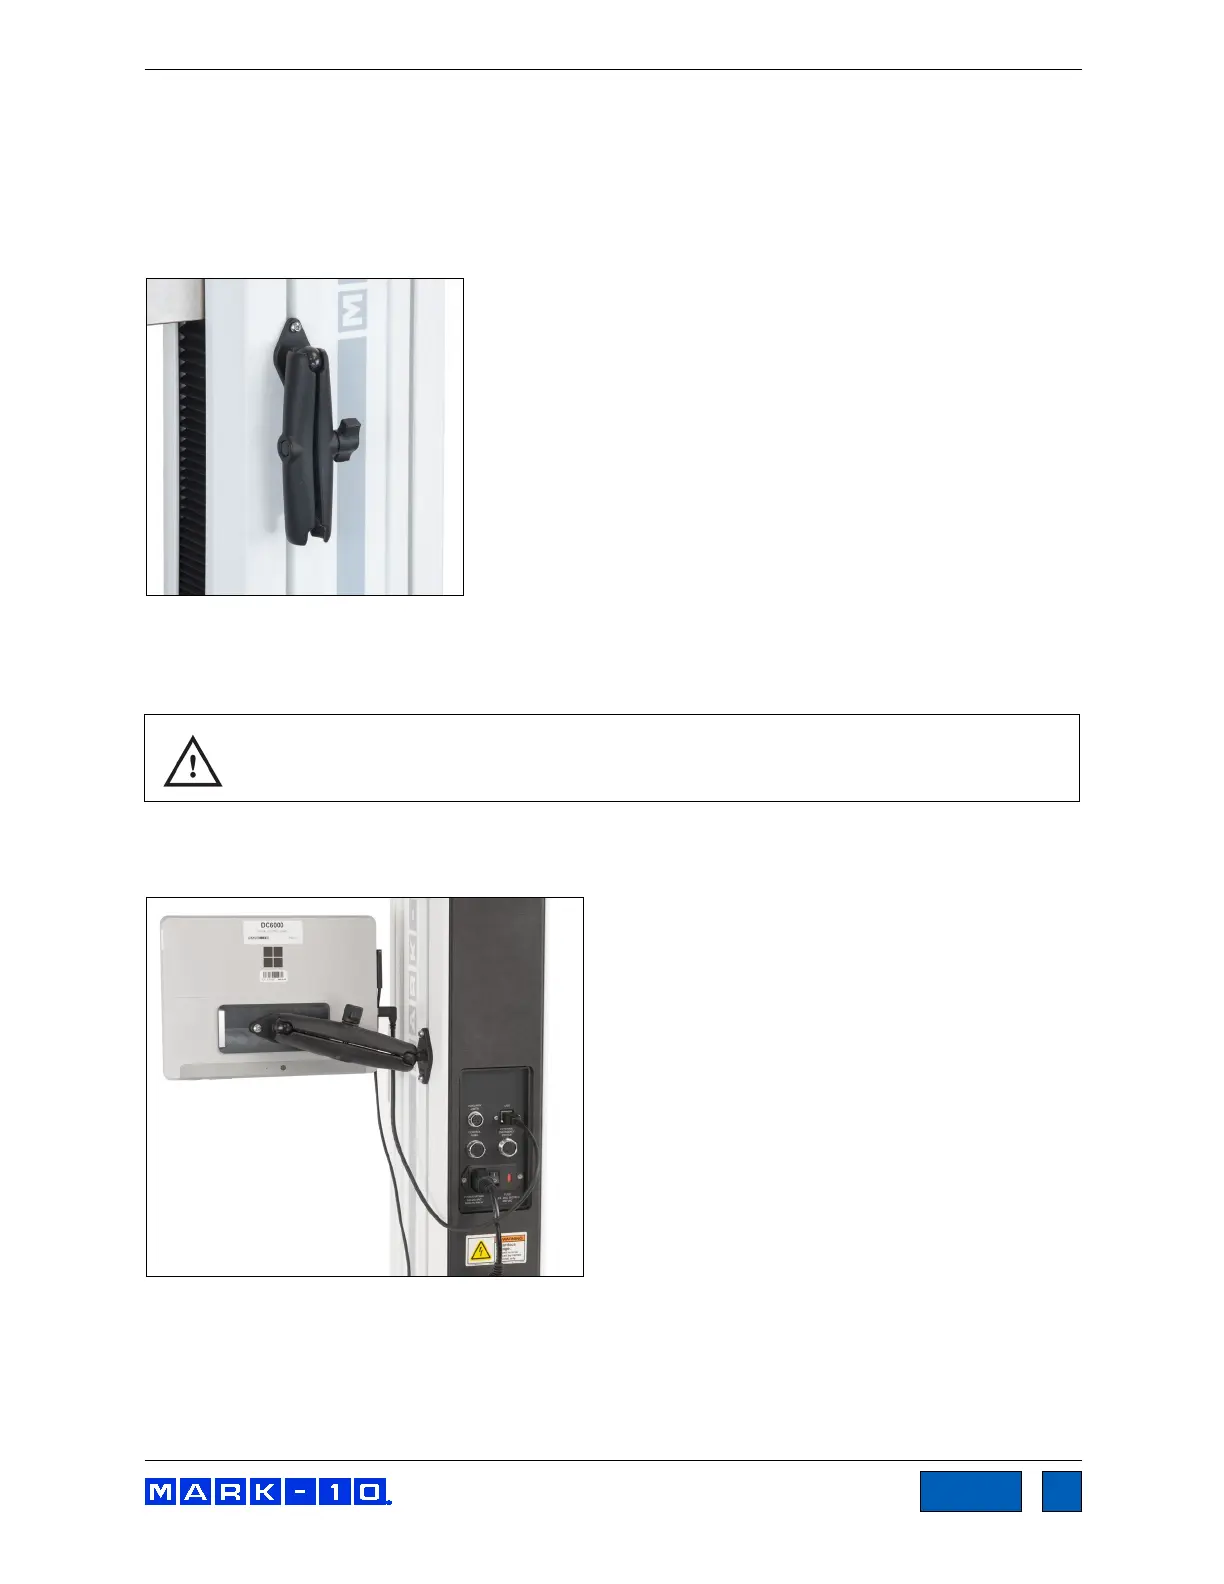
The mounting arm is pre-installed into the front right slot in the test frame column via two screws, as
shown below:
Loosen the knob sufficiently to slide the ball, mounted to the rear of the tablet, into the arm. Orient the
tablet horizontally, with the USB-C port positioned on the left side. Adjust the viewing angle as desired,
then tighten the knob.
Do not attempt to adjust the viewing angle before loosening the knob.
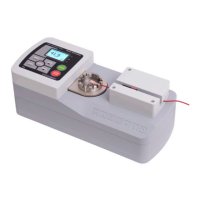
Connect the included USB cable between the USB-C port and the USB-B port in the rear of column, and
connect the AC adapter connector, as shown below:
Plug in the AC adapter and press the Power button, in the lower right corner of the tablet. The tablet will
boot up directly into the IntelliMESUR application. If not, select the IntelliMESUR icon in the Windows
home screen.
www.GlobalTestSupply.com
Find Quality Products Online at: sales@GlobalTestSupply.com