Catch Sensors | V1 | Servicing and Maintenance
7.
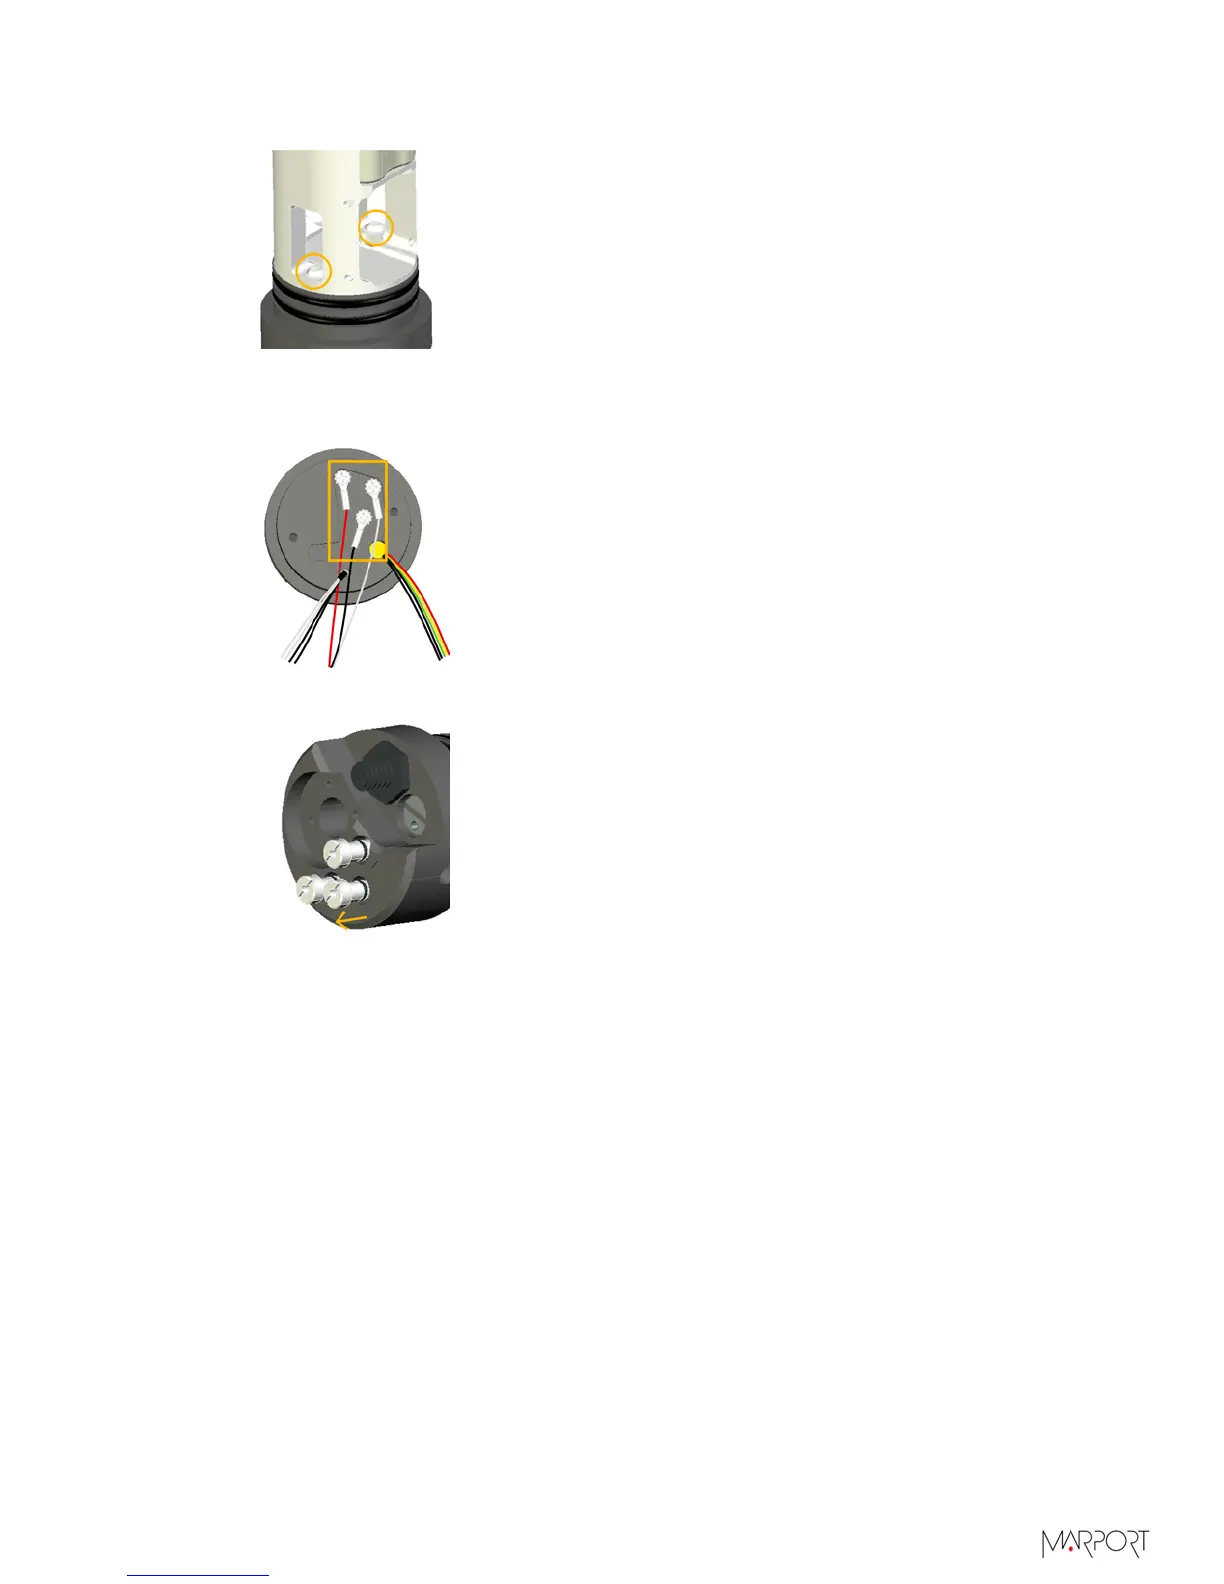
Remove the two screws maintaining the end cap with the 1/8" Allen key.
8.
Remove the 3 screws maintaining the 3 shoulder bolts with a Philips screwdriver or
a 5/64" Allen key (depending on the model of screws that you have). Hold still the
outside of the shoulder bolts with a flat head screwdriver while loosening the screws.
9.
Push the shoulder bolts out with the Allen key.
10.
From each shoulder bolt location, remove o-ring crushes with tweezers.
11.
Fully clean the surface and hole of debris (with a swab or Q-tip) and inspect the
surface for burrs or pitting.
12.
Put new lubricated o-ring crushes at each shoulder bolt location.
13.
Insert new shoulder bolts.
14.
Apply anti-seize on the screws behind the shoulder bolts and put them back into place
(torque at 15 in-lbs / 2 N-m). Hold still the outside of the shoulder bolts with a flat
head screwdriver while tightening the screws.
• White wire: water-switch
• Black wire: negative charge
| 70