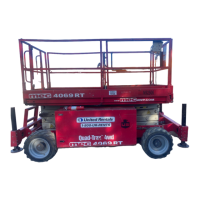
“4069RT” Service and Parts Manual March 2014
Page 1-11
FUNCTIONS MANIFOLD & HYDRAULIC VALVES
F
UNCTIONS
M
ANIFOLD
& H
YDRAULIC
V
ALVES
NOTE: Refer to Parts Section E.
Tag all components as they are removed to aid in reassembly.
H
YDRAULIC
M
ANIFOLD
R
EMOVAL
1. Disconnect the negative battery terminal.
2. Tag and disconnect the solenoid valve leads.
3. Tag and disconnect hydraulic hoses, and immediately cap the openings to prevent
contamination.
4. Remove the mounting bolts from the manifold.
5. Remove the manifold.
D
ISASSEMBLY
1. Mark and remove the coils from solenoid valves.
2. Mark and remove valves.
3. Mark and remove fittings, plugs, springs, balls, and orifices.
C
LEANING
AND
I
NSPECTION
1. Wash the manifold in cleaning solvent to remove built-up contaminants, then blow out
all passages with clean compressed air.
2. Inspect the manifold for cracks, thread damage and scoring where O-rings seal
against internal and external surfaces.
3. Wash and dry each component and check for thread damage, torn or cracked O-
rings, and proper operation.
4. Replace defective parts and O-rings.
A
SSEMBLY
NOTE: Lubricate all O-rings before installation to prevent damage to the O-ring. Seat balls in manifold block by
lightly tapping on the ball with a brass drift punch.
1. Install fittings, plugs, springs, balls, and orifices. Use one drop of Loctite #424 or
equivalent thread locker on each screw-in orifice.
2. Install valves.
I
NSTALLATION
1. Mount the manifold assembly using the mounting bolts.
2. Connect hydraulic hoses (as previously tagged). Be certain to tighten hoses.
3. Connect solenoid leads (as previously tagged).
4. Connect the battery.
5. Operate each hydraulic function and check for proper operation and leaks.
6. Adjust valve pressures.