Initial System Configuration
1004en01 03-11-24 49
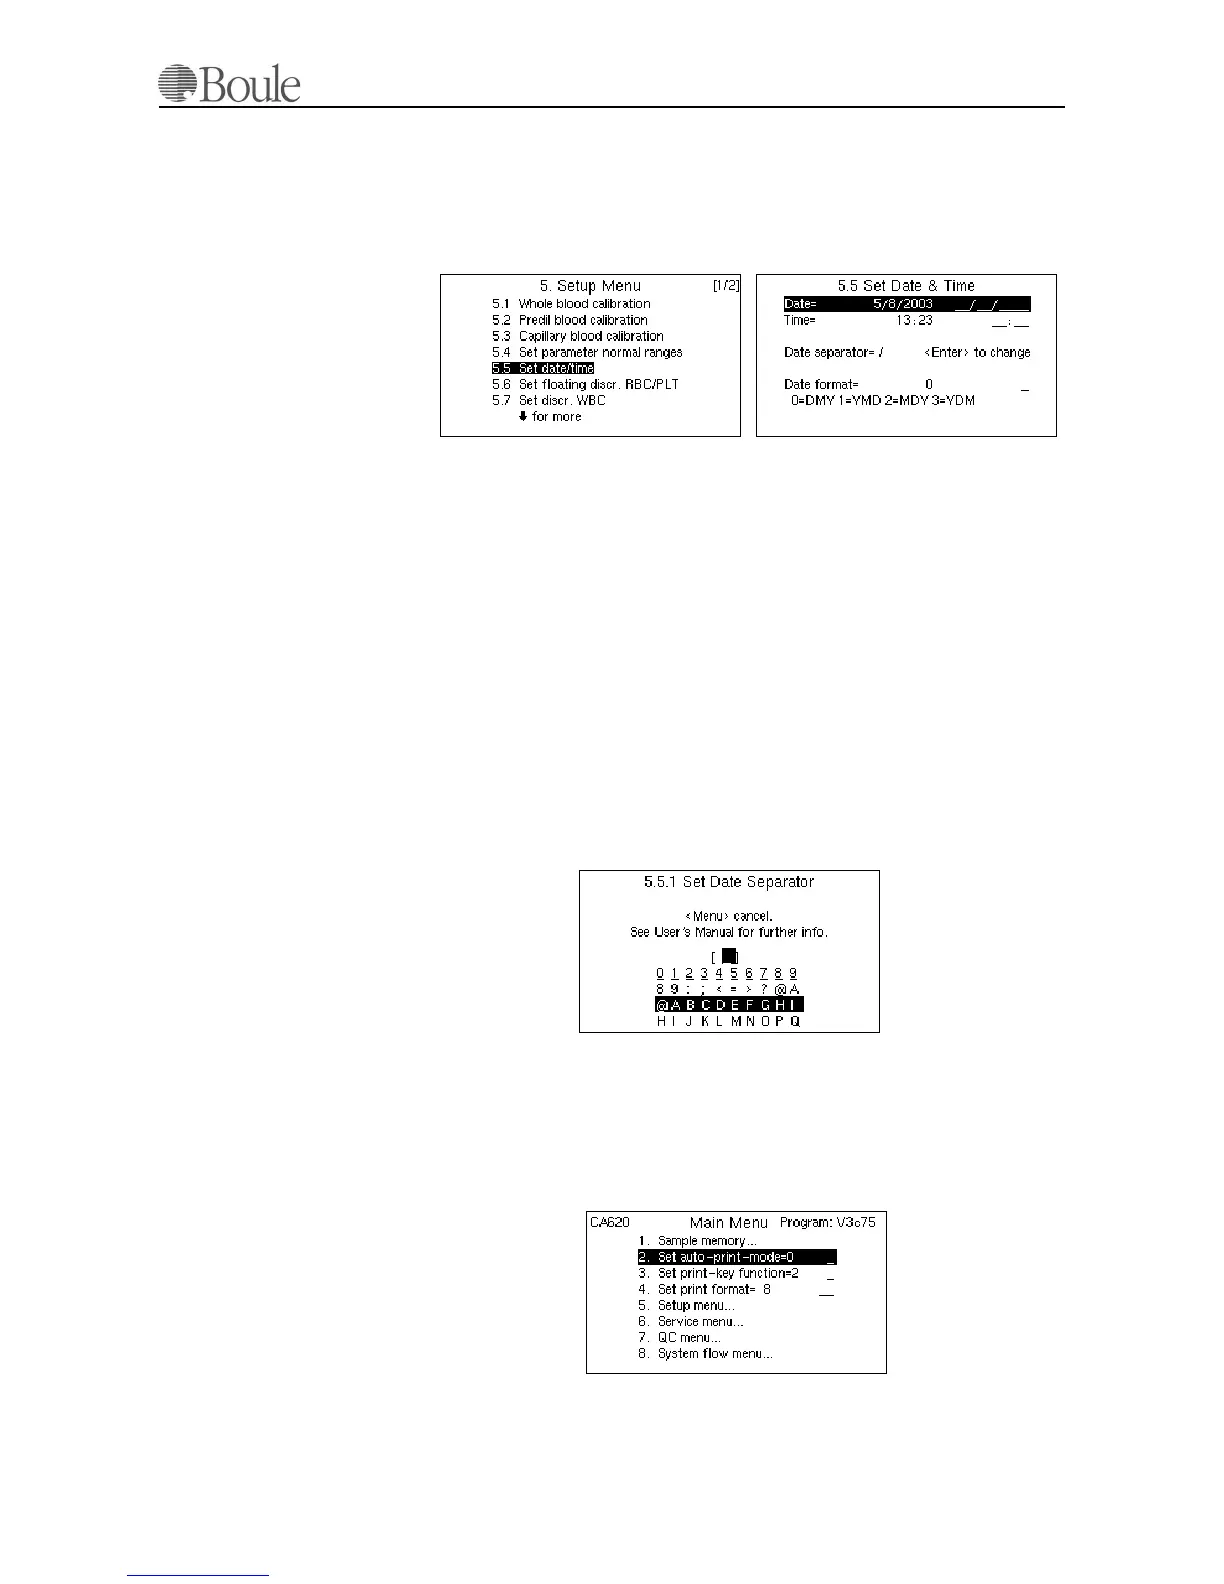
6.5 Setting Date and Time
1. Press [Menu] until the main menu is displayed and select menu 5.
2. Scroll to line 5.5.
3. Press [Enter]
As seen on the LCD screen, 4 different date formats can be set. For EU, set date
format 0, for the U.S. set date format 2.
1. Use the up-down arrow keys to scroll to the date format field.
2. Enter the correct setting.
3. Scroll to the line “Date'” and enter the correct date using the previous set
date format.
4. Scroll to the line “Time” and set the correct time in 24 hours notation.
In case a different date separator is required:
1. Scroll to the line “Date separator”.
2. Press [Enter]
From the following menu, different “date separator” signs can be chosen.
3. Use the scroll arrow keys to select.
4. Press [Enter] to validate.
6.6 Printer Configuration
In case a printer is connected to the instrument, which is strongly recommended,
the print command as well as the print format needs to be set.
1. Press [Menu] until the main menu is displayed. See below.
Point 2, 3 and 4 describes the settings of the print commands and format.
1042en.gif 1043en.gif
1044en.gif
1045en.gif