QC and Blood Controls
88 03-11-24 1156en01
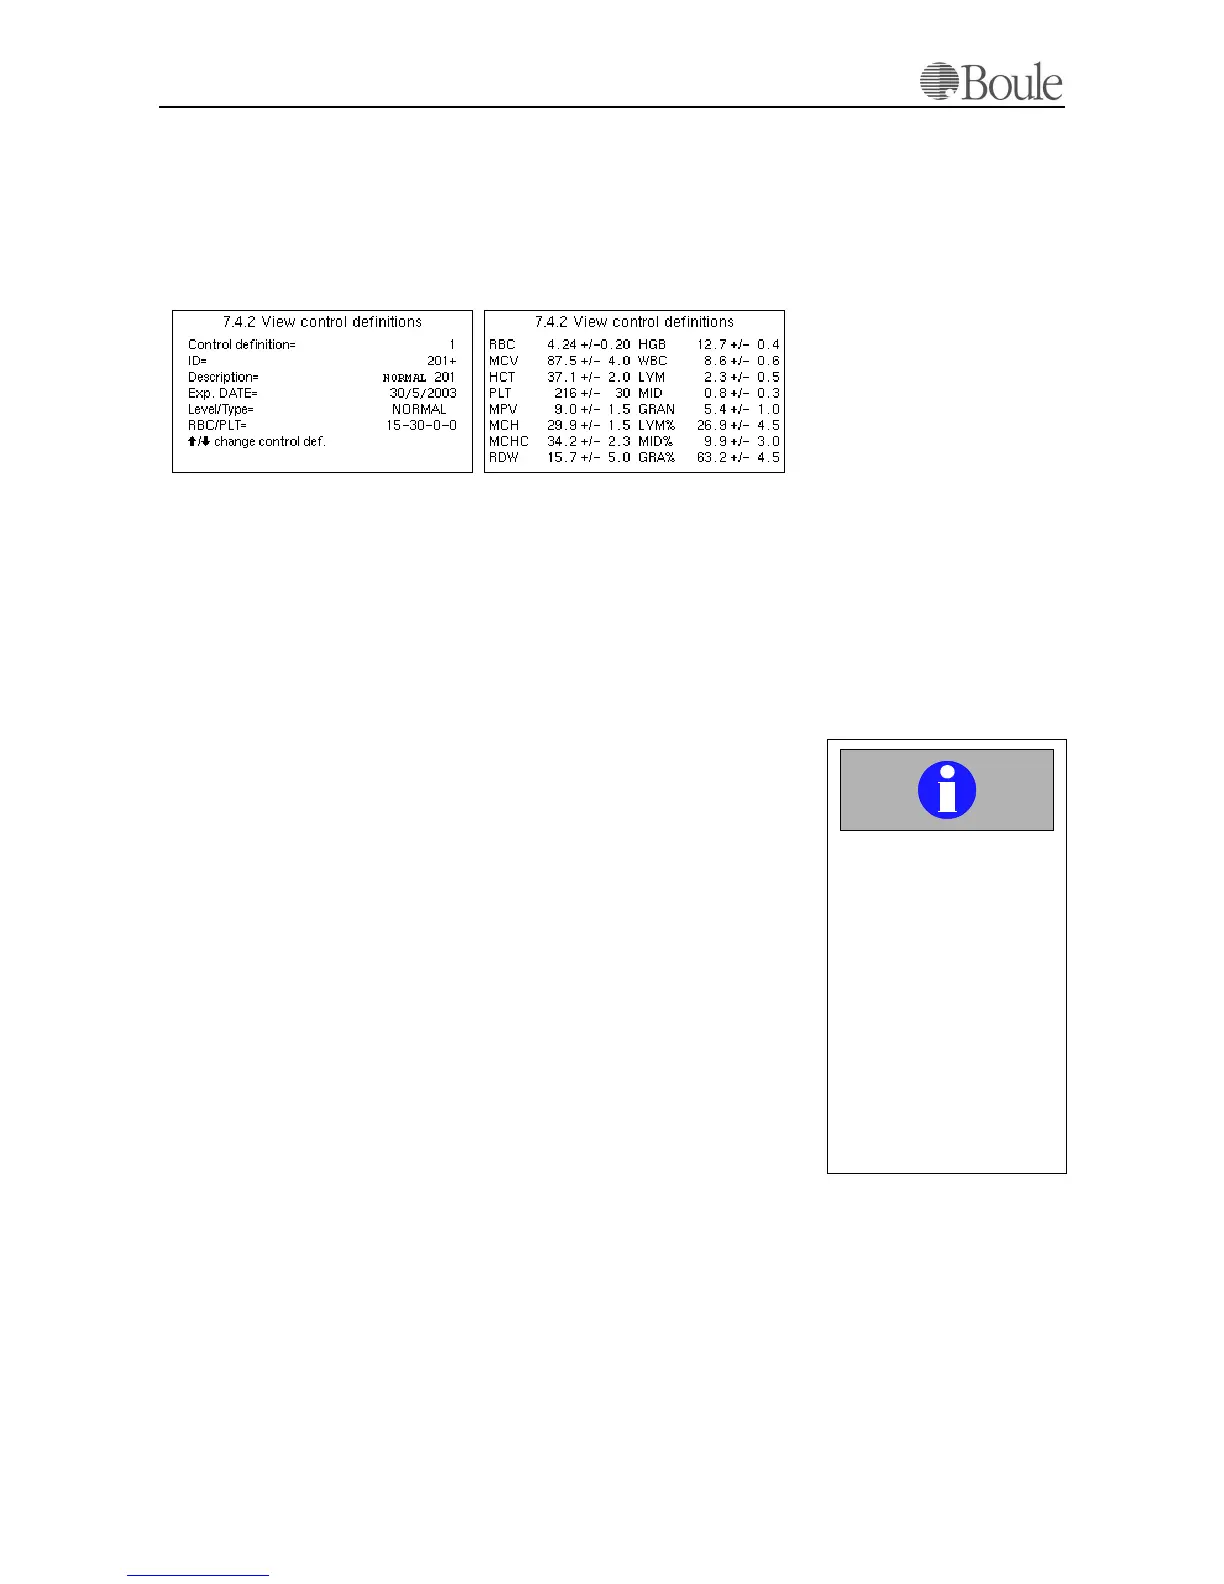
After the blood control data is read from the assay sheet. Go to menu 7.4.2 to
view the blood control assay values. See example below. Use the left or right ar-
row keys to switch between the 2 displays, see picture below.
12 different blood controls from Boule can be defined and stored simultaneously.
Use the up/down arrow keys to display another defined control blood.
.
Press [Enter] at menu 7.4.3 to print out all blood control definitions or press
[Enter] at menu 5.9 to obtain a short list.
Note:
In case all 12 control blood definitions/pages are in use, the next control that is
read via the bar-code scanner will ask the operator to delete the oldest control
samples first before continuing. Also, proper warnings are displayed in case a
wrong bar-code is read or if a bar-code is read out of sequence.
11.3 Use of Blood Controls and
Levey-Jennings Plots
Note:
Refer to section Use of Calibrators and Controls on page 81 how to handle the
blood control and how to dry the aspiration pipette manually in order not to con-
taminate the control.
Enter the control by reading the ID with the bar-code scanner from the sample
tube or enter the blood control ID manually and terminate with the “+” sign en-
tered with the right arrow key. Aspirate the control sample and wait for the re-
sults.
The CA620 will identify this ID and match the results with the previous defined
control data, see Initializing the Levey-Jennings Plots and Functions on
page 87 above. In case a parameter is outside the defined range, a “*” sign is dis-
played in front of the parameter value. Press [Print] to print out the results. The
printout will show either “L” or “H”' indicating that the parameter result is lower
or higher than the assay data.
To display the L-J plots, go to menu 7.2 and enter the requested control in the ID
field with the bar-code scanner or type the number manually and terminate the
control ID with the “+” sign entered with the right arrow key. A third and most
comfortable option is to select the control by using the left/right arrow keys.
The display will show the number of control samples selected in line 7.2.1.
1162en.gif1161en.gif
Important
Do not forget to dry the
aspiration pipette manually
on the outside at each con-
trol blood run and do not
push the control sample
tube against the upper
washing device.
Not following this disci-
pline might give dropping
values for the RBC, HGB,
PLT and WBC parameters.