User Interface
68 03-11-24 1006en01
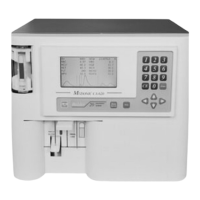
8.3 Setup Menu 2
1. Scroll with the up-down arrow key to “Setup menu 2” (menu 5.10).
2. press [Enter].
The following is displayed.
Within setup menu 2, less common functions are displayed and altered, such as
language, units etc.
To set language and units; please refer to Initial System Configuration on page
47.
Machine ID
Refer to Setup Menu 2 on page 68 above and scroll down with the arrow keys
to the line “Machine ID”.
This menu is only of use in case the instrument is connected to a computer sys-
tem. On the serial output a Machine ID number is sent to the connected com-
puter to identify the instrument in case that several Boule analyzers are used in a
lab. In such an environment the Machine ID can be set to the serial number of
the instrument to give the host a positive identification from which system data
was sent.
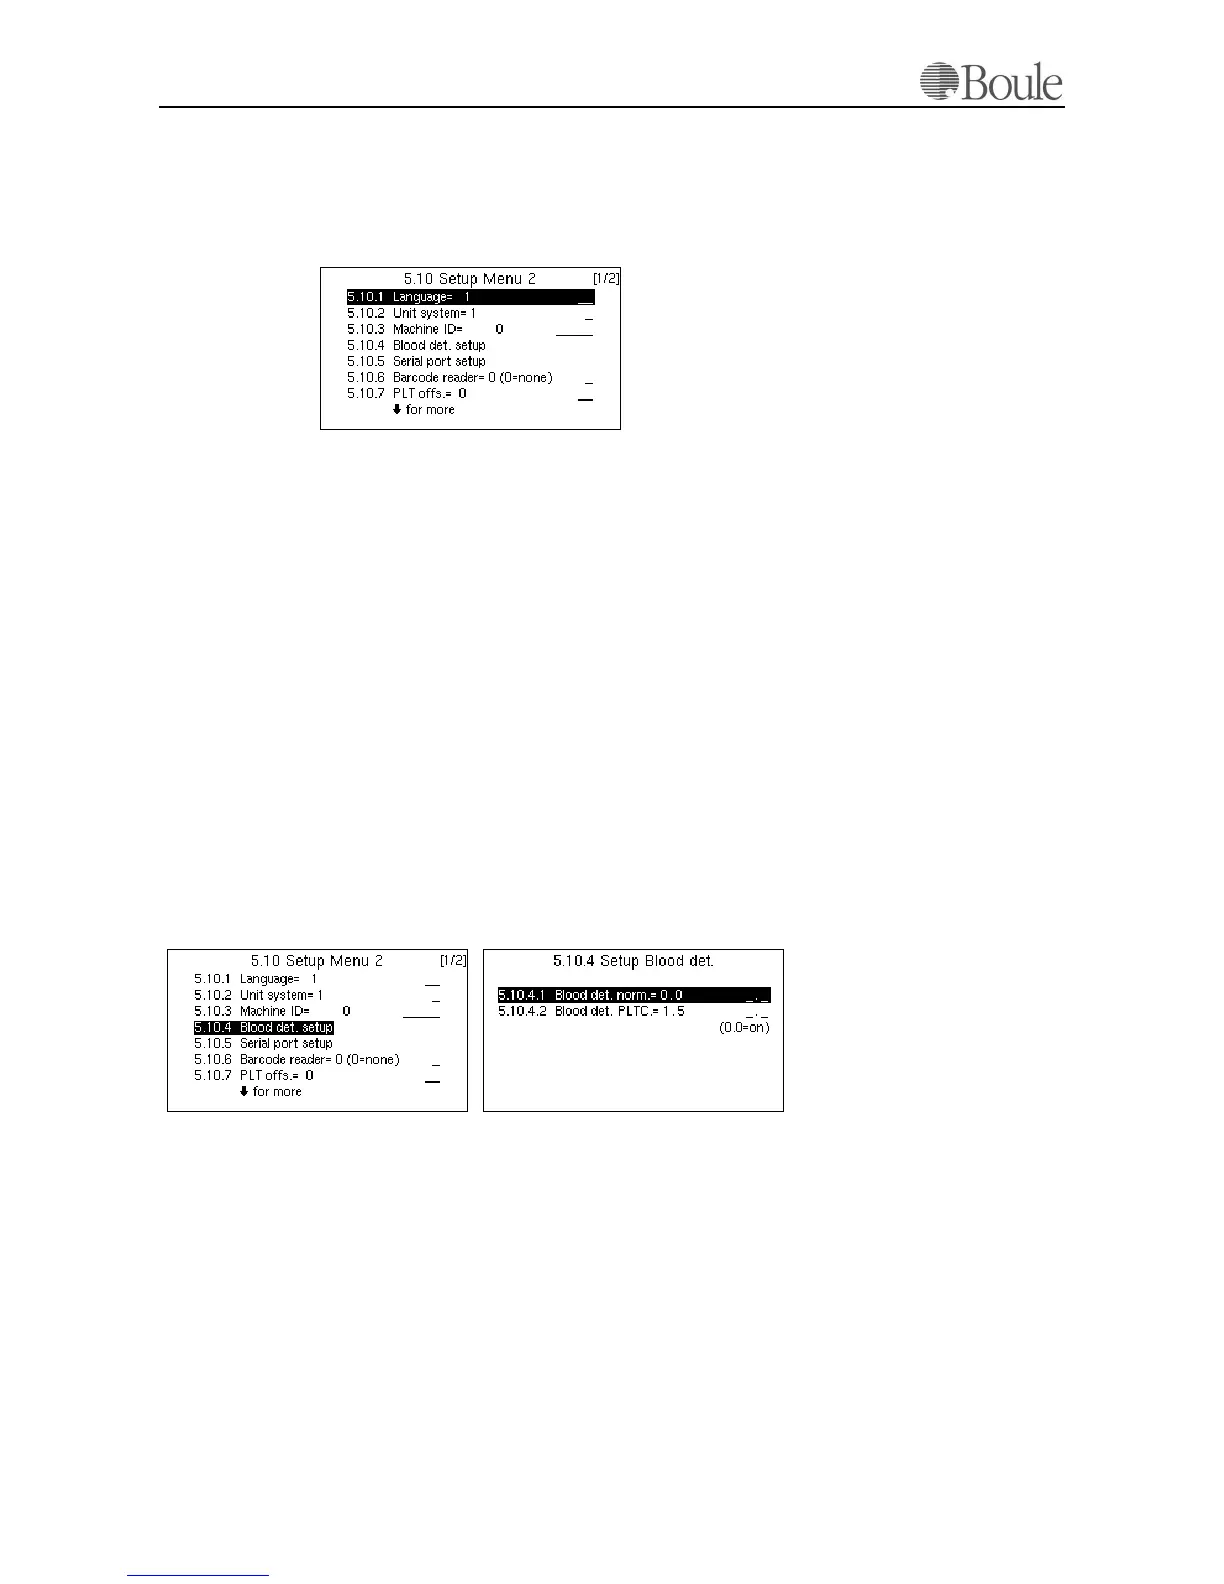
Blood detector setup.
Refer to Setup Menu 2 on page 68 above and scroll down with the “up/down”
arrow keys to the line “Blood det. Norm”, see below.
The CA620/530 aspiration of samples in “Open tubes” and “Cap piercing” is
stopped when the sample (blood) reaches a blood detector, which is located after
the shear valve system. This blood detector consists of a (green) LED and a pho-
tocell. Within 10 seconds after the aspiration command, this device should detect
blood. In case no blood is detected, the system will proceed anyhow.
Setting this menu 5.10.4.1 to “0” will enable the blood detector function of the
CA620/530. This means that if the instrument is used in “Blood mode”, the set-
ting must be “0” at this line.
1093en.gif
1095en.gif1094en.gif