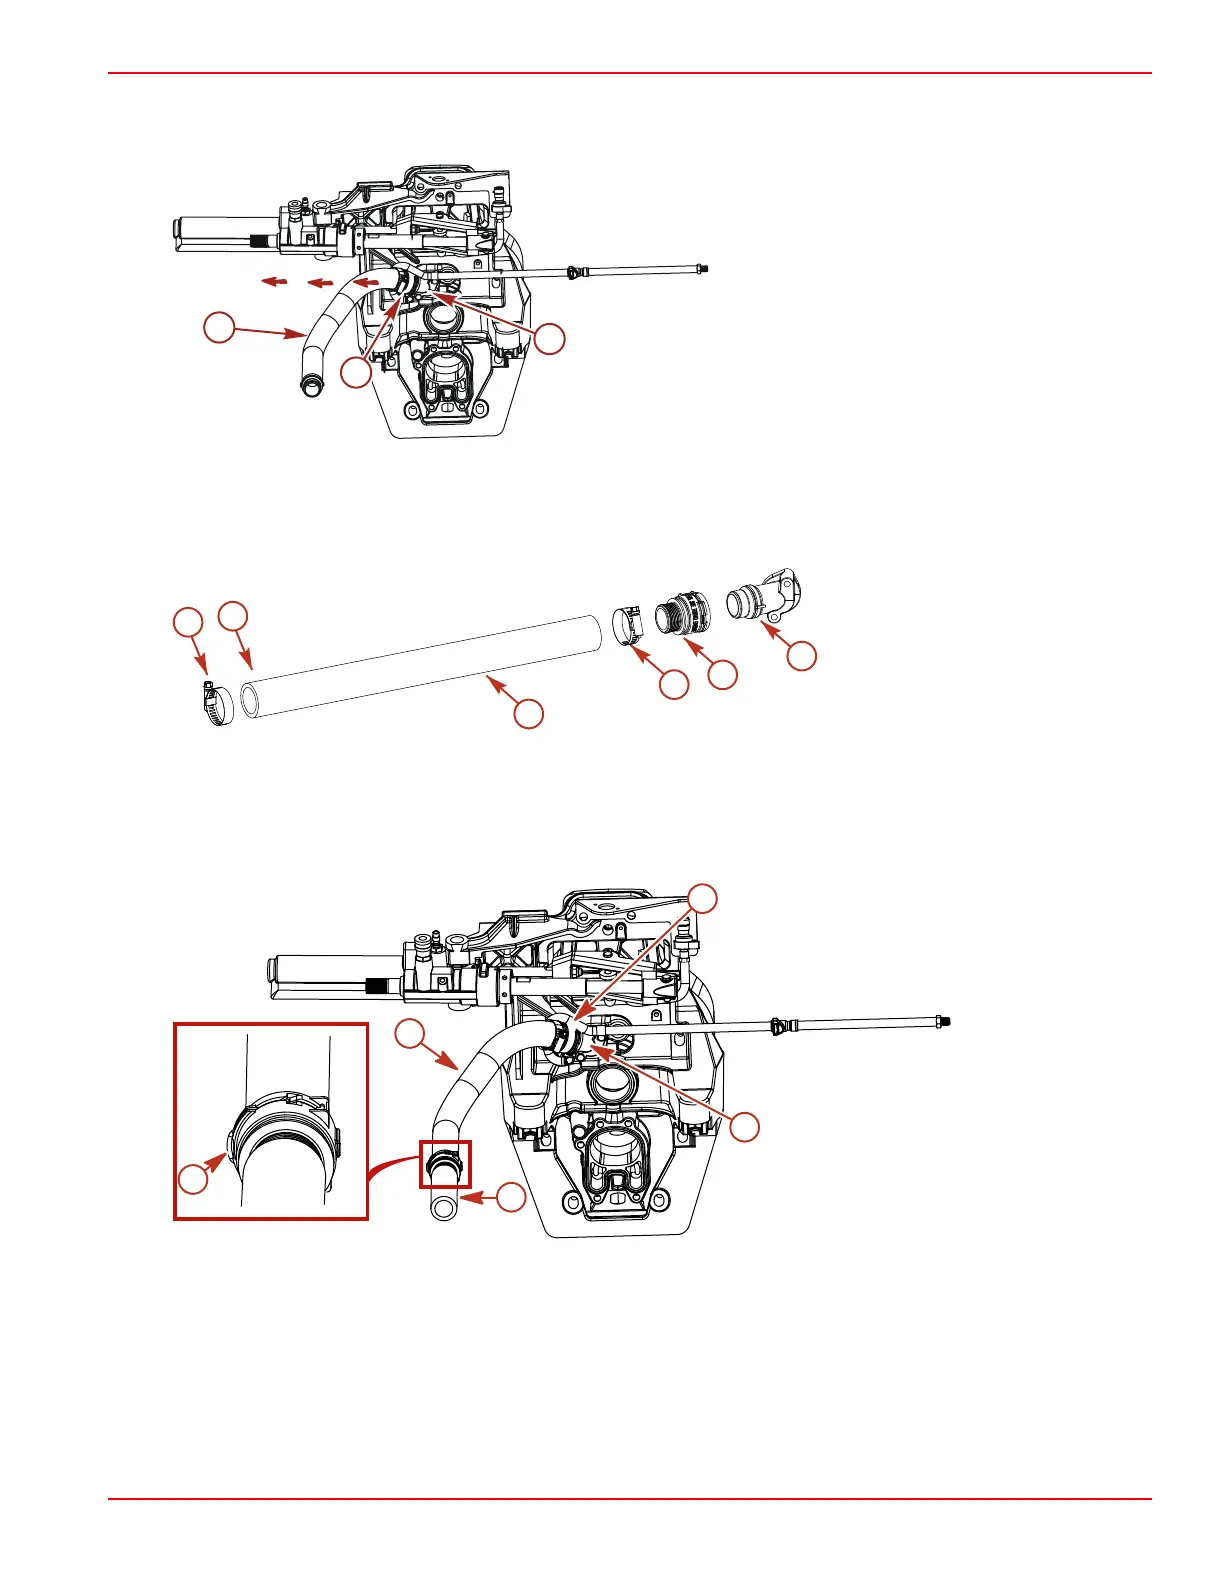
a. Pull on the seawater inlet hose near the connection point with an approximate force of 111 N (25 lbf). If the seawater
inlet hose does not become separated from the seawater inlet fitting when force is applied, the seawater inlet hose is
connected and sealed properly.
Shown with engine removed for visual clarity
a - Seawater inlet hose
b - Quick connect fitting
c - Seawater inlet fitting
b. If the seawater inlet hose does become separated from the seawater inlet fitting, reinstall as specified.
c. When all steps have been completed, check for any leaks at this connection.
4. Connect the seawater inlet hose to the engine seawater pump.
NOTE: The seawater inlet hose connects to the engine and the transom.
Seawater inlet hose assembly
a - Seawater inlet hose
b - To engine
c - Quick connect fitting
d - Seawater inlet fitting
e - Hose clamps
5. Models using the seawater extension hose assembly:
NOTE: The seawater inlet hose connects to the engine and the transom. The seawater extension hose assembly connects
to the transom and the seawater inlet hose.
a. When connecting the seawater extension hose assembly to the seawater inlet hose assembly, position the center of
the retainer clip away from the engine.
Shown with engine removed for visual clarity
a - Retainer clip position (away from engine)
b - Seawater extension hose
c - Seawater inlet hose (to engine seawater pump)
d - Quick connect fitting (to seawater inlet fitting)
e - Seawater inlet fitting (to transom)
b. Perform a pull test at the seawater inlet connection to ensure that the seawater inlet hose is connected properly.
a
c
8516
e
b
d
e
b
c
e
d
a
8517
Installation
90-8M0099748 eng DECEMBER 2015 © 2016 Mercury Marine Page 2B-11

 Loading...