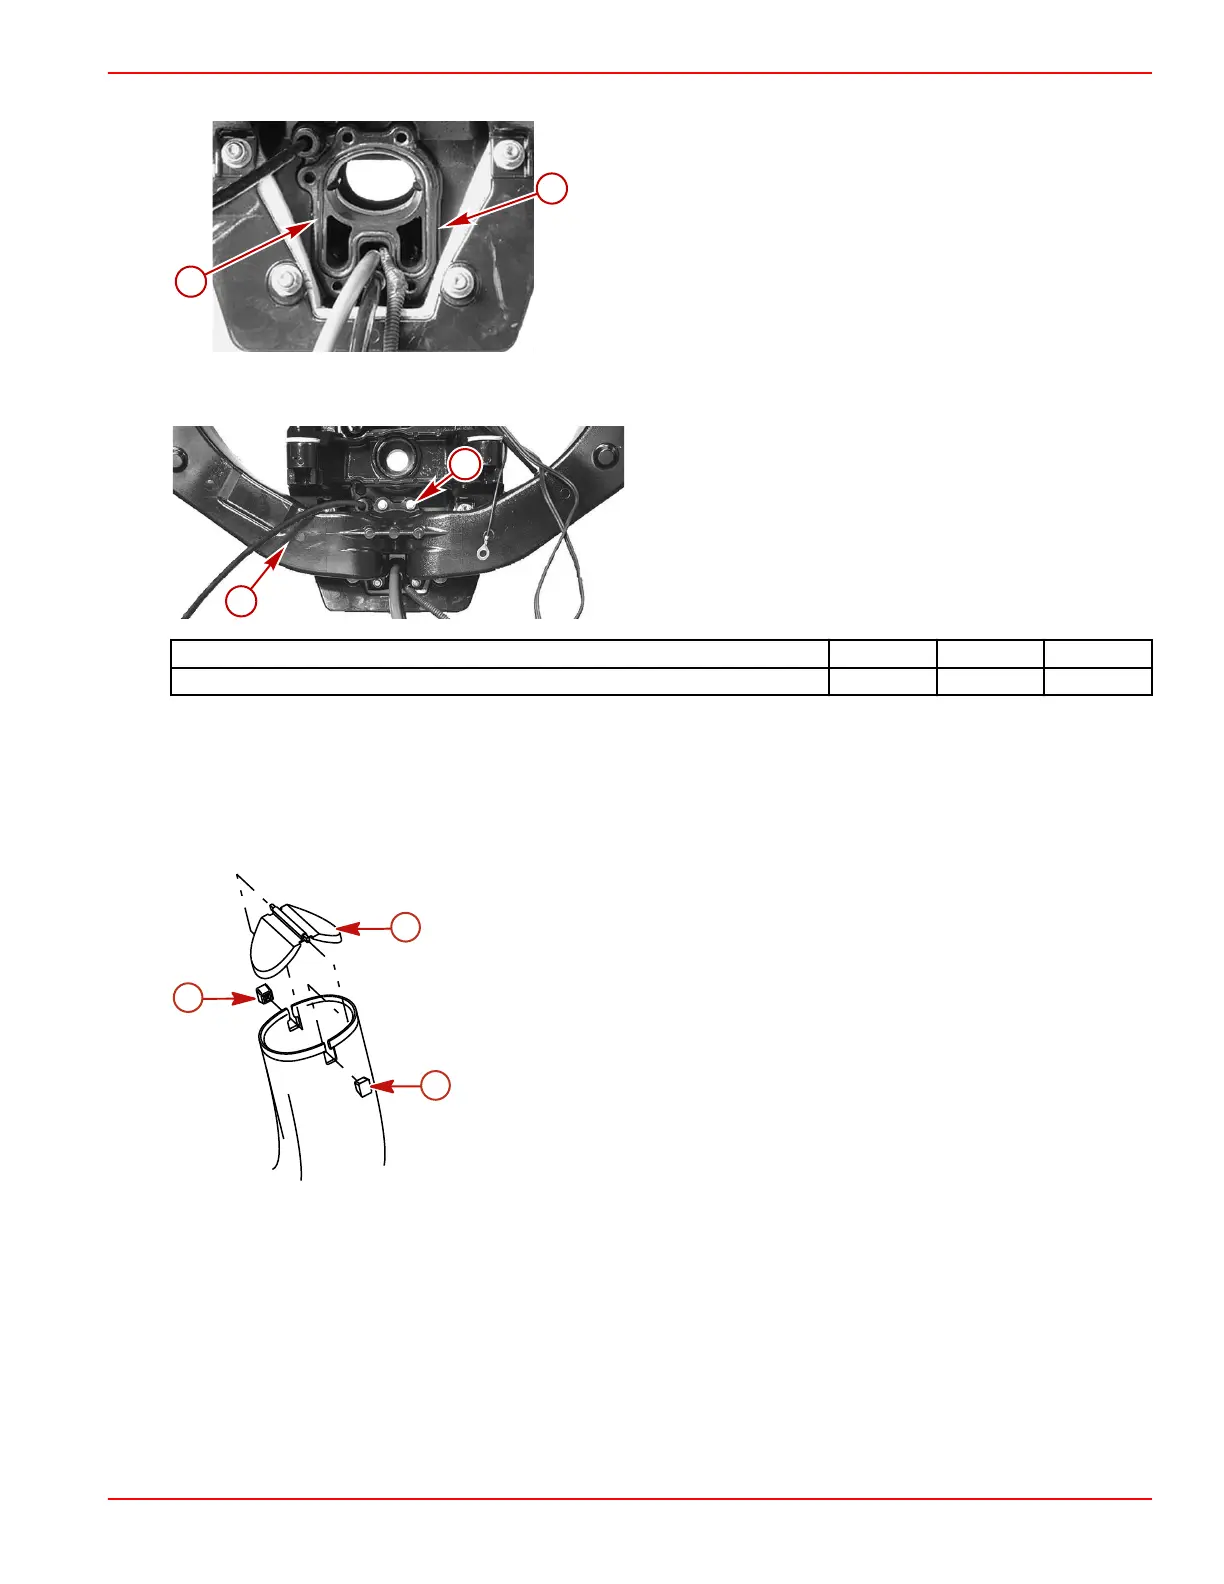
2. Inspect the O‑ring. The O‑ring must remain in the groove.
a - Mating surface
b - O‑ring
3. Inspect and clean the mating surfaces on the exhaust pipe.
4. Install the exhaust pipe assembly using the four screws and lockwashers. Tighten the screws to the specified torque.
a - Exhaust Y‑pipe screw (4)
b - Exhaust Y‑pipe
Description Nm lb‑in. lb‑ft
Exhaust Y‑pipe screw 34 – 25.1
Water Shutter Replacement
IMPORTANT: Exhaust system connections to components other than those supplied by Mercury Marine must use two stainless
steel clamps that are at least 13 mm (½ in.) wide at each joint.
1. Remove and retain the intermediate exhaust pipe from the Y‑pipe.
2. Remove and discard the water shutter and grommets from the Y‑pipe.
3. Install the water shutter into the Y‑pipe. Ensure that the water shutter is seated into the rubber grommets.
a - Water shutter
b - Rubber grommet
18483
Exhaust Pipe and Through-the-Propeller Exhaust
90-8M0099748 eng DECEMBER 2015 © 2016 Mercury Marine Page 7C-9

 Loading...