70
Pellerin Milnor Corporation
Replacing the Bearing Housing, Seal Sleeve, and Seals (Front
or Rear)
BNWVUM02.T03 0000278713 A.4 A.5 A.3 3/12/20 11:54 AM Released
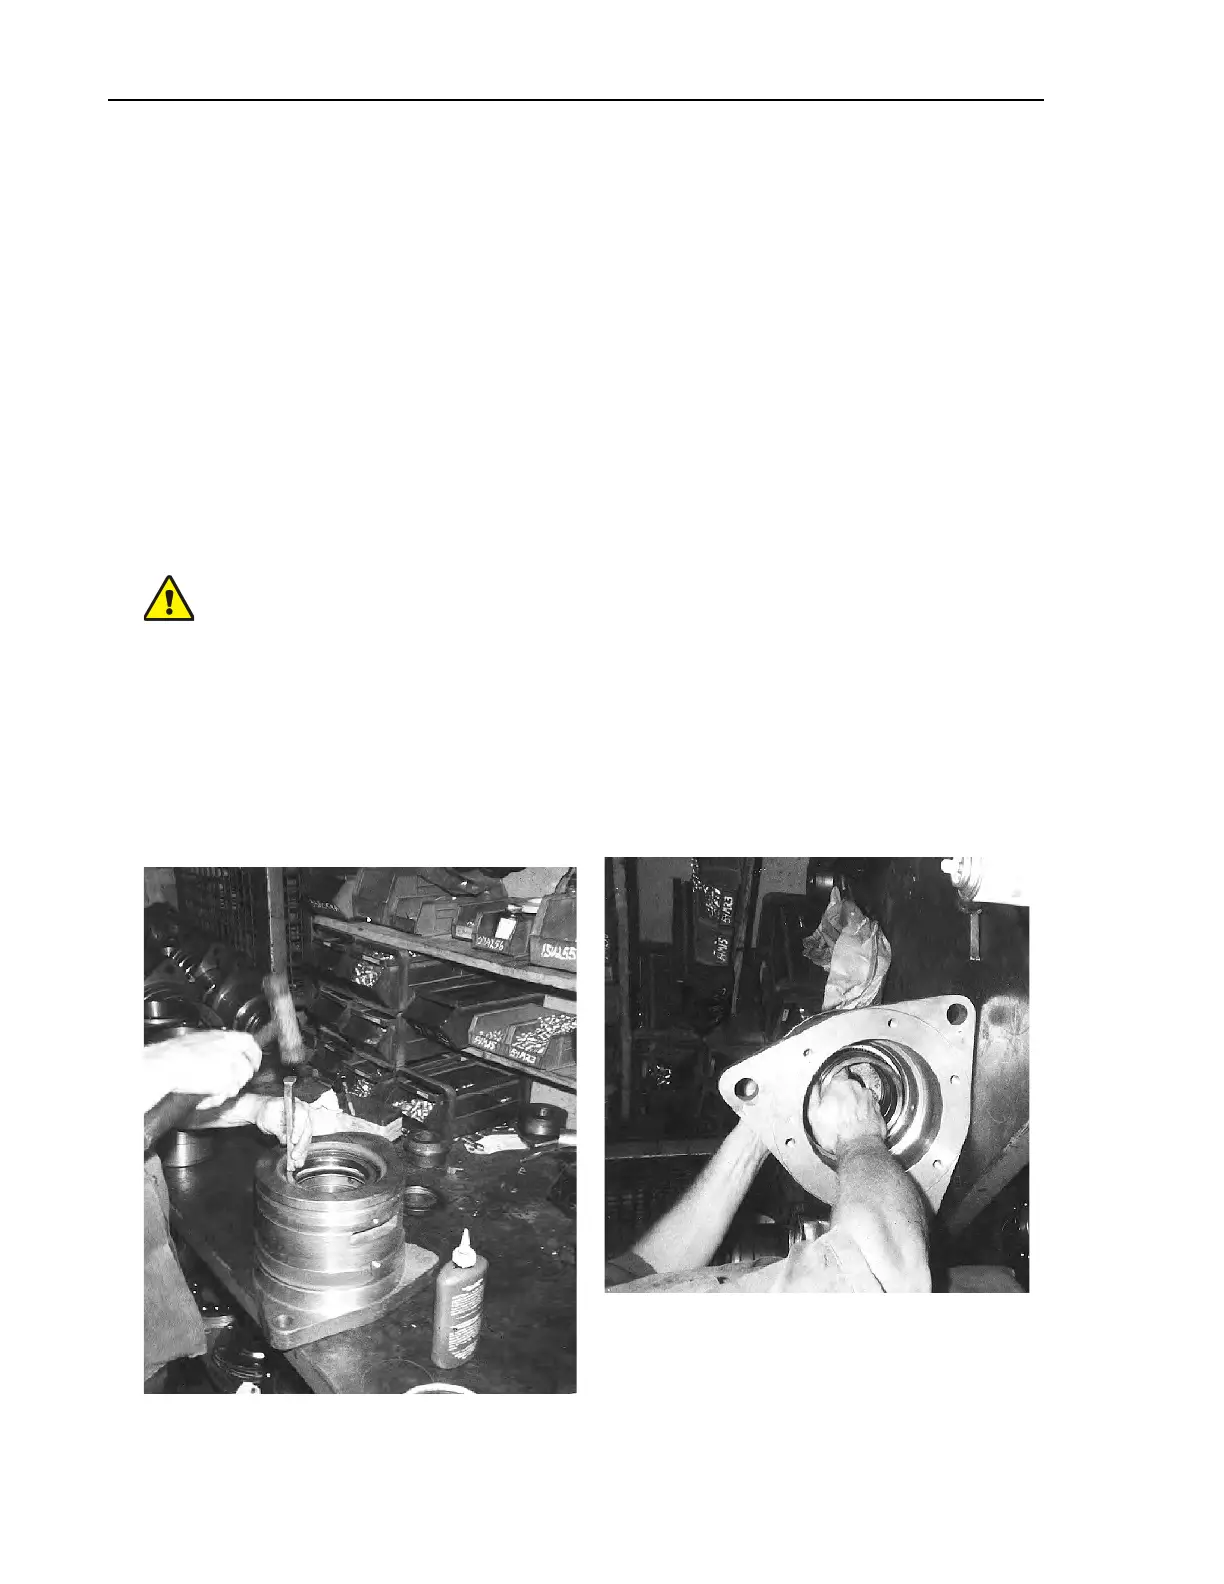
1. With the seal sleeve removed, press all old seals out of the bearing housing. Remove the large
o-ring from the outside of the housing. Thoroughly clean the bearing housing and flush out
all grease passages to make certain they are unblocked. Remove the o-rings from the inside of
the seal sleeve and clean the seal sleeve.
2. While the bearing housing is disassembled, charge all grease passages with grease. This will
assure that there are no blockages.
3. Replace the o-rings in the seal sleeve and the large o-ring on the outside of the bearing hous-
ing. Replace with new o-rings if the old ones are worn.
4. Press new seals into the bearing housing. You may gently work the seals in with a mallet and
metal drift as shown in Figure 33 .
CAUTION: Each seal must be of the proper material and face the proper direction.
The type of material and direction the seal faces may differ from one seal to another
within the same bearing housing and also from one type of machine to another. It is
essential to consult the Main Bearing Assembly drawing for your machine for the
proper part number and direction to face each seal.
5. Slip the seal sleeve into the bearing housing as shown in Figure 34 , using care not to damage
or fold under any of the seal lips. Be sure to insert the sleeve in the proper direction (see Bear-
ing Assembly drawing).
Figure 33. Installing Seals in Bearing
Housing
Figure 34. Installing Seal Sleeve in Bearing
Housing
Drive Assemblies