Pellerin Milnor Corporation 45
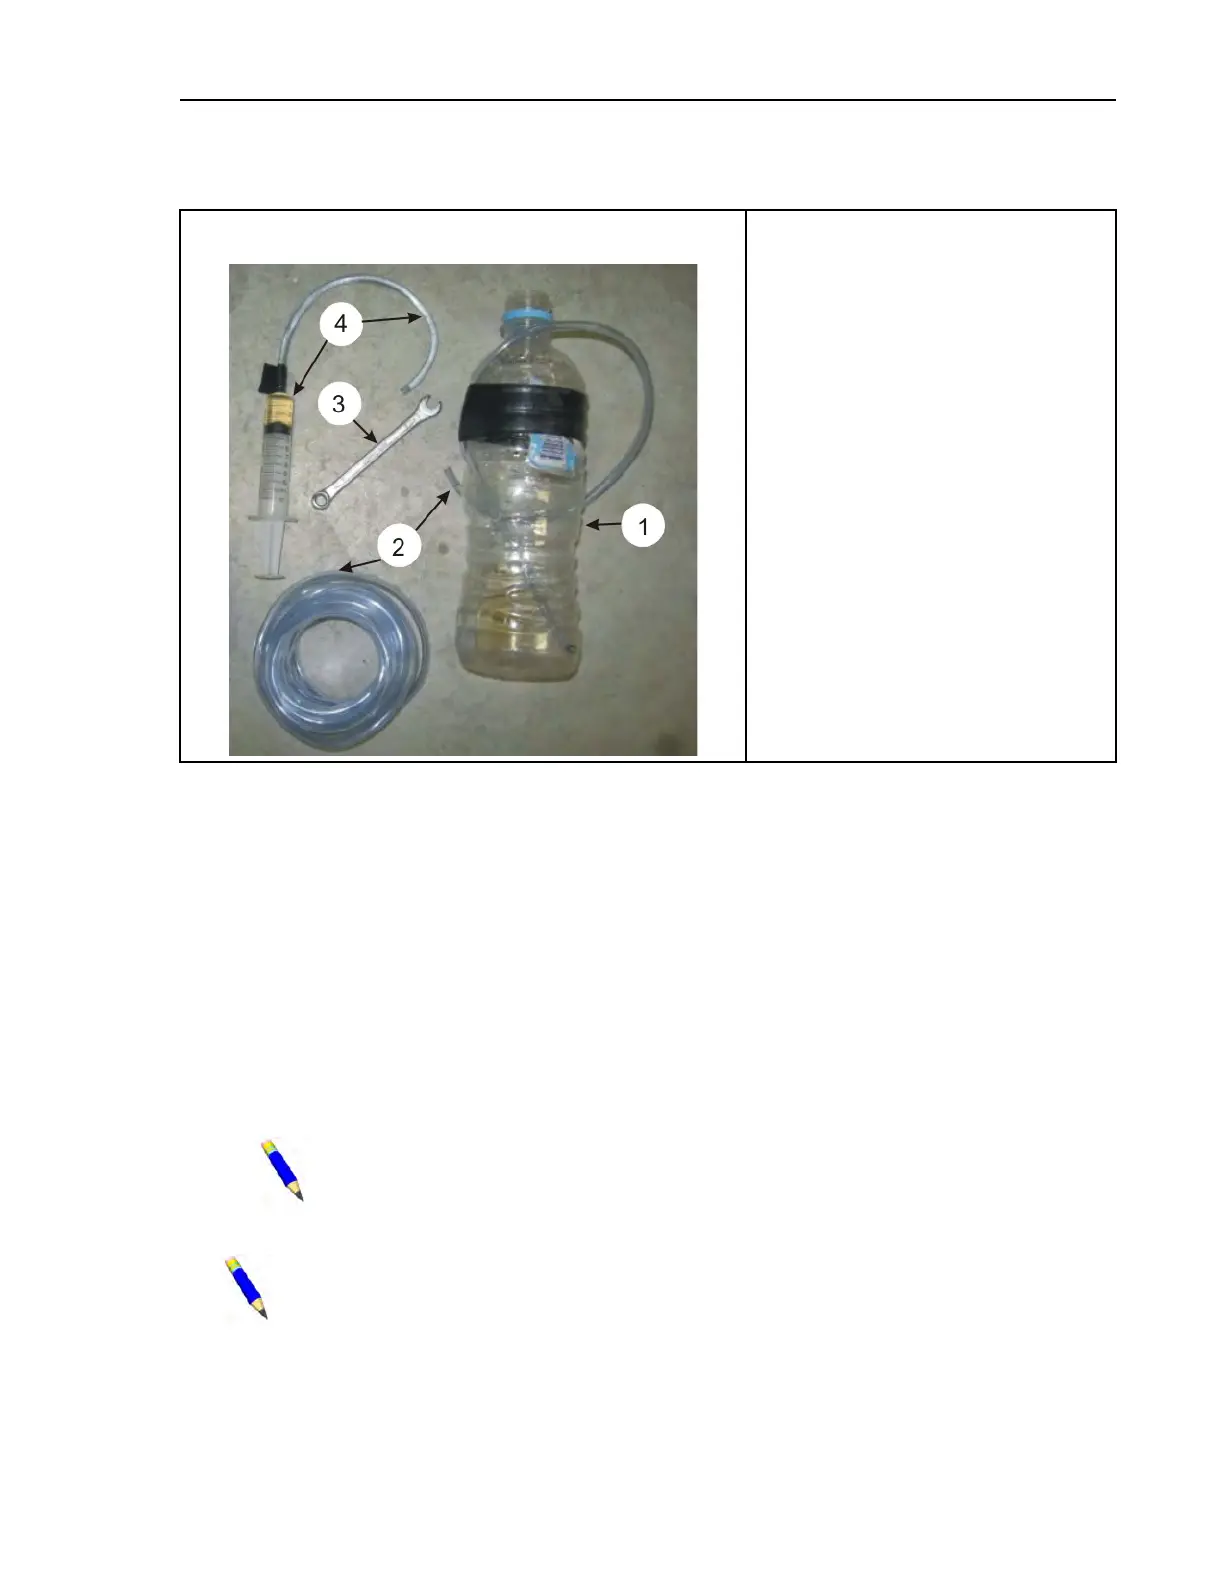
Figure 21. Typical Tools to Remove Air (Bleed) Brakes and Used Hydraulic Fluid
These tools use gravity and pressure in the hydraulic
cylinder
Legend
1. a clean 12 ounce container
2. a flexible hose to attach from the bleed
valves to a container
3. a wrench for the bleed valves (Figure 19
, item 12)
4. a suction device to remove brake fluid
from the reservoir
1. Use the tools in Figure 21: Typical Tools to Remove Air (Bleed) Brakes and Used Hydraulic
Fluid, page 45 to remove the used hydraulic fluid and clean the line. Do these steps:
a. Use a suction tool (Figure 21 , item 4) to remove the used fluid from the reservoir. Clean
the contamination.
b. Connect the tubing (Figure 21 , item 2) and container (Figure 21 , item 1) to the valve on
the caliper (Figure 18 , item 7).
c. Open the valve.
d. Add new fluid to flush out the lines.
e. Apply/release the brake (see Section : Operation of Brake Systems, page 48) approxi-
mately 5 to 15 times. This will flush the used fluid out of the lines.
f. Close the valve.
NOTE: These steps will cause air to go into the line.
2. Add new hydraulic fluid and remove (bleed) air from the brake circuit.
NOTE: This procedure uses pressure in the hydraulic cylinder and the tools in Fig-
ure 21: Typical Tools to Remove Air (Bleed) Brakes and Used Hydraulic Fluid, page
45 .
a. Fill the reservoir with new DOT 3 brake fluid. When you do the remaining steps, continue
to add new fluid to the reservoir. Do not let the reservoir become more than half empty.
Drive Assemblies