Pellerin Milnor Corporation 71
NOTE: If both housings are being installed, install the rear housing first.
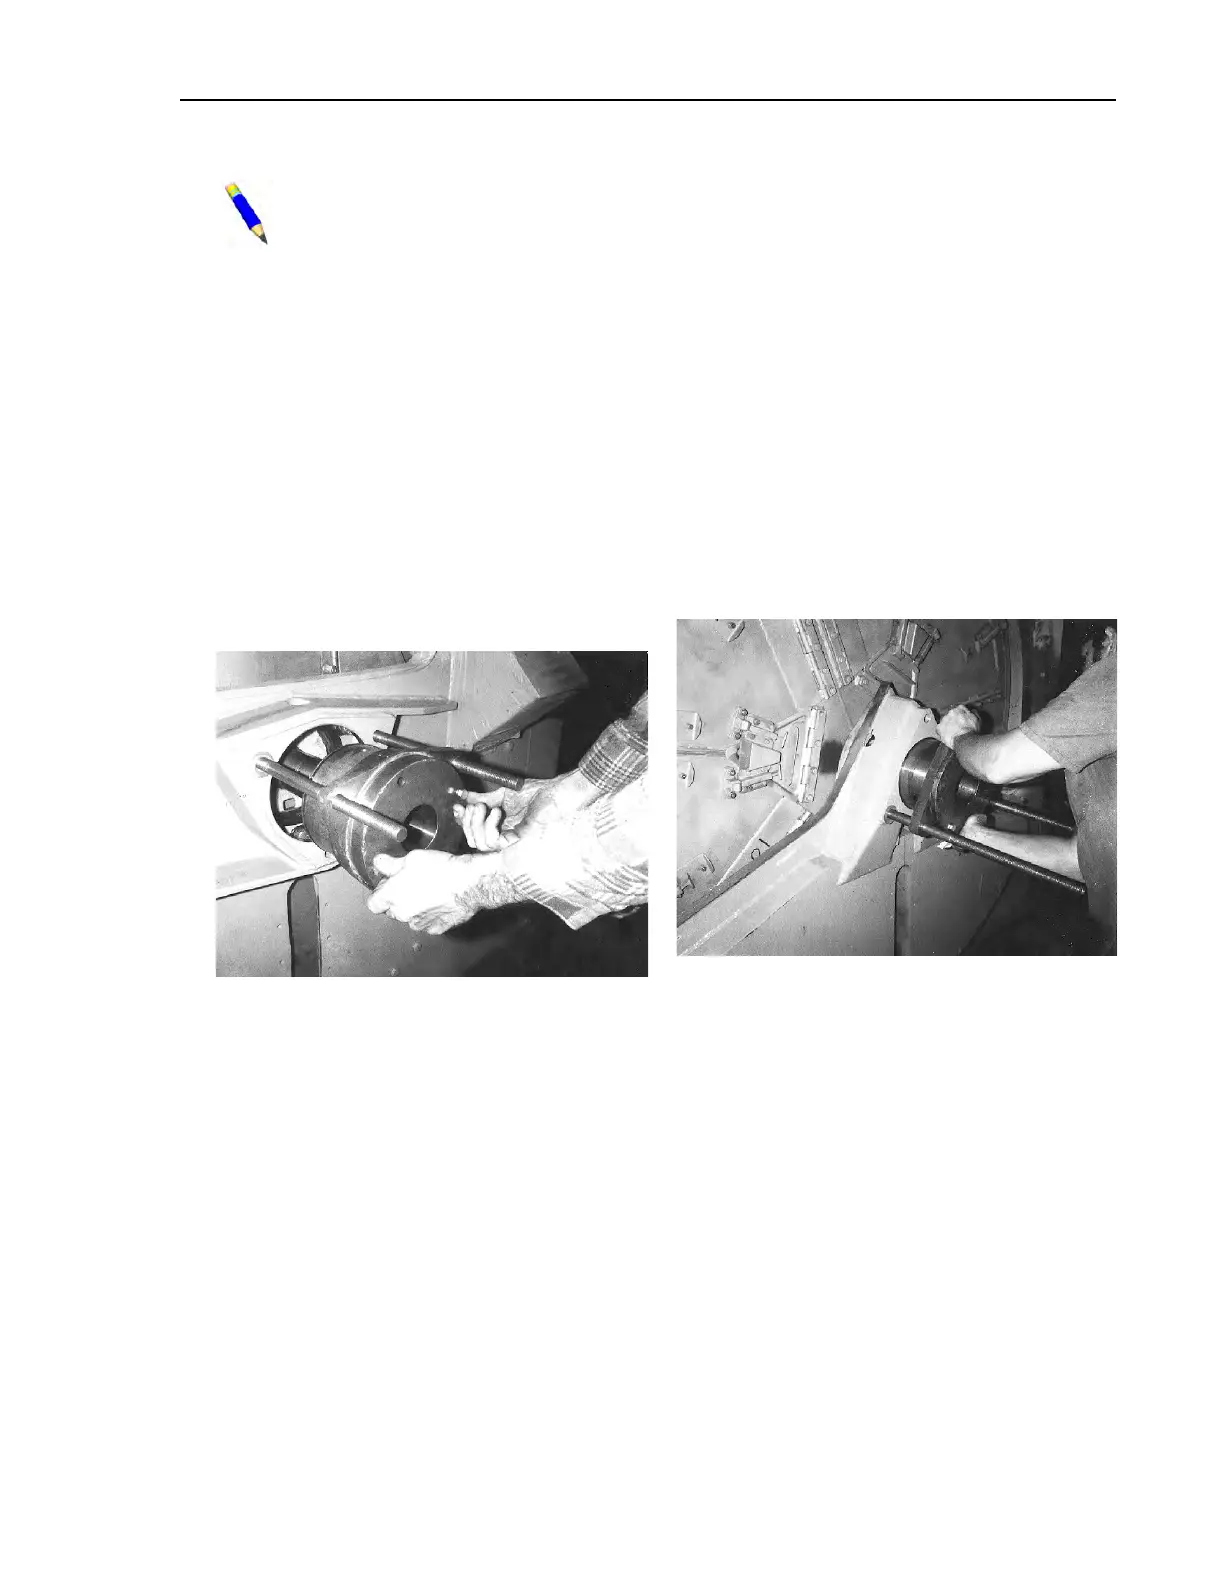
6. With two of the three temporary guide rods in position on the shell, place the bearing housing
onto the guide rods and install the seal sleeve setting fixture on to the bearing housing as
shown in Figure 35 . The seal sleeve setting fixture prevents the seal sleeve from being
pushed out of the housing as the housing is inserted into the shell. Note that the seal sleeve
setting fixture and the bearing setting fixture are very similar, but the seal sleeve setting fix-
ture has a longer hub.
7. With a clean, lint free cloth, apply a coating of light machine oil to the outside of the housing,
to assist in installation. Push the housing into the shell as shown in Figure 36 . Once the hous-
ing is far enough into the shell to support itself, place any shims back into position between
the housing and the shell. Remove, then replace guide rods if required to place shims under
bearing housing pads.
Figure 35. Installing the Bearing Housing
Setting Fixture onto Housing (42" machine
shown)
Figure 36. Pushing the Bearing Housing into
the Shell (60" Rapid-load machine shown)
8. Install the third guide rod, spacers if required, and hex nuts, using these to seat the housing
fully, as shown in Figure 37 . Remove the seal sleeve setting fixture.
Drive Assemblies