Pellerin Milnor Corporation 91
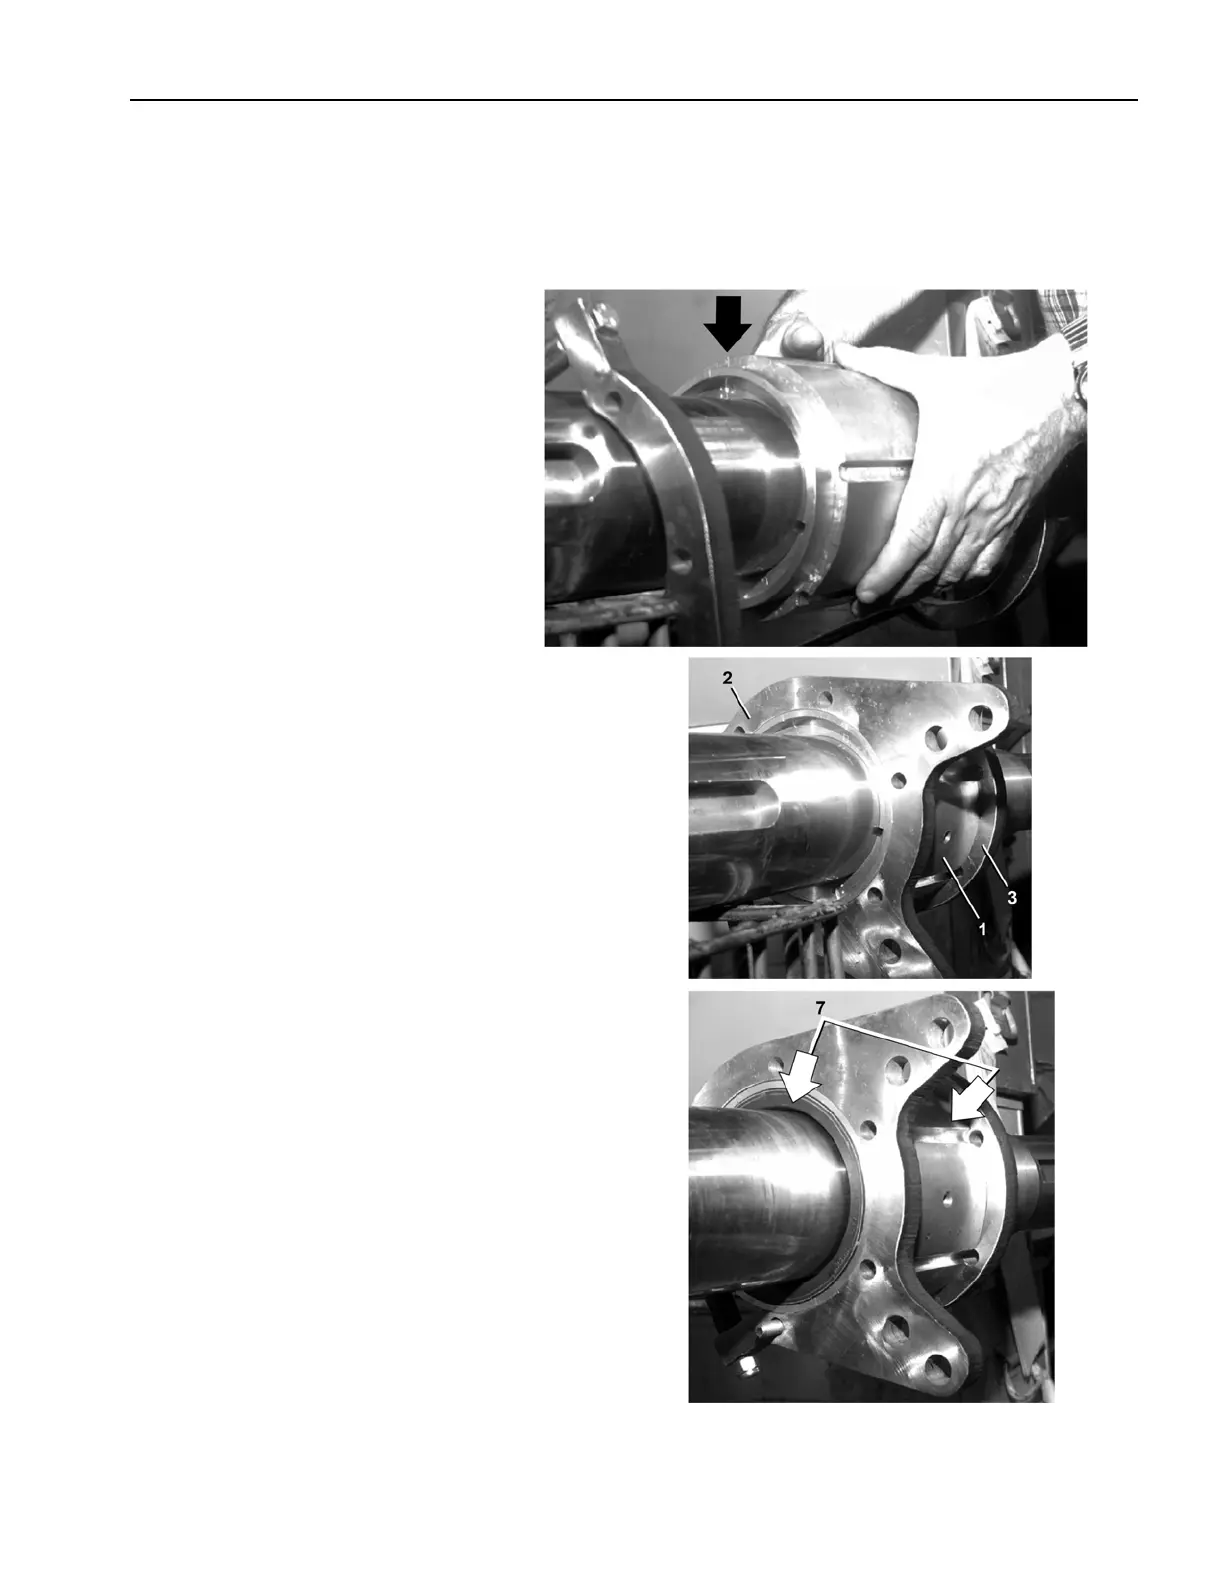
3. Put the two halves of the bronze
bushing around the shaft. Ensure
alignment by matching alignment
marks (large arrow).
4. Push the front and rear flanges (Item 2 & 3) onto
the bronze bushing (Item 1). Use only a hard rub-
ber mallet. Ensure spacers are loose.
5. Rotate the bushing so the seams are approxi-
mately 90 degrees to the flange openings.
6. Insert the seals (Item 7) in two locations (large ar-
rows). Use only hard rubber or plastic mallet.
Assembly Procedure
5 Sheets
6044SR2, 72044SR2/SR3
Drive Assemblies