5.5.6 Quick ADC conguration
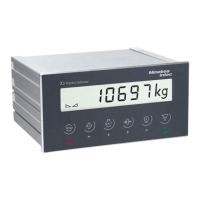
When [BUSY] is displayed, the instrument is back in weighing mode.
5.5.7 Function assignment of the "Tare (press and hold)" key
The calibration/adjustment function is normally triggered by pressing and holding down
the ‑key. For detailed information on calibration and adjustment, see Chapter 7.2.
When the service mode is activated, further functions can be assigned to the key:
- External linearization with the linearization weights entered under menu item 1.18
(menu item 1.9.7)
4. Enter external linearization weights (menu items 1.18.2 … 1.18.5).
1. Pull the power plug out of the indicator.
2. Push the menu switch to the "Open" position.
3. Connect the power supply unit and press the key during the "88888888"
display test.
[ADC-CON] and [S-CODE] will appear one after the other on the display, followed
by the cursor on a blank line.
4. Enter the service code [202122] and conrm by pressing key .
After that, [STAND.] or [VERF.]will be displayed with a lower-case "s" in the upper
right-hand corner.
5. Press key .
Now the display reads [UNIT].
6. Press key .
The current measurement unit is displayed.
7. Select another measurement unit with the key and conrm with the key.
The [RANGES] display appears.
8. Press key .
The [SINGLE] display appears.
9. Press key .
The [MAX.] display appears.
10. Press key .
11. Enter the maximum weight value and conrm by pressing .
The [D] display appears.
12. Press key .
13. Enter the resolution and conrm with .
The [SAVE] display appears.
14. Press key .
The display reads [NO].
15. Change this display to [YES] by pressing and conrm by pressing .
16. After completing the setting, push the menu switch back to the "Closed" position.
Ex Indicator Midrics 1 (MIXS1) 5 Getting started
EN-44 Minebea Intec