76
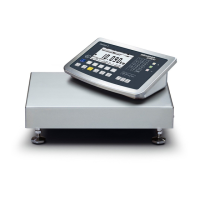
Signum 3 Ex
Configuring Printouts
Conguring
Printouts
Purpose
You can congure individual printout
formats for each application� Using the
total data record for Totalizing and Net
total formulation applications, you can
dene which parameters are printed
using the c key�
In the “Print parameters” Setup menu,
single, component and total data
records can be congured, which
contain the available print items for the
respective applications� This should be
carried out after setting the applications
since some data in the printout is
application-dependent�
Characteristics
– Quantity and extent of printout lists:
6 lists each with a max� length of 30
print items
- Single printout Printer 1
- Component printout Printer 1
- Total data printout Printer 1
- Single printout Printer 2
- Component printout Printer 2
- Total data printout Printer 2
– Single, component and total data
records can be configured separately
– Print single printout: p key
Auto printout of application when
Setup menu is activated:
– Animal weighing (averaging)
– Checkweighing
– Classification
– Print component printout:
Totalizing/Net-total formulation
with the O key (Setup: Application
3: Totalizing: Printout: Component
printout)
– Print total data printout:
For selected application Totalizing/
Net-total formulation with c key
– When switching to another application
in Setup, only the application-
dependent printout lists are deleted�
The other printout lists remain saved�
– Print items can be deleted individually:
Press and hold the ( key
– Print items “Form Feed” for record
footer:
Move to the next label start for printer
type: YDP04IS, setting “Label, manual
form feed”
– ISO/GLP/GMP-compliant printout:
The Setup menu conguration under
“ISO/GMP-compliant printout” is also
active for congured printouts�
Preparation
§ Turn scale on: Press the e key
§ While all segments are lit, press the
)key
§ Select Setup menu: Press the k key
repeatedly until setup is displayed
§ Select “Cong� printout:” Press the
)key
§ Press the k key repeatedly until
prtpot is displayed
§ Press the ) key
prtprot
(see page 35 for a detailed menu list)
7
7�4 Header and ID header input
7�5 Interface quantity
7�6 Standard interface
7�7 Component interface
7�8 Result interface
7�13 ISO/GMP
7�14 Date without time
7�15 Automatic printout after
stability
7�16 Flex print
7�17 Decimal separator
9
9�1 Factory settings
– The rows of the printout list can be
called up and activated individually�
Example: see under Conguration,
menu item 7�6
– The print selection set as active appears
with the left selection bar on the
display, e�g� gross, tare, net�
§ Extend printout, press the ) key, the
selection bar now appears on the right
of the display�
§ Select print items using the k key
§ Apply the desired print items by
pressing the ) key
§ Press the ( key to change the print
selection set as active�
The selection bar appears on the left�
The required print item is set as active
and appears in the printout�
�
– Print items can be deleted individually
from the active printout selection:
Pressand hold the ( key
§ Save the settings with the ) key and
exit Setup: Press the ( key several
times�
Additional Functions
Printing the “Selection” and “List”
Settings
– LIST: Output of the current printout
list
SELECT: Print currently selectable items
§ When the select bar is on LIST or
SELECT:
Press the p key
> Printout (example)
Indiv.Prt
List
====================
Net (N)
Gross (G#)
Tare
Tare (T2/PT2)
Piece count
====================
etc�
Configuring Printouts
 Loading...