6-48 Mx100/200 Series Operation Manual
This section describes the procedure to directly enter place data when CAD conversion is not
used. Go to the next section, Data Check, provided CAD Conversion is used.
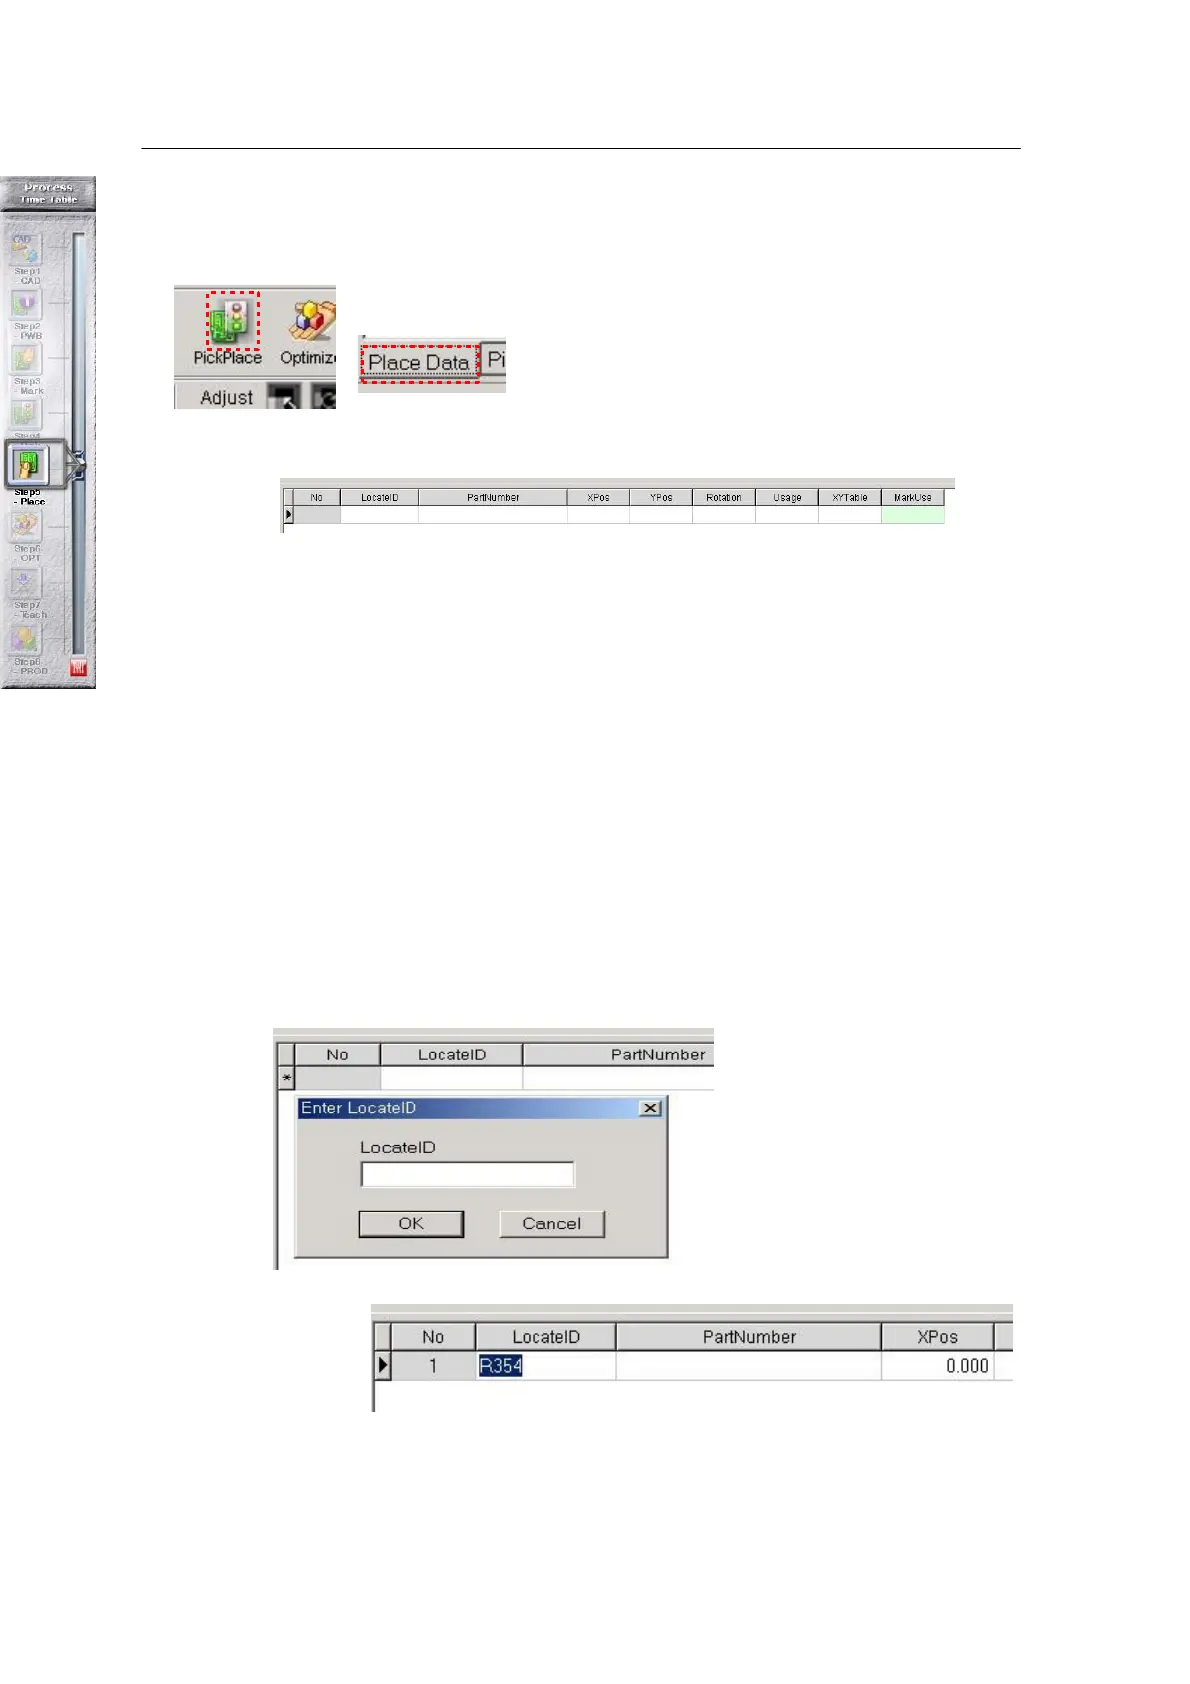
Choose the Pick & Place icon in the main window.
Choose the Place Data tab given at the bottom.
Each parameter of the Place Data tab is described below:
• Locate ID: Identifies a place position.
• Part Number: Indicates a part number to be placed at the given position. Part number
can be entered by selecting Locate ID from the Pick Data tab.
• X,Y, Rotation: Coordinate values of each part.
• Usage: Selects placement on each Locate ID (yes: place, No: not place).
• XYTable: Sets use of Front and Rear Tables.
• MarkUse: Sets use of Component Fiducial Mark.
♣ Data input process
Select Locate ID with the mouse > Select ↓ on the keyboard > Enter Locate ID > Select
OK
<Figure 6-36 가 Locate ID input window >
<Figure 6-37 가 Enter Locate ID >
After entering Locate ID, do teaching to enter part position.
Teaching is done by moving the teaching camera to the teaching position. Teaching can be carried
out in two ways: