Page48
4.CreasingBladeInstallation
CreasingBlade&AnvilSetsareavailableintwosizes-Standardforsheetsover0.25mmthick&
Narrowforsheetsunder0.25.Thesefiguresareonlyaguide-goodresultscan,inmostcases,still
beachievedoutsideaBladeSet'srange-seeTroubleshootingGuideformoreinformation.
ThefollowingprocedureshouldbeusedwheninstallinganewBladeSetinamachineforthefirst
time.Subsequentinstallation(i.ewhenswoppingfromStandardtoapreviouslyinstalledNarrow
BladeSet)shouldnotrequirere-setting.
RotatetheDynaCreaseCrankshaftbyhanduntiltheBladeDrive
PowerLinksareattopdeadcentre(CounterweightimmediatelybelowCrankshaft).
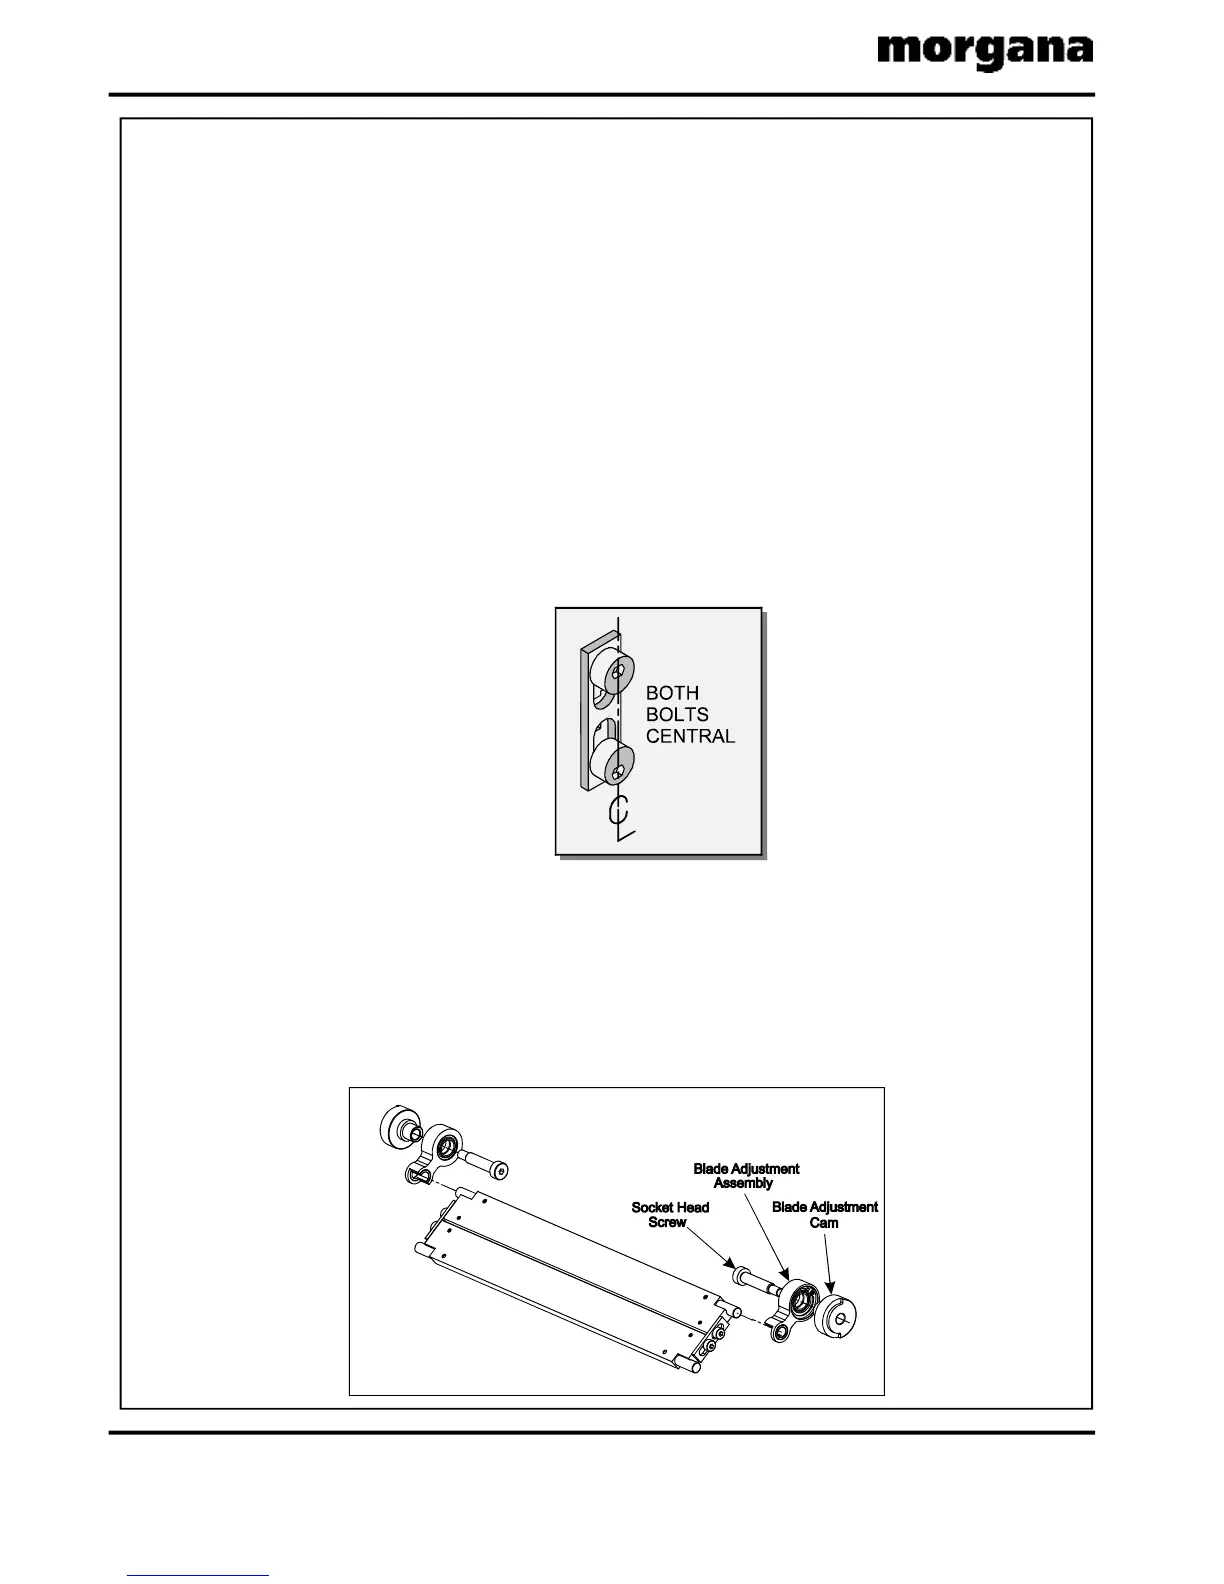
ExaminethenewBladeSetandcheckthattheBladeAlignmentBoltsarecorrectly
positioned-thehighpointoftheBladeeccentricsshouldbefacingthehighpointoftheAnvil
eccentricsatbothends.Ifnot,loosentheM4lockingscrewsslightly,adjustthebolts
accordingly,&re-tightenthelockingscrews.(SeeFIG.4.2).
AssembletheBladeAdjustmentAssembliesontotheBladeorAnvilPins&installtheBlade
Setintothemachine.(SeetheBladeAssemblysectionintheOperatorsManual).
4.4EnsurethattheAnvil(orBlade)isattopDeadCentre(CrankshaftCounterweight
immediatelybelowCrankshaft)andlightlysecuretheBladeAdjustmentAssemblieswith
theirShoulderBolts.RotatetheAdjustmentCamsbyhanduntiltheystopthentightenthe
ShoulderBoltssecurely.Finally,rotatetheCrankshafthalfaturntobringtheAnvilclearof
theBlade.(SeeFIG.4.4).
4.1.DroptheDeliveryUnit,
4.2.
4.3.
FIG.4.2
FIG.4.4
CREASING/FOLDING