EasyManua.ls Logo

Morgana Digifold Pro CB User Manual

Morgana Digifold Pro CB
92 pages
To Next Page IconTo Next Page
Page #1 background imageLoading...
Page #1 background image
ISSUE
2
APRIL
2012
174-037
DOCUMENT
CREASING/FOLDINGMACHINE
SERVICE
MANUAL
MorganaSystemsLimited UnitedKingdom
Website: www.morgana.co.uk
Telephone:(01908)608888 Facsimile:(01908)692399
DigifoldPro (CB/UL)

Table of Contents

Question and Answer IconNeed help?

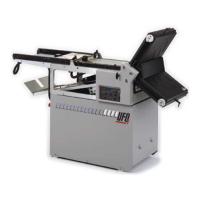
Do you have a question about the Morgana Digifold Pro CB and is the answer not in the manual?

Morgana Digifold Pro CB Specifications

General IconGeneral
Speed (max)6000 sheets per hour
Maximum Paper Weight400gsm
Folding Speed6000 sheets per hour
Number of Folding Plates2
Paper Weight80 to 400gsm
Maximum Sheet Size700mm x 385mm
Power Requirements240V, 50/60Hz
Paper Size (max)385 x 700mm
Paper Size (min)210mm x 140mm
Minimum Sheet Size210mm x 140mm

Summary

ENGINEERING SET-UP & CALIBRATION TECHNIQUES

Pre-Power Setup Procedure

Outlines the steps for initial setup before powering the machine.

Powered Setup Procedure

Details the setup procedures required after the machine is powered on.

Section M Trouble Shooting

Creasing Unit

Troubleshooting specific issues related to the creasing unit.

Folding Unit

Troubleshooting specific issues related to the folding unit.

Section N Circuit Diagrams

DigiFold Wiring Diagram

Provides the overall wiring diagram for the DigiFold machine.

SECTION A

A.5 The Top Cover Assembly

Step-by-step guide to removing the top cover assembly.

SECTION B

B.1 Valve Setting

Instructions for removing the butterfly valve assembly.

SECTION C

REMOVAL OF CREASING UNIT

Step-by-step guide for removing the creasing mechanism assembly.

REMOVAL REPLACEMENT CREASING DRIVE BELT

Detailed instructions for removing and replacing the creasing drive belt.

SECTION E

REMOVAL REPLACEMENT OF INPUT ROLLERS

Instructions for removing and replacing the top and bottom input rollers.

SECTION G

ELECTRICS REMOVAL REFITTING PCB's

Instructions for replacing main control and processor boards.

SECTION J

REMOVING FITTING OF FOLD KNIFE ASSEMBLIES

Detailed steps for removing and fitting fold knife assemblies.

SECTION K

Main Fold Rollers - Replacement

Detailed steps for replacing the 1st, 2nd, and 3rd fold roller assemblies.

Pre-Power Set up Procedure

6. SET UPPER INPUT ROLLER PARALLELISM AND CORRECT PRESSURE

Sets parallelism and pressure for the upper input roller.

7. SET FOLD ROLLERS PARALLEL AND TO CORRECT PRESSURE

Sets parallelism and pressure for the fold rollers.

9. SET FOLD KNIFE POSITIONS USING JIG

Sets fold knife positions using a specific jig.

Pre-Power Setup Procedure

1. Loading Table Alignment

Details how to check and adjust the loading table's squareness.

2. Dynacrease Alignment

3. Belt Tension

4. Creasing Blade Installation

6. Upper Input Roller - Setting the Parallelism & Pressure

7. Fold Rollers - Setting the Parallelism & Pressure

9. Setting The Fold Knives

Powered Set up Procedure

12. SET GAP POTENTIOMETERS

Calibrates the fold roller gap potentiometers.

13. SET TILT POTENTIOMETER

Calibrates the DynaCrease tilt potentiometer.

12. Fold Roller Gap Potentiometers

13. DynaCrease Tilt Potentiometer

16. Delivery Assembly

16.1. Delivery Belt

Instructions for correctly setting the delivery belt tension.

18. Crease Setup

18.1. Parallelism

Checks parallelism of creases and adjusts upper input roller if needed.

18.2. Depth and Edging

Checks crease depth and profile, adjusting blade bolts and adjusters.

19. Squareness

20. Crease Bias

Calibration

22. Crease Positions - Set by Position

Sets and checks crease positions using test stock and tools menu.

23. Fold Positions - Set by Position

Sets fold positions using test stock and adjusts fold 1/2.

24. Deflect Adjustments

FAULT ‘NO SYNC' appears on touchscreen Machine will not boot up

1. CHECK THE ATX POWER SUPPLY AS FOLLOWS

Checks ATX power supply voltages.

2. CHECK THE ITX MOTHER BOARD AS FOLLOWS

Checks ITX motherboard battery and performs a boot-up sequence.

FAULT Pump will not operate when the Compressor switch is switched on

Section N

DIGIFOLD PRO WIRING DIAGRAM

The main wiring diagram for the DigiFold Pro machine.

Related product manuals