List of Figures xxi
List of Figures
Figure 1-4 RDAC Diagnostic Screen................................................................................................... 1-12
Figure 2-1 UHF Receiver Module Input/Output ..................................................................................... 2-2
Figure 2-2 UHF Receiver Module Functional Block Diagram................................................................ 2-7
Figure 2-3 800/900 MHz Receiver Module Functional Block Diagram.................................................. 2-8
Figure 3-1 UHF Exciter Module Input/Output ........................................................................................ 3-2
Figure 3-2 Exciter Module Functional Block Diagram ........................................................................... 3-5
Figure 4-1 PA Input/Output.................................................................................................................... 4-2
Figure 4-2 Power Amplifier Functional Block Diagram .......................................................................... 4-5
Figure 5-1 Station Control Module Indicators and Input/Output Connections ....................................... 5-2
Figure 5-2. Station Control Module (SCM) Audio Path........................................................................... 5-6
Figure 5-2 Station Control Module Functional Block Diagram - Station Control Circuitry.................... 5-11
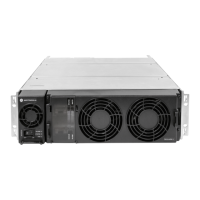
Figure 6-1 Backplane Interface Board................................................................................................... 6-2
Figure 6-2 Backplane Interface Board Connector Locations (Front and Rear View) ............................ 6-3
Figure 6-3 Rear view with fuse cover plate removed .......................................................................... 6-26
Figure 7-1 Power Supply Input/Output Connections ............................................................................. 7-2
Figure 7-2 Power Supply Functional Block Diagram ............................................................................. 7-5
Figure 7-3 Measuring 14.2 VDC and 5.1 VDC (other voltmeter probe to chassis)................................ 7-7
Figure 7-4 Pin-out of connector (measuring 14.2 VDC and 5.1 VDC)................................................... 7-7
Figure 7-5 Measuring 14.2 VDC and 28.6 VDC (other voltmeter probe to chassis).............................. 7-8
Figure 7-6 Pin-out of connector (measuring 14.2 VDC and 28.6 VDC)................................................. 7-8
Figure 8-1 Wireline Board Jumpers and Input/Output Connections ...................................................... 8-2
Figure 8-2 Location of jumpers on the P8 connector ............................................................................ 8-6
Figure 8-3 Choosing Remote Control Mode in CPS.............................................................................. 8-7
Figure 8-4 CPS configuration for Wireline board................................................................................... 8-8
Figure 8-5 GPIO Physical Pin Configuration in CPS (example shown above is for TRC15)................. 8-9
Figure 8-5 Wireline Functional Block Diagram .................................................................................... 8-13
Figure 8-6 Location of LEDs................................................................................................................ 8-16
Figure 8-7 Timing requirements for a Valid Tone Remote Control Sequence ..................................... 8-17
Figure 8-8 Valid amplitudes for Tone Remote Control signaling.......................................................... 8-18
Figure 9-1 UHF Base Station/Repeater Preselector.............................................................................. 9-1
Figure 9-2 Duplexer (UHF) .................................................................................................................... 9-2
Figure 9-3 Duplexer (800 MHz) ............................................................................................................. 9-2
Figure 9-4 External Dual Circulator Tray (UHF) .................................................................................... 9-2
Figure 9-5 External Dual Circulator Tray (800 MHz) ............................................................................. 9-3
Figure 9-6 Typical Antenna Relay Module – Inputs/Outputs ................................................................. 9-4
Figure 9-7 Test Equipment Setup for External Preselector Field Tuning............................................. 9-15
Figure 9-8 Connection of the 435–470 MHz band preselector............................................................ 9-18
Figure 9-9 Initial curve (Start 400 MHz, Stop 620 MHz) ...................................................................... 9-19
Figure 9-10 Initial curve (Start 400 MHz, Stop 505 MHz) ...................................................................... 9-19
Figure 9-11 Passband tuning of tuning screw 4 ....................................................................................9-20
Figure 9-12 Passband tuned to required range (tuning screw 4) .......................................................... 9-21
Figure 9-13 Passband tuning of tuning screw 3 ....................................................................................9-22
Figure 9-14 Passband tuned to required range (tuning screw 3) .......................................................... 9-22
Figure 9-15 Passband tuned to required range (tuning screw 2) .......................................................... 9-23
Figure 9-16 Passband and return loss after rough tuning ..................................................................... 9-24
Figure 9-17 Return loss......................................................................................................................... 9-24
Figure 9-18 Turn screw clockwise ......................................................................................................... 9-25
Figure 9-19 Turn screw counter clockwise ............................................................................................ 9-25
Figure 9-20 Result after fine tuning ....................................................................................................... 9-26
Figure 9-21 Inspect against mask template .......................................................................................... 9-27
 Loading...