Page 2-22 V10/V7.5/V5/V3.5 Installation and Operation Manual
Issue 3.5 Section 2 Preparation for Use and Installation
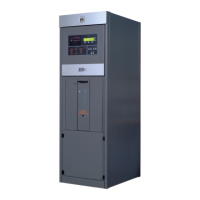
2.3.7.2 NE30 Exciter(s)
NOTE
NE30 exciters are analog operation only.
(a) On the rear of the exciter(s), verify the
voltage indicated on the fuse holder/
LINE VOLTAGE SELECTOR inside
the AC MAINS connector(s) is set for
the proper voltage (230 V ac).
(b) If the visible printing does not indicate
the correct ac source voltage,
carefully withdraw it from the
connector and re-insert it so that the
correct ac source voltage is shown.
NOTE
Ensure that the correct slow-blow fuse is
installed (2 A for 220 - 240 V ac)
(c) From the front of the transmitter,
install the exciter(s) in the exciter
compartment(s) above the switching
power supply modules.
(d) At the back of the transmitter, plug the
following connectors into the back of
the exciter(s):
• ac power cord(s) (P66 for A14 and P67
for A15, if used) into the ‘Ac Mains’
receptacle(s).
• 25-pin D-sub control/monitor plug(s)
(P68 for A14 and P69 for A15, if used),
into the ‘Control/Monitor’ receptacle(s).
• RF output BNC plug(s) (W1P1 for A14
and W2P1 for A15, if used) into the ‘RF
Output’ N receptacle(s).
(e) Connect the program input to the
appropriate exciter input, as detailed
in the NE30 exciter's Technical
Instruction Manual. Make any
necessary program input adjustments
and secure the exciter(s) using four
front panel screws located in a bag
attached to the exciter(s).
NOTE
Route exciter program cables through a
ferrite toroid, provided with the exciter’s
ancillary kit, to the rear of the exciter(s).
(f) For external exciter mounting,
consider the following:
• Connect a coaxial cable between the
exciter’s RF OUT N connector and J1
(exciter A) or J2 (exciter B) of RF
drive splitter/changeover assembly
A16 (see Figure MD-3 of the V10 or
V5 Repair Manual).
• Connect each exciter’s RF mute
(safety interlock) control to the
transmitter’s exciter interlock control,
using a single-conductor, shielded
wire (user supplied). The exciter
interlock controls are available on the
EXC A and EXC B terminals of TB2
on the remote interface PWB (A44).
• Nautel exciters require an open
contact for normal operation. For
exciter A (A14), connect the centre-
conductor to TB2-2 and the ground to
TB2-3. For exciter B (A15, if used),
connect the centre-conductor to
TB2-5 and the ground to TB2-6.
• Install the other ends of the RF mute
wires from step (b) in a 25-pin D-sub
plug (Nautel Part # JS31, located in the
blank exciter kit) with the centre-
conductor at pin 4 and the shield at pin
25. Mate the plug with the ‘Control/
Monitor’ receptacle on the exciter rear
panel. A connector shell (Nautel Part #
JK16) is also available in the blank
exciter kit.