Page 2-24 V10/V7.5/V5/V3.5 Installation and Operation Manual
Issue 3.5 Section 2 Preparation for Use and Installation
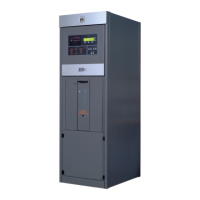
2.4 COMMISSIONING
PROCEDURES
The following procedures are in a step-by-
step format. They permit a person who is
not familiar with the transmitter to perform
required checks. Complete the
procedures in sequence.
The transmitter is precisely calibrated and
subjected to a burn-in during manufacture.
It should not be necessary to change any
adjustment, other than those specified.
NOTE (for IBOC users)
If the transmitter is part of an IBOC
system, it should be commissioned in
conjunction with the IBOC system
components. Refer to the turn-on or
commissioning procedures of these items
for more information.
NOTE
Depending on customer requests, the
exciter, IPA, IPA power supply and/or fan
power supply may be duplicated and
connected to form main and standby
modules. The LVPS module may also be
duplicated, but is not main/standby
configurable. The control/display panel’s
diagnostic display indicates which module
(A or B) is selected as the main source.
Duplicated modules are as follows:
A Side
A – Exciter......................................................A14
A – IPA Module (V10/V7.5)............................A19
A – IPA PA (V5/V3.5)................................ A19A4
A – IPA Switching Power Supply Module........U1
A – LVPS Module...........................................U11
A – Fan Supply Module .................................U13
B Side
B – Exciter......................................................A15
B – IPA Module (V10/V7.5 only)....................A20
B – IPA PA (V5/V3.5, dual PA only)......... A19A3
B – IPA Switching Power Supply Module........U2
B – LVPS Module...........................................U12
B – Fan Supply Module .................................U14
2.4.1 Precautions
The transmitter contains many solid state
devices that can be damaged if subjected
to excessive heat or high voltage
transients. Ensure circuits are not
overdriven or disconnected from their
loads while turned on. Read and observe
the precautionary information in Section
3 - Operating Instructions prior to applying
power and during operation.
2.4.2 Turn-On Prerequisites
To verify the transmitter is ready to turn
on, complete the following steps:
(a) Verify all interconnect wiring is
installed and installation requirements
of paragraph 2.3 have been
completed.
(b) Ensure ac power is switched off.
(c) Set the ON/STANDBY switch of each
switching power supply module (A-H
for V10, A-C and E-G for V7.5, A-D for
V5, A-C for V3.5, IPA A and IPA B, if
applicable) to STANDBY (toggle
down). Use the transmitter’s
silkscreened panel as location aids.
WARNING
For certain customers an “Interlock
Shorted” jumper is factory installed
between the interlock inputs (TB1-1/
TB1-2) on the remote interface PWB
(A44). While this jumper is in place,
safety features controlled by the
external interlocks are disabled.
Implement a fail-safe method of
alerting personnel to this fact. Voltages
that are dangerous to life are present
on RF output stages and the antenna
system if transmitter is turned on.
(d) If a jumper has not been factory
installed, close all external interlocks
or connect a temporary jumper wire
between TB1-1 and TB1-2 of the
remote interface PWB (A44).