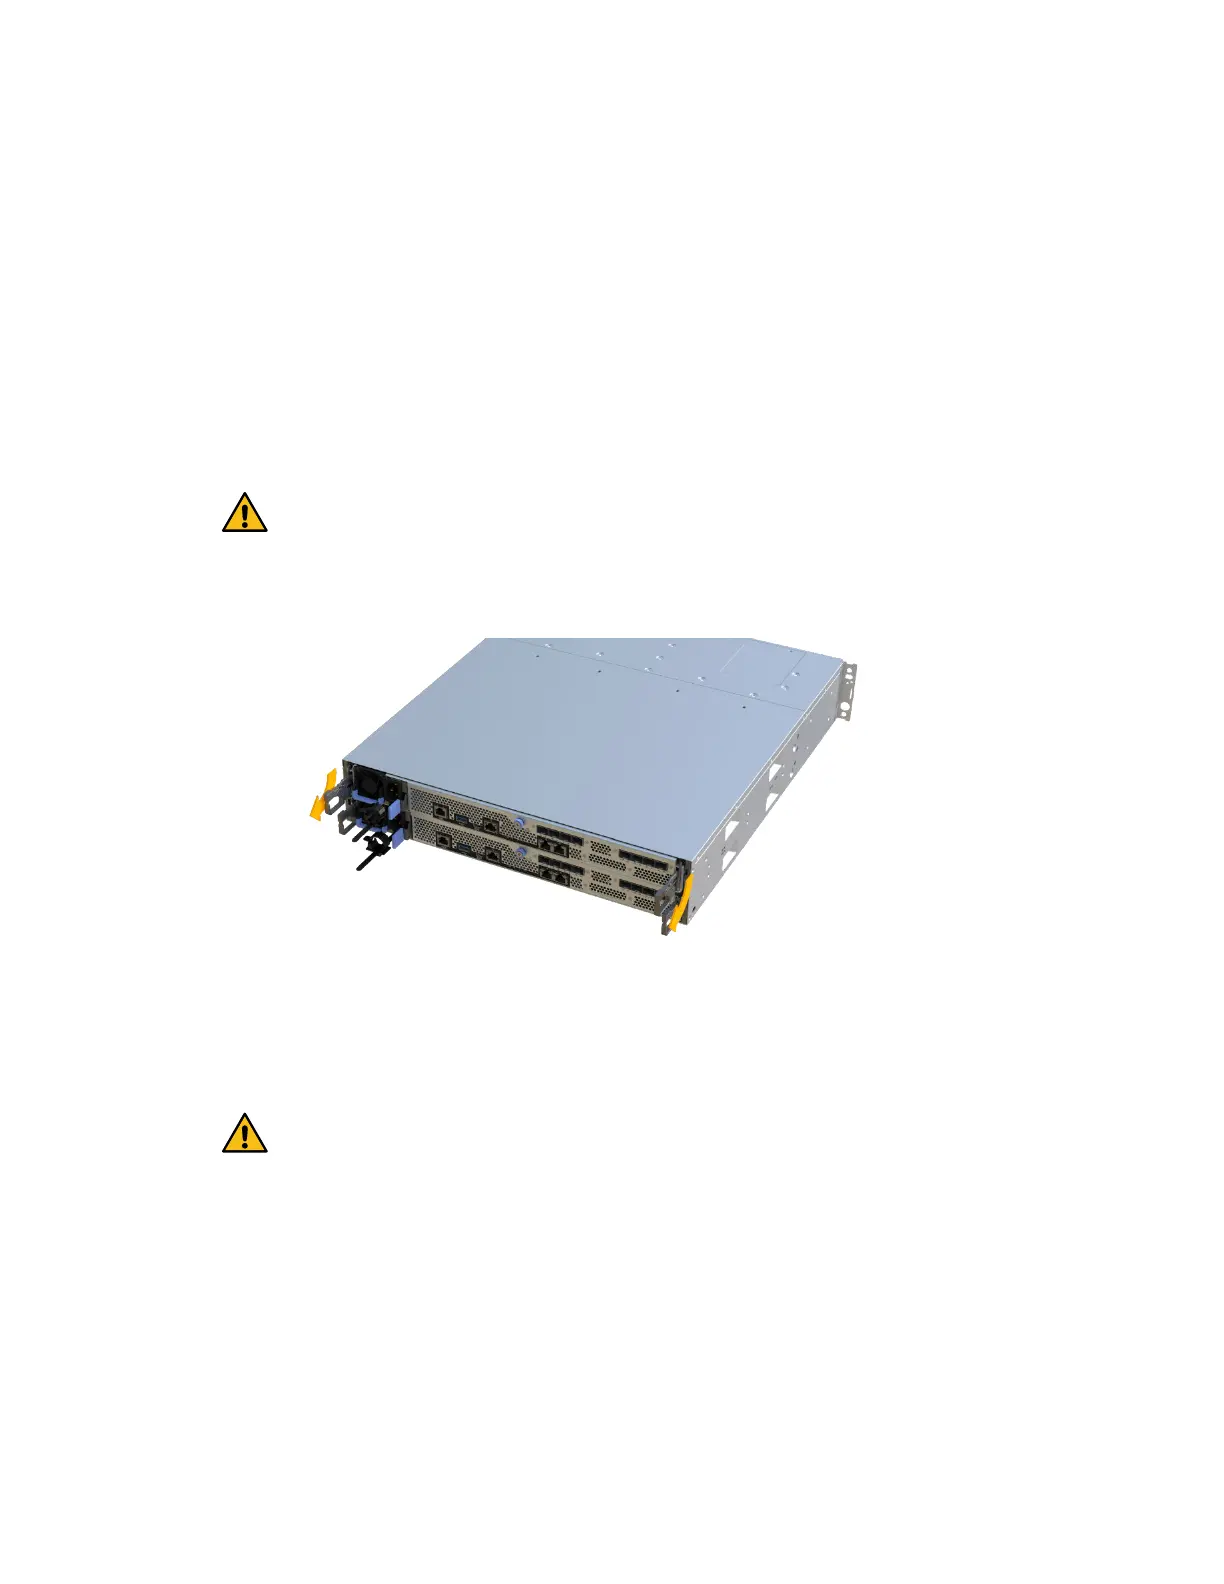
Remove controller canister
You remove the failed controller canister so you can replace your DIMMs with new ones.
Before you begin
• You must use labels to identify each cable that is connected to the controller canister.
• You have an ESD wristband, or you have taken other antistatic precautions.
• You have prepared a flat, static free work area.
Steps
1. Put on an ESD wristband or take other antistatic precautions.
2.
Label each cable that is attached to the controller canister.
3.
Disconnect all the cables from the controller canister.
Attention: To prevent degraded performance, do not
twist, fold, pinch, or step on the cables.
4. Confirm that the Cache Active LED on the back of the controller is off.
5.
Squeeze the handles on either side of the controller, and pull back until it releases from the
shelf.
6. Using two hands and the handles, slide the controller canister out of the shelf. When the front
of the controller is free of the enclosure, use two hands to pull it out completely.
Attention: Always use two hands to support the weight of a controller canister.
Maintaining EF300 and EF600 Hardware 33
DIMMs