Configure Advanced Features
122
AC1900, N900, and N450 WiFi Cable Data Gateways
3. Type admin for the user name and type your password.
If you did not yet personalize your password, type password for the password.
4. Click the OK button.
The BASIC Home screen displays.
5. Select ADV
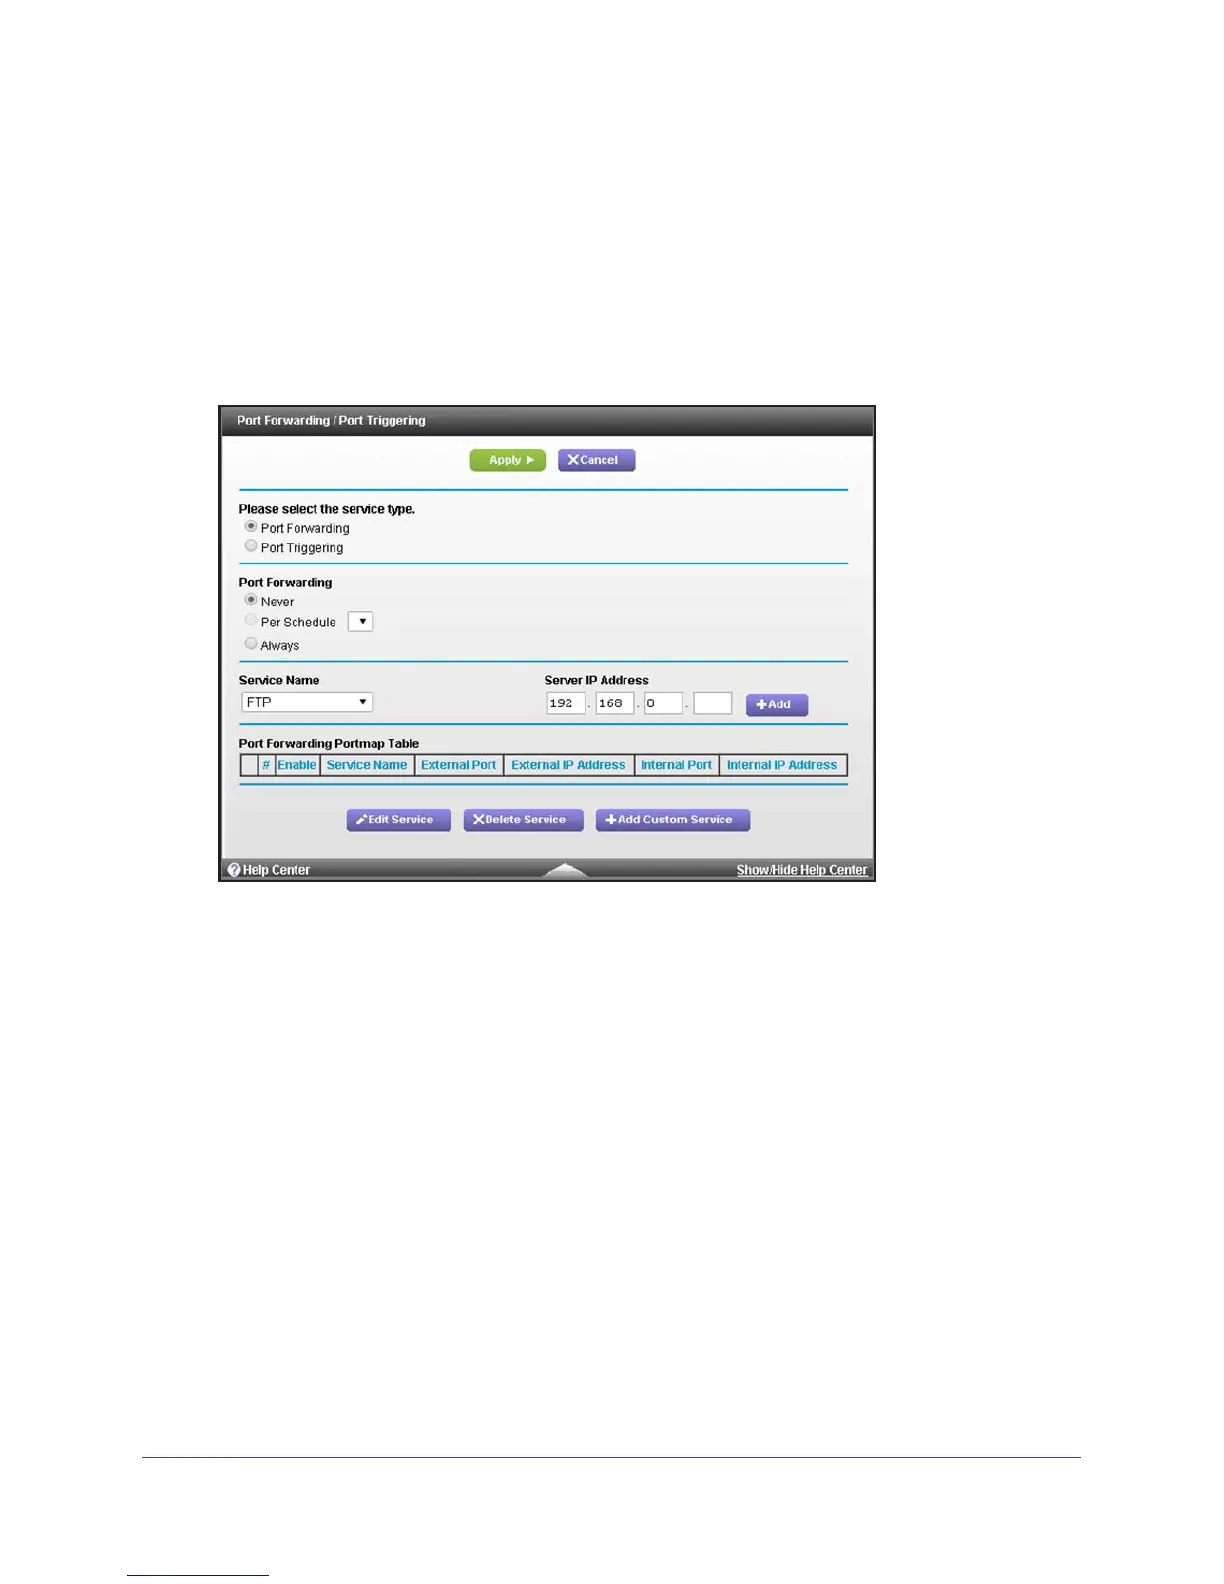
ANCED > Advanced Setup > Port Forwarding / Port Triggering.
The Port Forwarding / Port Triggering screen displays.
6. Leave the Port Forwarding radio button selected as the service type.
7. From the Service Name menu, select the service or game that you plan to host on your
network.
If the service does not display in the menu, see Manage Services or Applications for Port
Forwarding on page 123.
8. In the Server IP
Address field, complete the IP address of your local device that must
receive the inbound traffic that is covered by this service.
9. Click the Apply button.
The service or application is added to the Port Forwarding Portmap Table. The Enable
check box is selected automatically
.
10. In the Port Forwarding section, selects how the cable data gateway applies port forwarding:
• Per Schedule. Port forwarding is enabled according the schedule that you must
select from the menu.
For more information, see Schedule When Features Are Active on page 68.
• Always. Port forwarding is always enabled.
 Loading...