5.
If the selection from the QoS Mode menu is 802.1P/DSCP, do the following to
change the selection to Port-Based:
a.
From the QoS Mode menu, select Port-Based.
A pop-up warning window opens.
b.
Click the CONTINUE button.
The pop-up window closes.
Note: For information about broadcast filtering, see Manage Broadcast Filtering
and Set Port Storm Control Rate Limits on page 41.
6.
To set the port priorities, do the following:
a.
Click the PRIORITY tab.
b.
Click the purple pencil icon.
The port priority settings become available.
c.
For each port for which you want to set the priority, select a settings from Low
(P0) to High (P7) from the individual menu for the port.
d.
Click the APPLY button.
Your settings are saved.
7.
To set rate limits, do the following:
a.
Click the RATE LIMITS tab.
b.
Click the purple pencil icon.
The rate limit settings become available.
c.
For each port for which you want to set rate limits, select the rate in Mbit/s from
the individual Ingress and Egress menus for the port.
The default selection is No Limit.
d.
Click the APPLY button.
Your settings are saved.
Use 802.1P/DSCP Quality of Service
In the 802.1P/DSCP QoS mode, the switch uses the 802.1P or DSCP information in the
header of an incoming packet to prioritize the packet. With this type of QoS, you cannot
control the port prioritization on the switch because the device that sends the traffic
(that is, the packets) to the switch prioritizes the traffic. However, you can set the rate
limits for individual ports on the switch.
The switch accepts traffic on a port at the rate (the speed of the data transfer) that you
set for incoming traffic on that port. The switch transmits traffic from a port at the rate
User Manual39Optimize the Switch
Performance
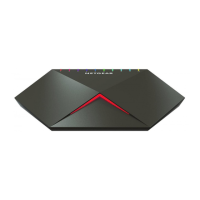
Nighthawk SX10 Pro Gaming Advanced 8-Port Gigabit Ethernet Switch Model GS810EMX
 Loading...