3. Enable the LAG on the switch (see Enable a Link Aggregation Group on page 82)
and on the other device.
Set Up a Link Aggregation Group
You set up link aggregation on the switch by adding ports to a link aggregation group
(LAG) and by enabling the LAG. However, for a LAG to take effect, you first must make
sure that all ports that participate in the LAG (that is, the ports on both devices) use the
same speed, duplex mode, and flow control setting (see Manage Individual Port Settings
on page 42 for information about changing these settings on the switch) and you must
set up a physical link aggregation connection (see Make a Link Aggregation Connection
on page 82).
After you set up a link aggregation group and make a physical link aggregation
connection, you can enable the link aggregation group (see Enable a Link Aggregation
Group on page 82).
To set up a link aggregation group on the switch:
1.
Open a web browser from a computer that is connected to the same network as the
switch or to the switch directly through an Ethernet cable.
2. Enter the IP address that is assigned to the switch.
The login page displays.
3. Enter the switch password.
The default password is password. The password is case-sensitive.
The HOME page displays.
4.
From the menu at the top of the page, select SWITCHING.
The QOS page displays.
5.
From the menu on the left, select LAG.
The LAG page displays.
6.
Click the tab for the LAG that you want to configure.
The text in the tab for the selected LAG displays green.
7.
To add ports to the LAG, click the icons for the ports that you want to add (from 1
to 10).
The icon for a selected port displays purple.
A LAG must consist of at least two ports.
8.
To set up the LAG as a static LAG, click the Static/LACP button.
User Manual81Manage the Switch in Your
Network
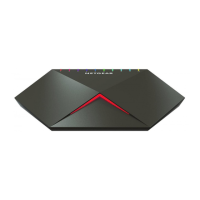
Nighthawk SX10 Pro Gaming Advanced 8-Port Gigabit Ethernet Switch Model GS810EMX
 Loading...