Broadcast filtering is enabled. In the right pane, the STORM CONTROL RATE tab
displays.
8.
To set storm control rate limits, do the following:
a.
Click the STORM CONTROL RATE tab.
b.
Click the purple pencil icon.
The storm control rate settings become available.
c.
For each port for which you want to set storm control rate limits, select the rate
in Mbit/s from the individual menu for the port.
The default selection is No Limit.
d.
Click the APPLY button.
Your settings are saved.
Manage Individual Port Settings
For each individual port, you can set rate limits for incoming and outgoing traffic, set
the port speed (by default, the speed is set automatically), enable flow control, change
the port name label, and change the LED color scheme.
Set Rate Limits for a Port
You can limit the rate of incoming (ingress) traffic, outgoing (egress) traffic, or both on
a port to prevent the port (and the device that is attached to it) from taking up too much
bandwidth on the switch. Rate limiting simply means that the switch slows down all
traffic on a port so that traffic does not exceed the limit that you set for that port. If you
set the rate limit on a port too low, you might, for example, see degraded video stream
quality, sluggish response times during online activity, and other problems.
You also can set port rate limits (the same feature) as part of the Quality of Service
configuration on the switch (see Use Port-Based Quality of Service and Set Port Priorities
on page 38).
To set rate limits for incoming and outgoing traffic on a port:
1.
Open a web browser from a computer that is connected to the same network as the
switch or to the switch directly through an Ethernet cable.
2. Enter the IP address that is assigned to the switch.
The login page displays.
3. Enter the switch password.
The default password is password. The password is case-sensitive.
User Manual42Optimize the Switch
Performance
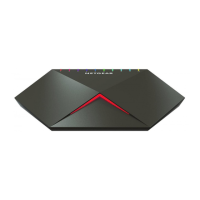
Nighthawk SX10 Pro Gaming Advanced 8-Port Gigabit Ethernet Switch Model GS810EMX
 Loading...