•
Color. The LED default color depends on the connection speed. For each
connection speed, select a predefined color or create your own color. To change
the color for a port speed, do the following:
a.
For port 1 or 2, click the 10G, 5G, 2.5G, or 1G icon. For ports 3 through 10,
click the 1G or 100M icon.
b.
Select one of the predefined colors. Or, to create your own color, click the
Other menu, and click a color in the color circle.
•
Brightness. By default, the LED brightness is high. To change the brightness,
move the button on the Brightness slider.
Your settings are saved automatically (that is, the page does not provide an APPLY
button).
Manage Port LEDs in a Batch
The switch lets you manage the following settings for port LEDs (also referred to as
Activity LEDs) in a batch:
•
Activity. By default, a port LED lights when you connect a powered-on device to
the port. You can disable the LED.
•
Frequency. By default, the frequency with which a port LED lights is high. You can
choose from four other frequency settings.
•
Color. The LED default color depends on the connection speed. For each connection
speed, you can select a predefined color or create your own color.
•
Brightness. By default, the LED brightness is high. You can lower the brightness.
Note: Because of different port speed capabilities, you can manage either the LEDs
for ports 1 and 2 in a batch or the LEDs for ports 3 through 10 in a batch.
To manage port LEDs in a batch:
1.
Open a web browser from a computer that is connected to the same network as the
switch or to the switch directly through an Ethernet cable.
2. Enter the IP address that is assigned to the switch.
The login page displays.
3. Enter the switch password.
The default password is password. The password is case-sensitive.
The HOME page displays.
User Manual96Maintain and Monitor the Switch
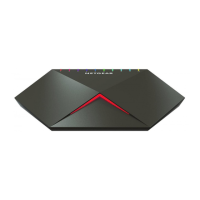
Nighthawk SX10 Pro Gaming Advanced 8-Port Gigabit Ethernet Switch Model GS810EMX
 Loading...