ANSI Hardware Installation Manual Installing cards in the 7360 ISAM WM shelf
Issue: 09 3HH-12893-AAAA-TCZZA 427
DRAFT
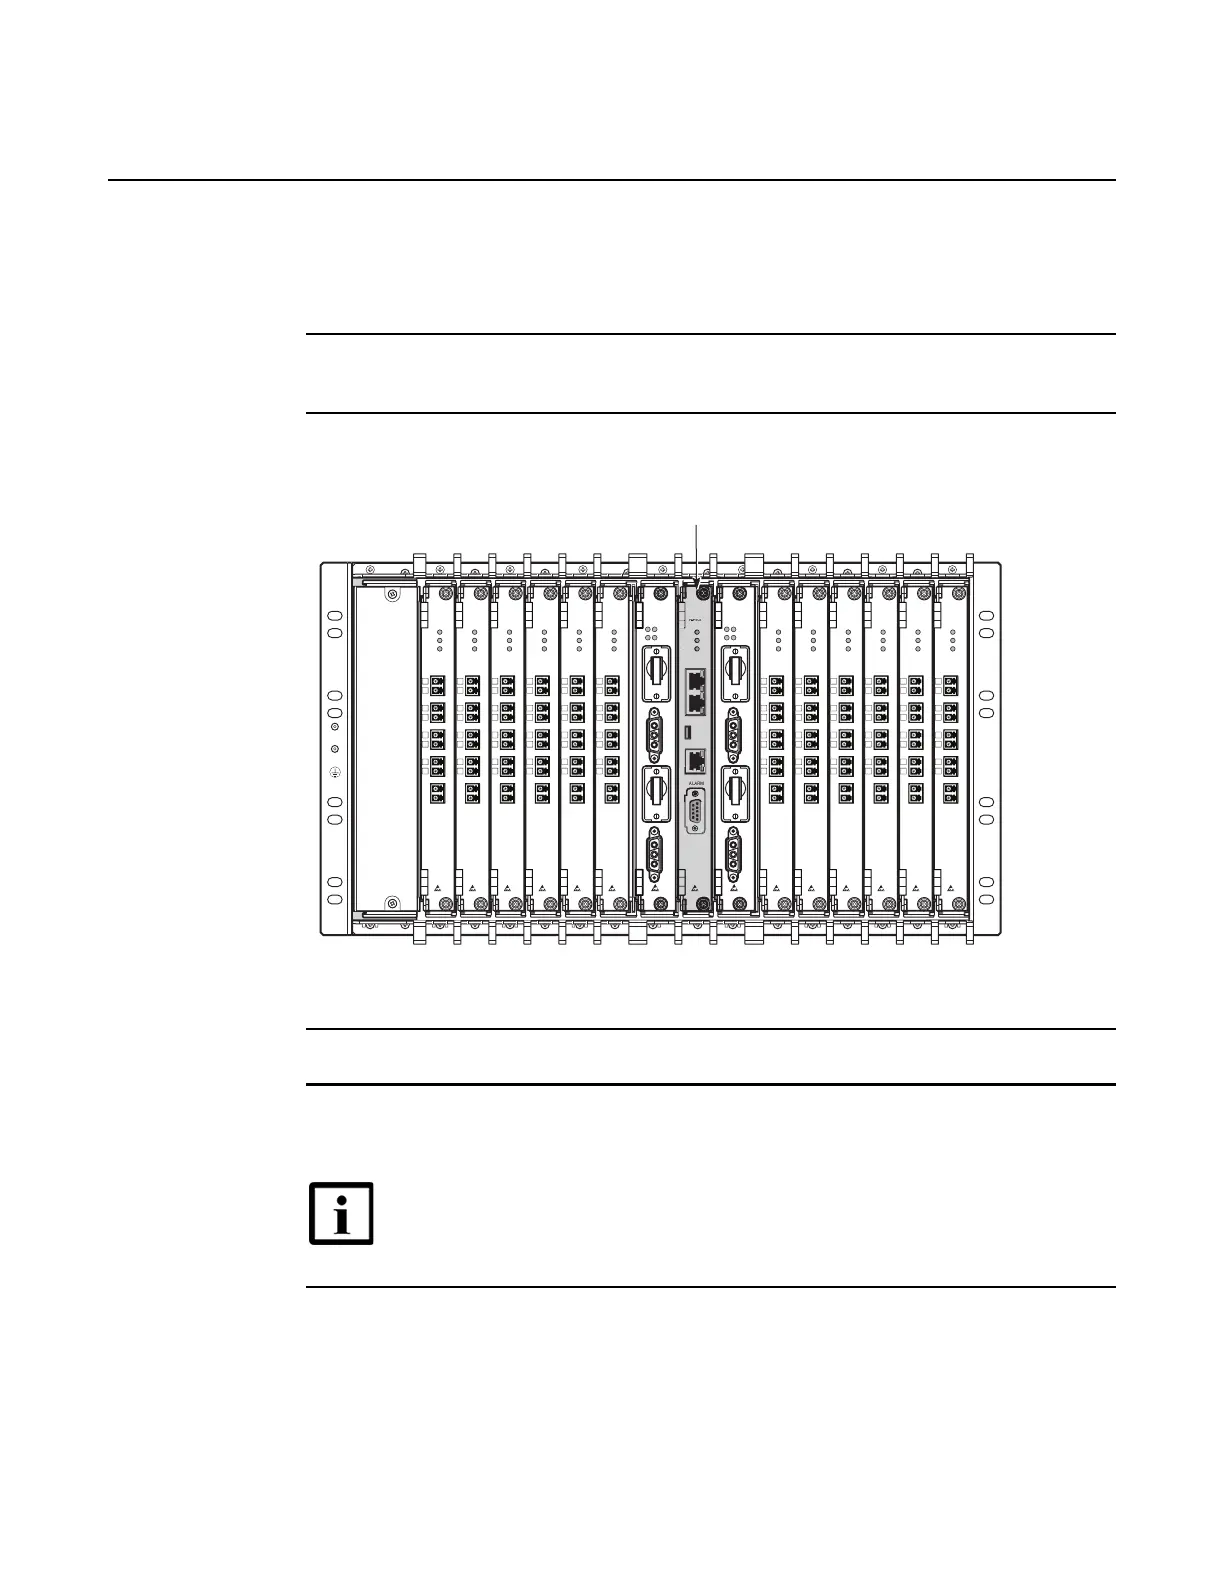
Procedure 97 To install controller cards
Each 7360 ISAM WM shelf contains one controller card. Proceed as follows to install the
7360 ISAM WM controller card:
1 Remove the controller card from its ESD protective bag. Make sure to wear the antistatic
wrist strap.
2 Insert the controller card in the controller slot of the of the 7360 ISAM WM; see Figure 253.
Figure 253 7360 ISAM WM controller card slot
3 Use the ejector handles to engage the card connectors in the backplane, see Figure 252.
4 Lock the card in place with the fixation screws located at the top and bottom of the faceplate
of the card. The maximum torque is 0.3 Nm.
Note — Once the board is mounted in its slot, the green PWR LED lights
up.
25793
ALM
PW2
S1
PW1
PW2
S2
RUN
PW1
FWPC-A
ALM
PW2
S1
PW1
PW2
S2
RUN
PW1
FWPC-A
USB
COM
ALM
PWR
RUN
GE1
GE2
1
2
3
4
1
2
3
4
A
B
PORT A
PORT B
ODN
ALM
PWR
PW1
FWLC-A
1
2
3
4
1
2
3
4
A
B
PORT A
PORT B
ODN
ALM
PWR
PW1
FWLC-A
1
2
3
4
1
2
3
4
A
B
PORT A
PORT B
ODN
ALM
PWR
PW1
FWLC-A
1
2
3
4
1
2
3
4
A
B
PORT A
PORT B
ODN
ALM
PWR
PW1
FWLC-A
1
2
3
4
1
2
3
4
A
B
PORT A
PORT B
ODN
ALM
PWR
PW1
FWLC-A
1
2
3
4
1
2
3
4
A
B
PORT A
PORT B
ODN
ALM
PWR
PW1
FWLC-A
1
2
3
4
1
2
3
4
A
B
PORT A
PORT B
ODN
ALM
PWR
PW1
FWLC-A
1
2
3
4
1
2
3
4
A
B
PORT A
PORT B
ODN
ALM
PWR
PW1
FWLC-A
1
2
3
4
1
2
3
4
A
B
PORT A
PORT B
ODN
ALM
PWR
PW1
FWLC-A
1
2
3
4
1
2
3
4
A
B
PORT A
PORT B
ODN
ALM
PWR
PW1
FWLC-A
1
2
3
4
1
2
3
4
A
B
PORT A
PORT B
ODN
ALM
PWR
PW1
FWLC-A
1
2
3
4
1
2
3
4
A
B
PORT A
PORT B
ODN
ALM
PWR
PW1
FWLC-A
B
O
E1
E
 Loading...