PROPlus / PRO Series Automated Dispensing Systems
52 www.nordsonefd.com info@nordsonefd.com +1-401-431-7000 Sales and service of Nordson EFD dispensing systems are available worldwide.
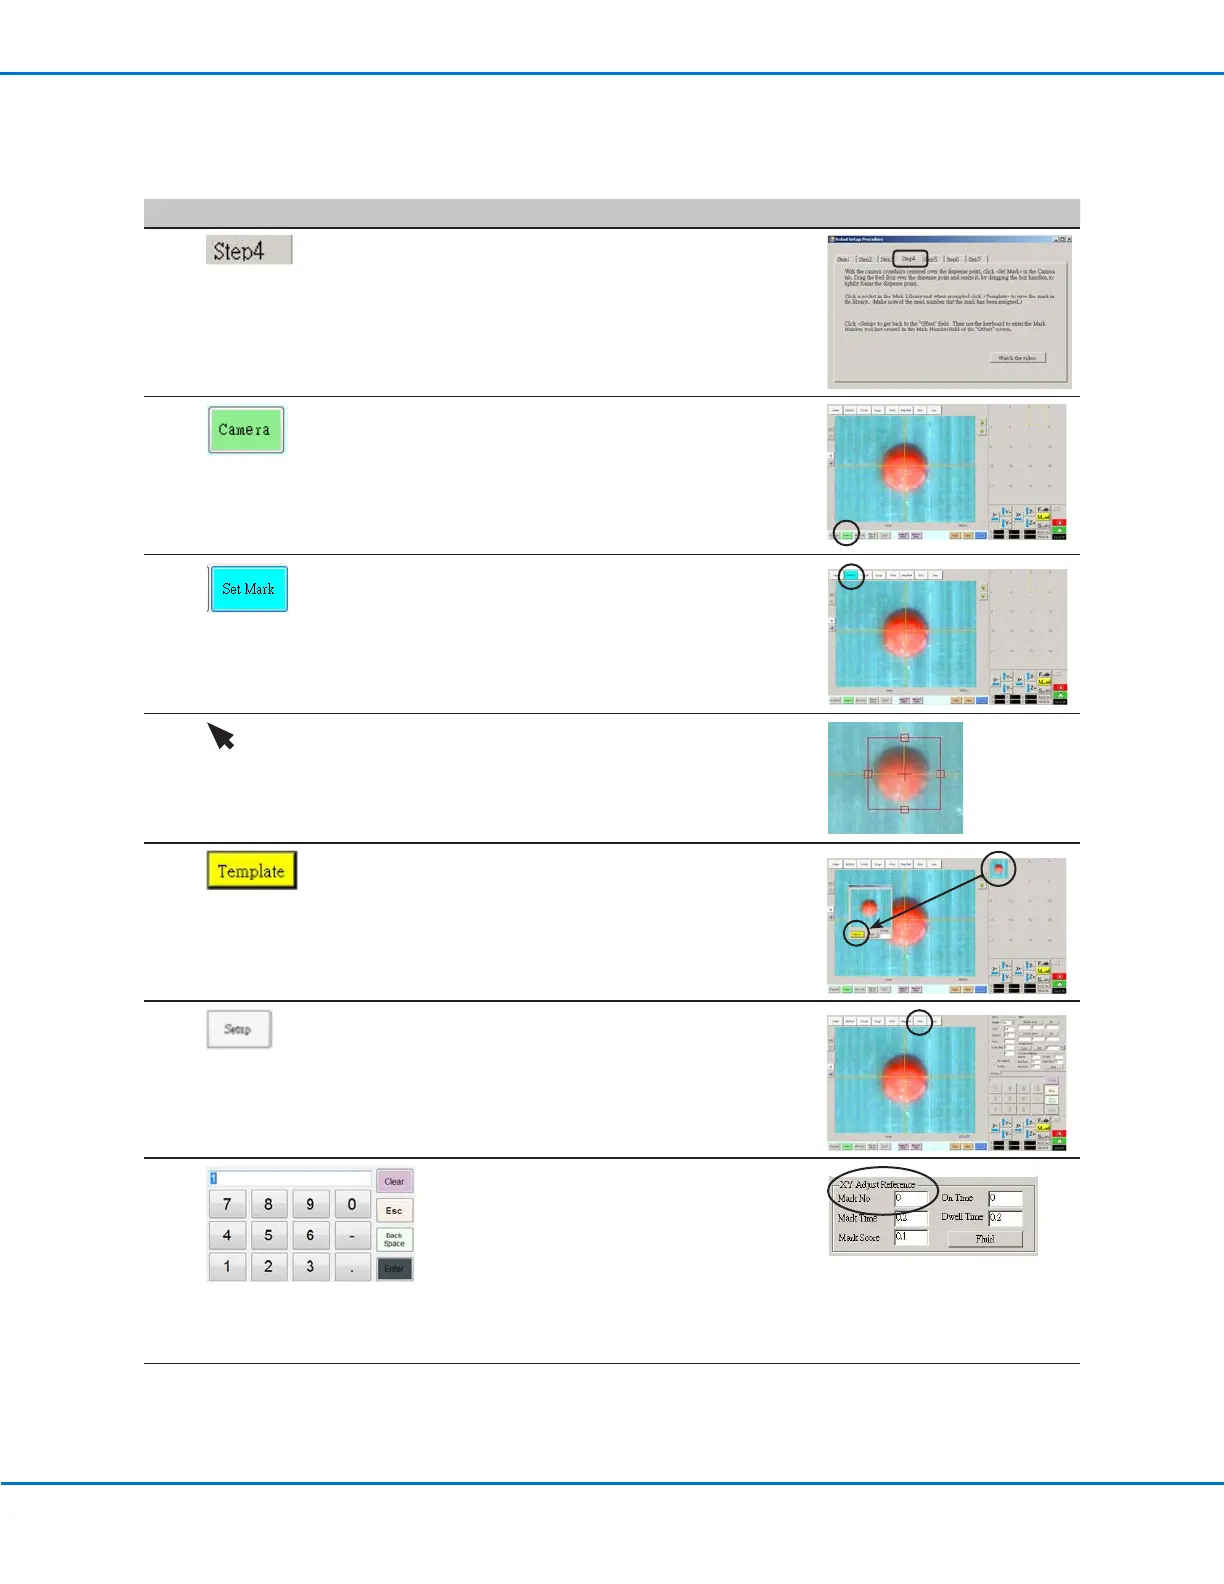
Robot Initial Setup (Step4 Tab): Setting a Mark
# Click Step Reference Image
1
• Click the STEP4 tab.
2
• Click the CAMERA tab.
The actual camera view appears in the
Primary View screen and the Mark Library
appears in the Secondary View screen.
3 • Click SET MARK.
A red box appears.
4 • Click and hold the center of the red box,
drag it over the dispense dot, and then click
and drag the four box handles such that they
outline the dot.
5
• Click a socket in the Mark Library to save the
mark as a Mark No., then click TEMPLATE
when the Template Match window appears.
The system saves the image in the Mark
Library.
NOTE: Be sure to remember the Mark No.
6
• Click SETUP to go back to the Camera
window Offset fields.
7
• Use the keypad to enter the Mark number in
the Mark No field under XY Adjust Reference.
NOTES:
- Make sure you click ENTER on the keypad
to enter the Mark number.
- Mark Time sets the time allowed for the
system to find the mark.
8 • Continue to “Robot Initial Setup (Step5 Tab):
Setting the Camera Scale” on page53.
Setting Up the System Using the Robot Initial Setup Wizard (continued)