6.1 Camera Setup
Left-click the mouse to select the Camera (Mouse: ) In Setup Menu display, the
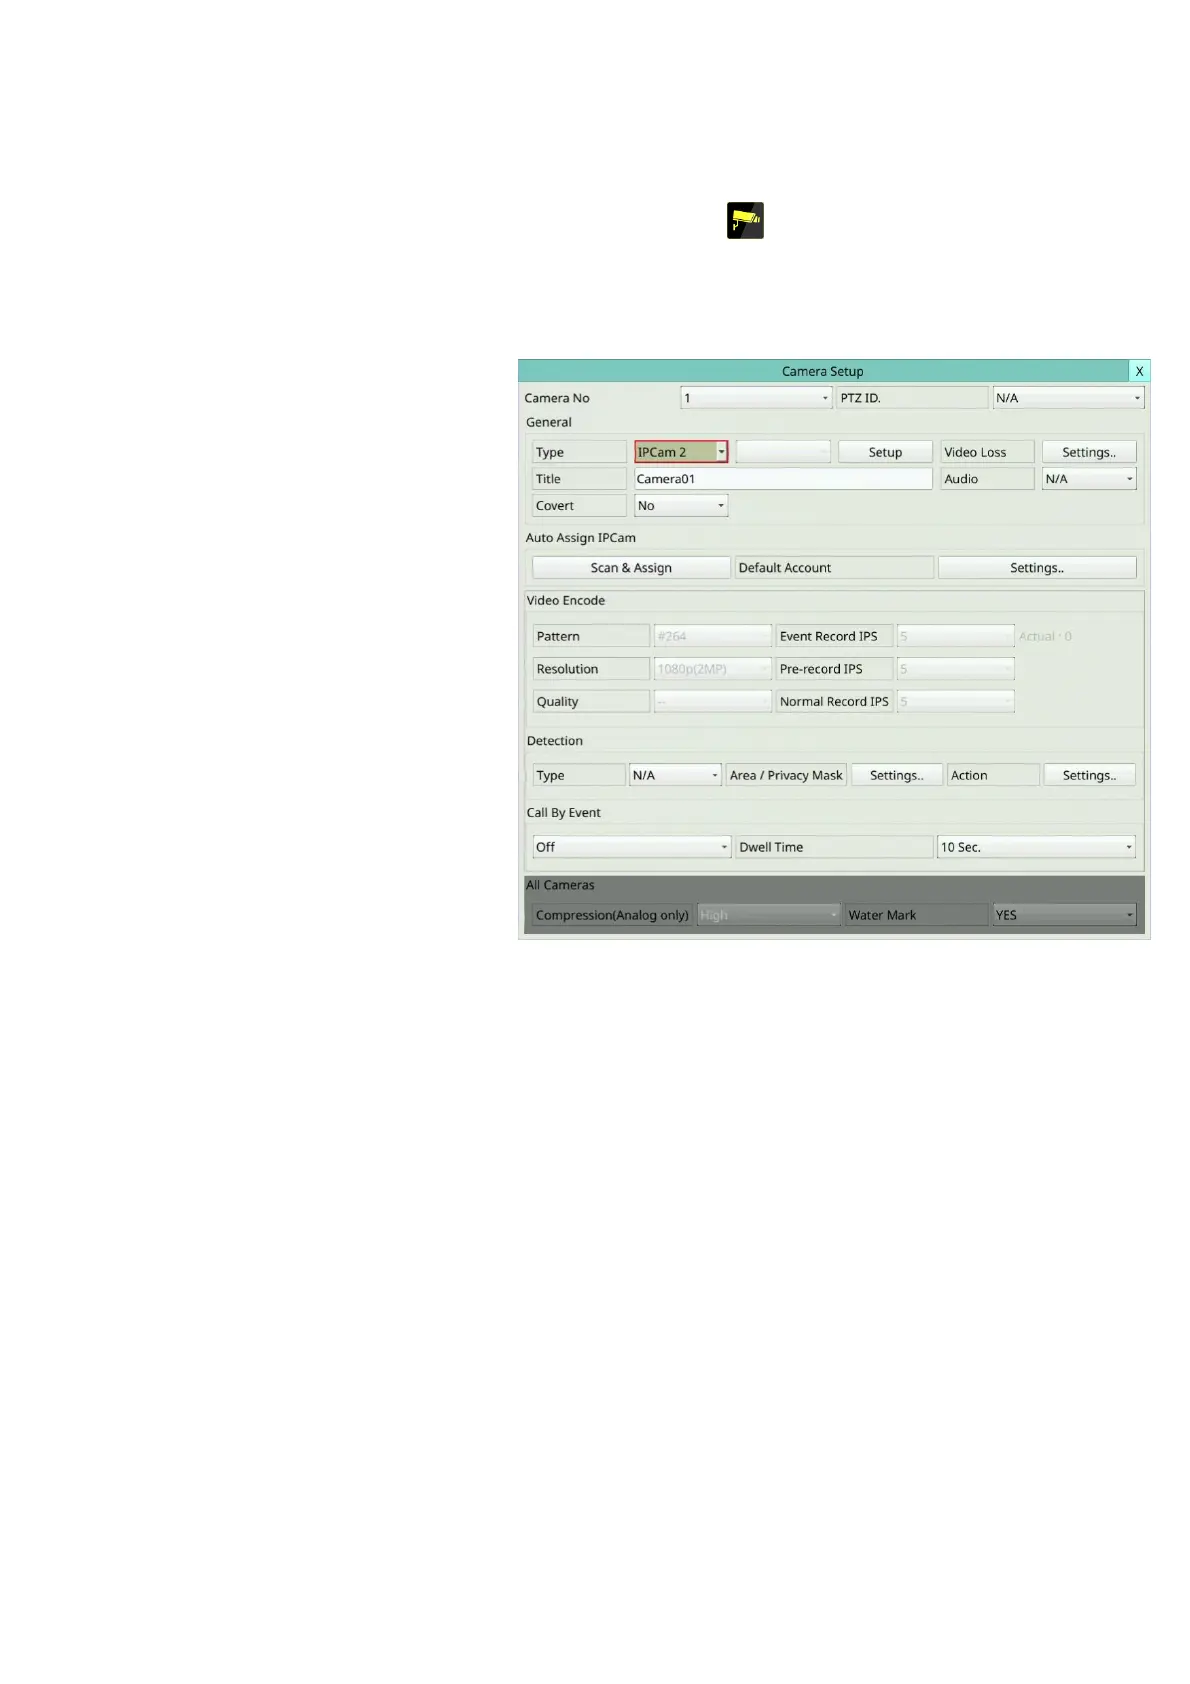
Camera Setup will be shown.
There are IP CAM and analog cameras, can be connected. The Camera Setup allows the
administrator to define some fundamental attributes for all the installed cameras.
The general operations are as
below:
Mouse: Click in the
respective item
Select the items to set.
X (Mouse: Left Click X or
Right Click to leave)
Press this button to escape
from this screen, and return
to Setup Menu display. If
the contents have been
modified, a Save dialog will
be shown to ask the user to
save the changes, press YES
to exit and save, CANCER to
exit without saving.
Following is a brief description
for each item and its specific
operations:
Camera No – Press the Numeric to select the camera.
PTZ ID – the PTZ ID of this camera if it’s a PTZ camera. The PTZ ID has to be consistent
with the setting of this camera. Please refer to the manual of the camera for the ID
setting. Change the value (N/A, 0-255 for RS-485, or non-485 for IP-CAM or
data-over-coax). The default setting is “N/A” – Not Available, which means that it’s
not a PTZ camera.
All Cameras:
Compression (Analog only) – Compression ratio of Normal or High. High compression
ratio will result in smaller storage size, and hence longer recording time; but the
Normal Record IPS will always be the same as Event Record IPS in Camera Setup, and
Dual Streaming will always be used for network video. (This option is not available for
IP camera.)
Watermark – to record with digital watermark or not. If yes, all the recorded images
for all the cameras will have digital watermark embedded.
Note: For the record data with the digital watermark, if the data is falsified, no matter
whether the file is played locally or remotely when it is played to the time of the
tampering, a warning message will pop up "File is corrupted or falsified. Do you want to
continue? ".