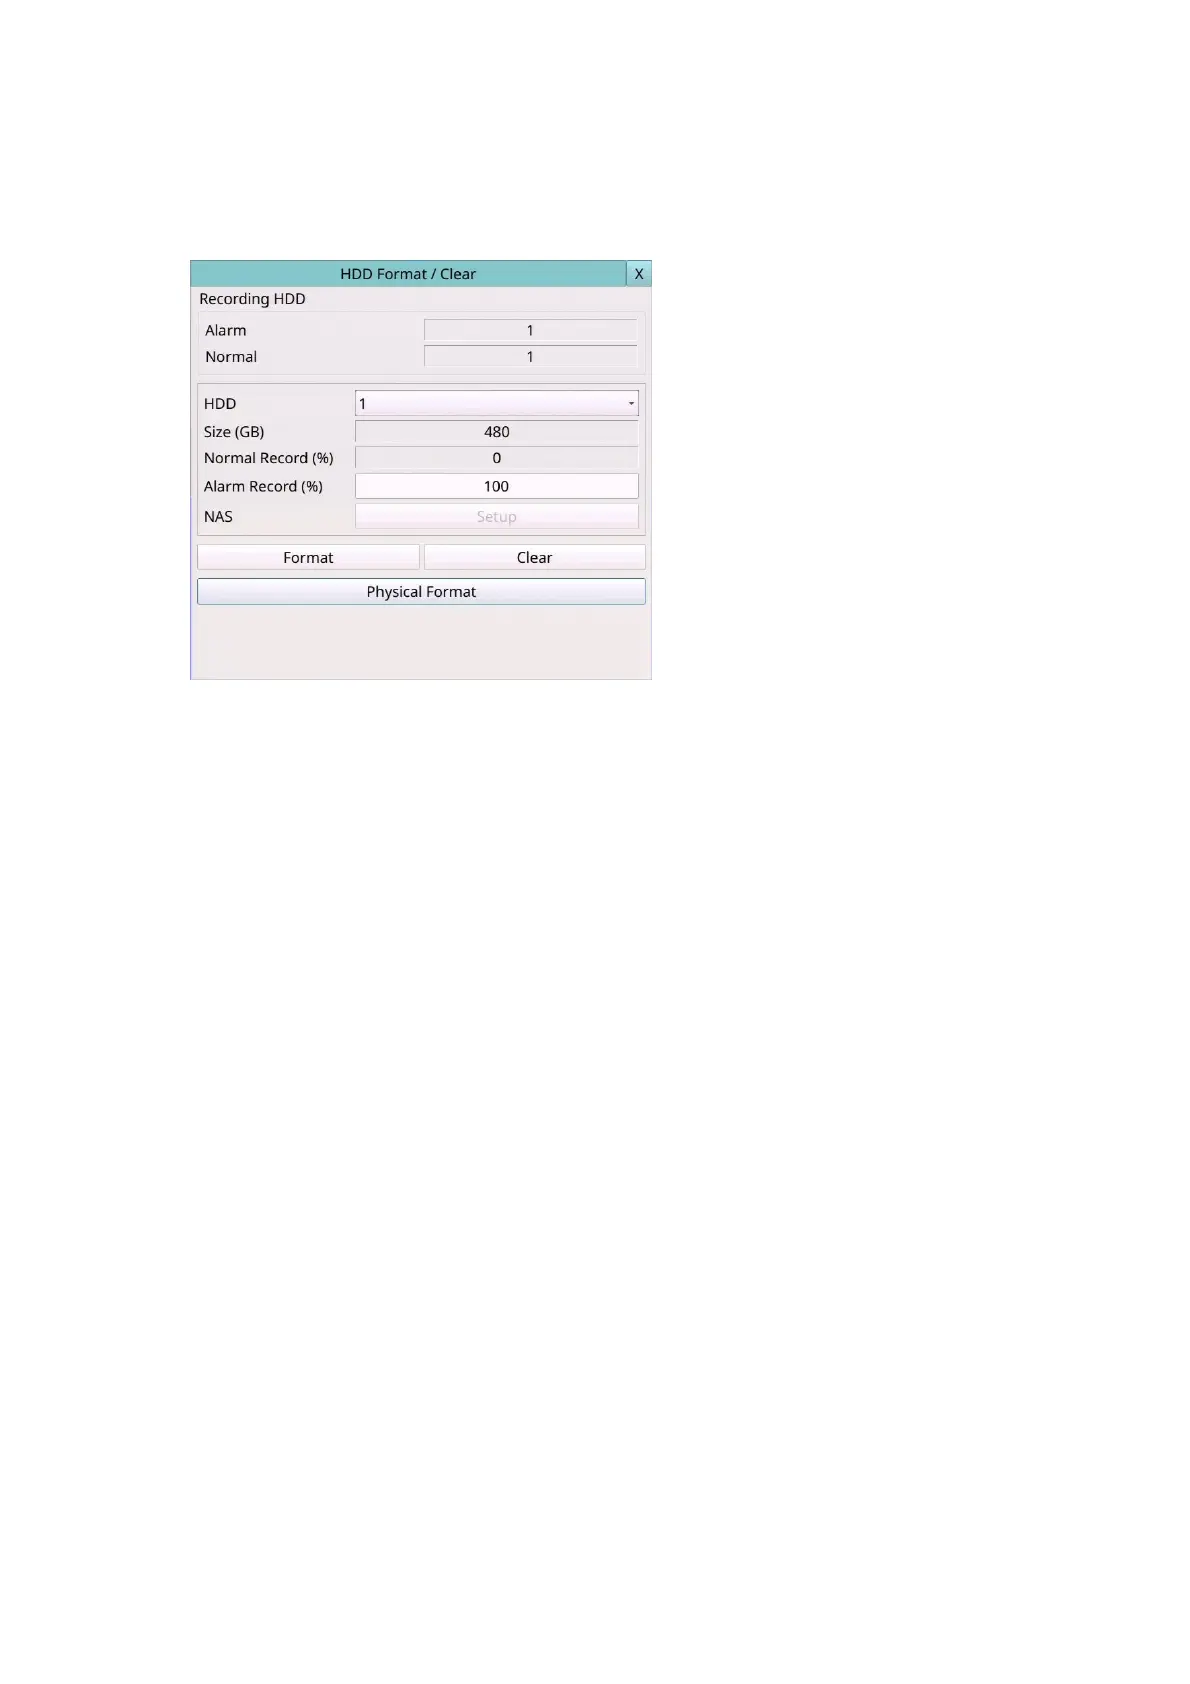
6.5.1 HDD Format/Clear
In HDD Setup, press HDD Format/Clear to call up HDD Format/Clear Setup as shown.
The HDD must be formatted before it can be used to record video/audio. The HDD
Format/Clear screen allows the administrator to format and/or clear each HDD, and set
the size for Alarm Record partition and Normal Record partition for each HDD. Please
make sure there’s no remote user before formatting the HDD.
Please note that if NAS device is connected and setup correctly, it will be always the
last storage in the HDD list.
The general operations are as below:
Mouse: Click in the respective item
Select the items to set.
X (Mouse: Left Click X or Right Click to leave)
Press this button to escape from this screen, and return to HDD Setup display. If the
contents have been modified, a Save dialog will be shown to ask the user to save the
changes, press YES to exit and save, CANCER to exit without saving.
Format (Mouse: Left click)
Press this button to format the HDD. A confirmation dialog will be shown on the
screen. Press YES to confirm, or CANCEL to cancel. Please note that it would take
some time to format a brand new HDD.
Note: If the HDD has not been formatted, it will be formatted and partitioned with
default record size, 100% for Alarm and 0% for Normal. If it has been formatted,
it will be formatted according to the Alarm REC Size (%) and Normal REC Size (%)
displayed on the screen, but the previously recorded contents within the new
size won’t be cleared and will be accessible.