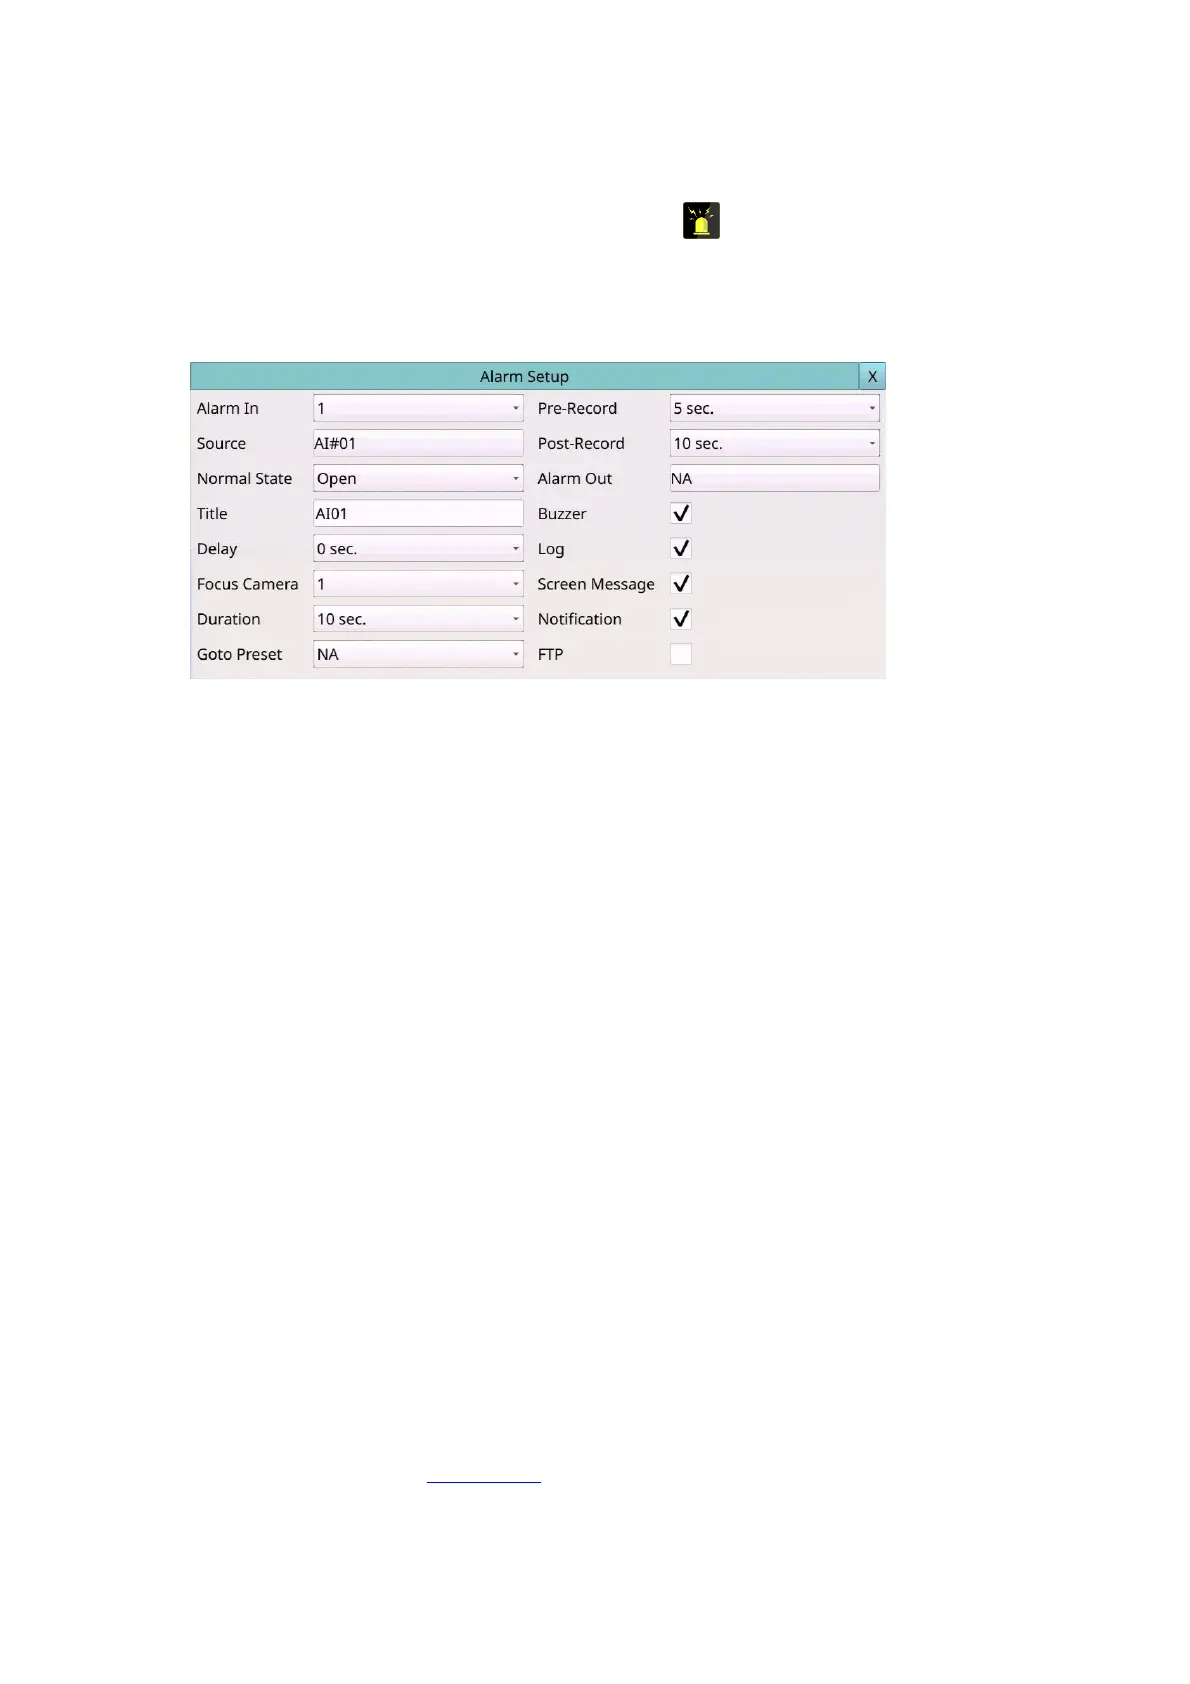
6.2 Alarm Setup
Left-click the mouse to select the Alarm (Mouse: ) In Setup Menu display, the Alarm
Setup will be shown. The Alarm Setup allows the administrator to define the attributes
for each alarm input, and the actions if it’s triggered. Up to 32 alarm inputs can be
configured, which are directly connected to the system or the alarm inputs of IP-CAM.
The general operations are as below:
Mouse: Click in the respective item
Select the items to set.
X (Mouse: Left Click X or Right Click to leave)
Press this button to escape from this screen, and return to Setup Menu display. If the
contents have been modified, a Save dialog will be shown to ask the user to save the
changes, press YES to exit and save, CANCER to exit without saving.
Following is a brief description for each item and its specific operations:
Alarm In – Press the Numeric to select the Alarm In No.
The alarm in default is set as the Alarm In No1.
Source – used to setup the Alarm Input Source, including Source Type which is N/A,
Local or IP-CAM, Source ID which is 1-4/8/16 for Local or the camera ID for IP-CAM,
and Sub ID which is 1-4 for IP-CAM.
Normal State – N/A, Close, Open, Close(Level) or Open(Level). Please check the
signal type, normally close or normally open, connected to the alarm input terminal
on the rear panel of the system. If there’s no signal connected, please select N/A –
Not Available, and the following items will not be settable. The default setting is
Open. Please note that for Close(Level) and Open(Level), the Duration and
Post-record mentioned below will keep being activated when the alarm input is at
alarm state.
Title – The title (Max. 8 characters) of this alarm input. Please follow the Text Input
method described in Section 4.1 to modify this item.
Delay – the alarm input will be treated as if it’s triggered Delay time (0-15 seconds)
later after being really triggered, 0 sec. for no delay.