General:
Type – whether this camera is IP CAM or N/A. If IP CAM, the IP CAM settings will be
settable.
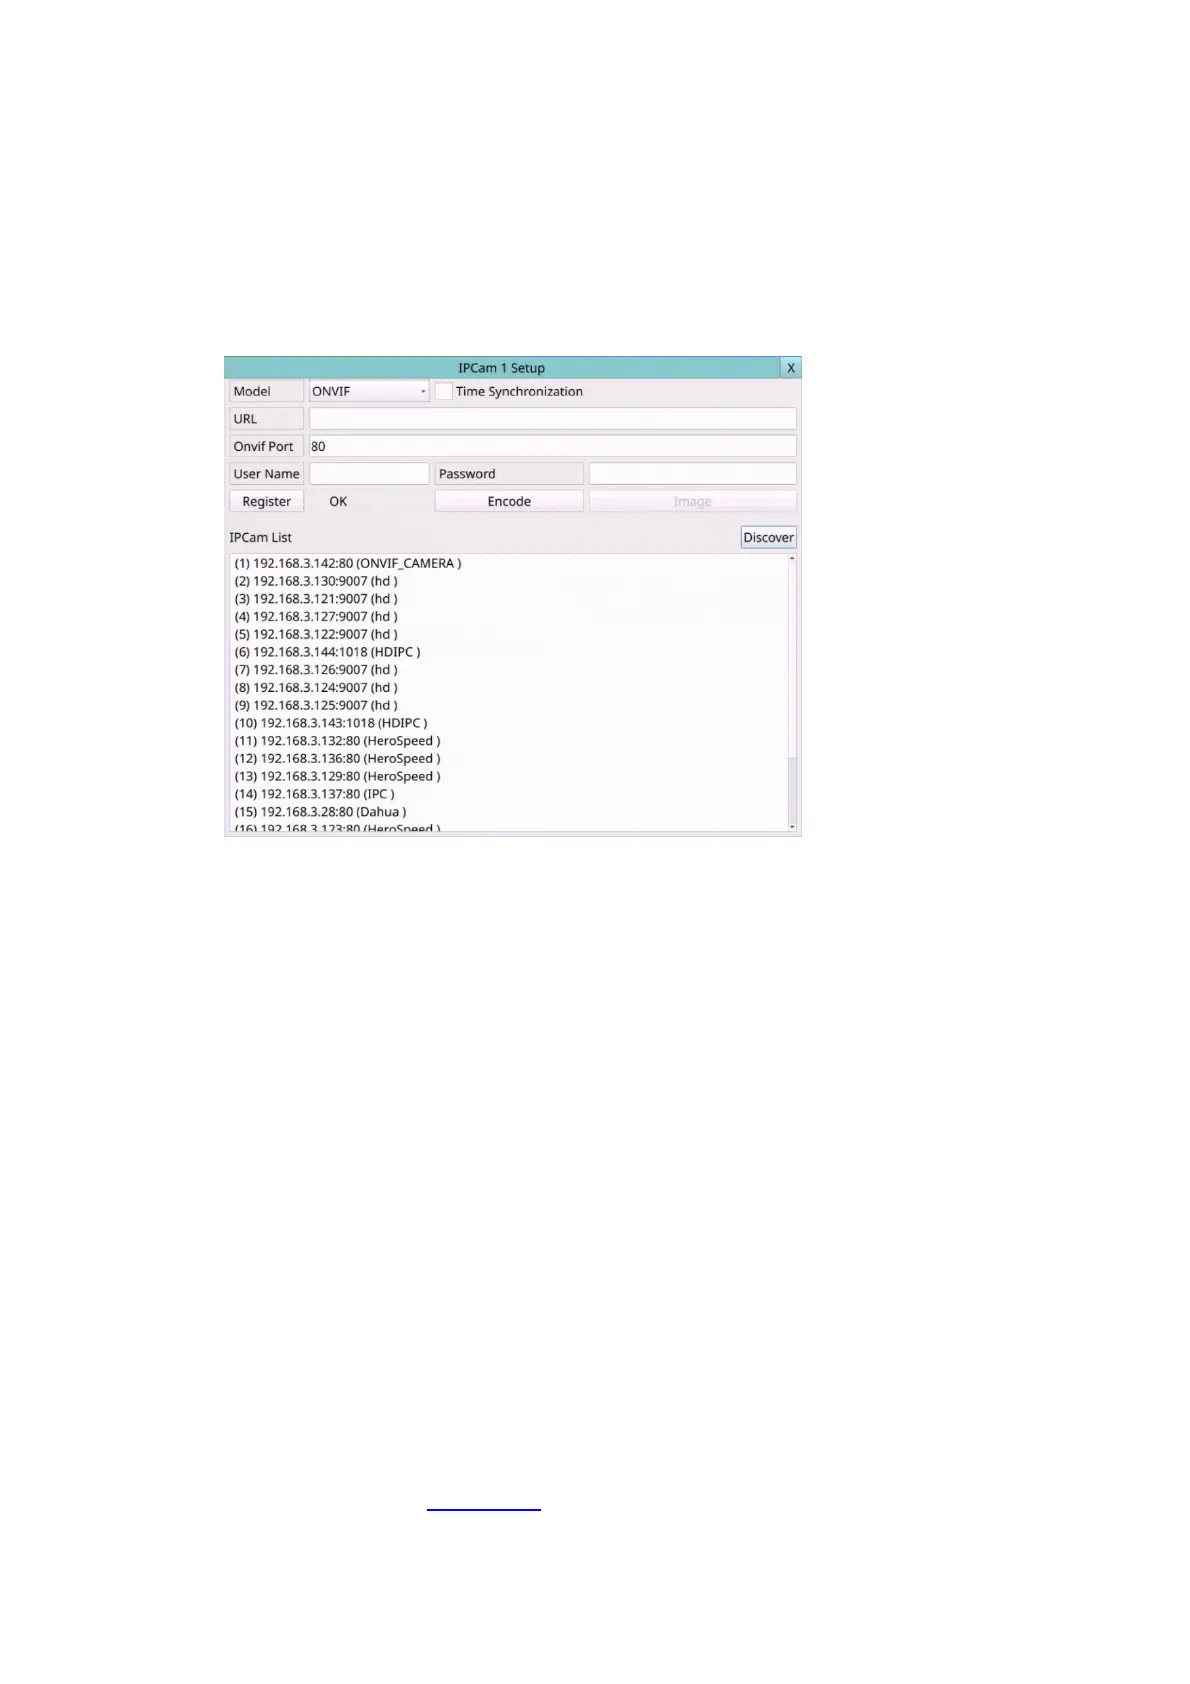
Setup – when Type set as IPCAM, it is used to set up the IPCAM related settings for
this camera. Press Setup (Mouse: Left click) to call up the IPCAM Setup display for the
camera as shown below.
Please select ONVIF for the IP CAM that can support ONVIF Profile S /Profile T,
otherwise select RTSP. For ONVIF, user can click on Discover to discover the IP CAM
(static IP or DHCP) in the LAN, then double click the left mouse button to select the
IP CAM in IPCAM List, the URL and ONVIF Port will be display in the field. For RTSP,
please enter Main Stream URI and Dual Stream URI manually. Please also enter the
correct Username, Password, and if it’s to be time-synchronized with the NVR for the
IP CAM. Please note that camera setup is not supported for RTSP. However,
live/network view, record, and playback are supported, but users need to configure
the bit rate and the frame rate of main/dual stream manually so that the Max.
Incoming bandwidth won’t be exceeded. For plug-and-play, please note that it is
supported for DHCP or static IP of IP-CAM, but only two predefined sets of
username/password for IP-CAM is supported.
After defined sets of Mode/ URL/ Onvif Port/ Username/ Password/ Time
Synchronization, press Register to connect to the IP Camera.
Note: Add IP CAM via left mouse button double click from Discover IP CAM List, it
would keep IP CAM's UUID. So that even if the IP URL changed, still can find the IP
CAM and automatic use. If key-in the URL and ONVIF Port values directly, it wouldn't
keep the UUID. After the IP CAM URL is changed, the user needs to modify the URL
value manually.
Title – The title (Max. 16 characters) of this camera. Please follow the Text Input
method described in Section 4.1 to modify this item.
Covert – covert or not. If the camera is covert, the video of this camera can only be
seen if the user has logged in as Administrator.