Basic scan-to-file jobs on the scanner
Introduction to scan-to-file jobs
Introduction
A basic scan-to-file job takes two steps. Feed the original and press the start key. Every
other type of scan-to-file job, where you change the scan-to-file settings, is called an ex-
tended scan-to-file job. An extended scan-to-file job takes one additional step. Define the
scan-to-file job settings on the scanner operator panel. The scanner operator panel shows
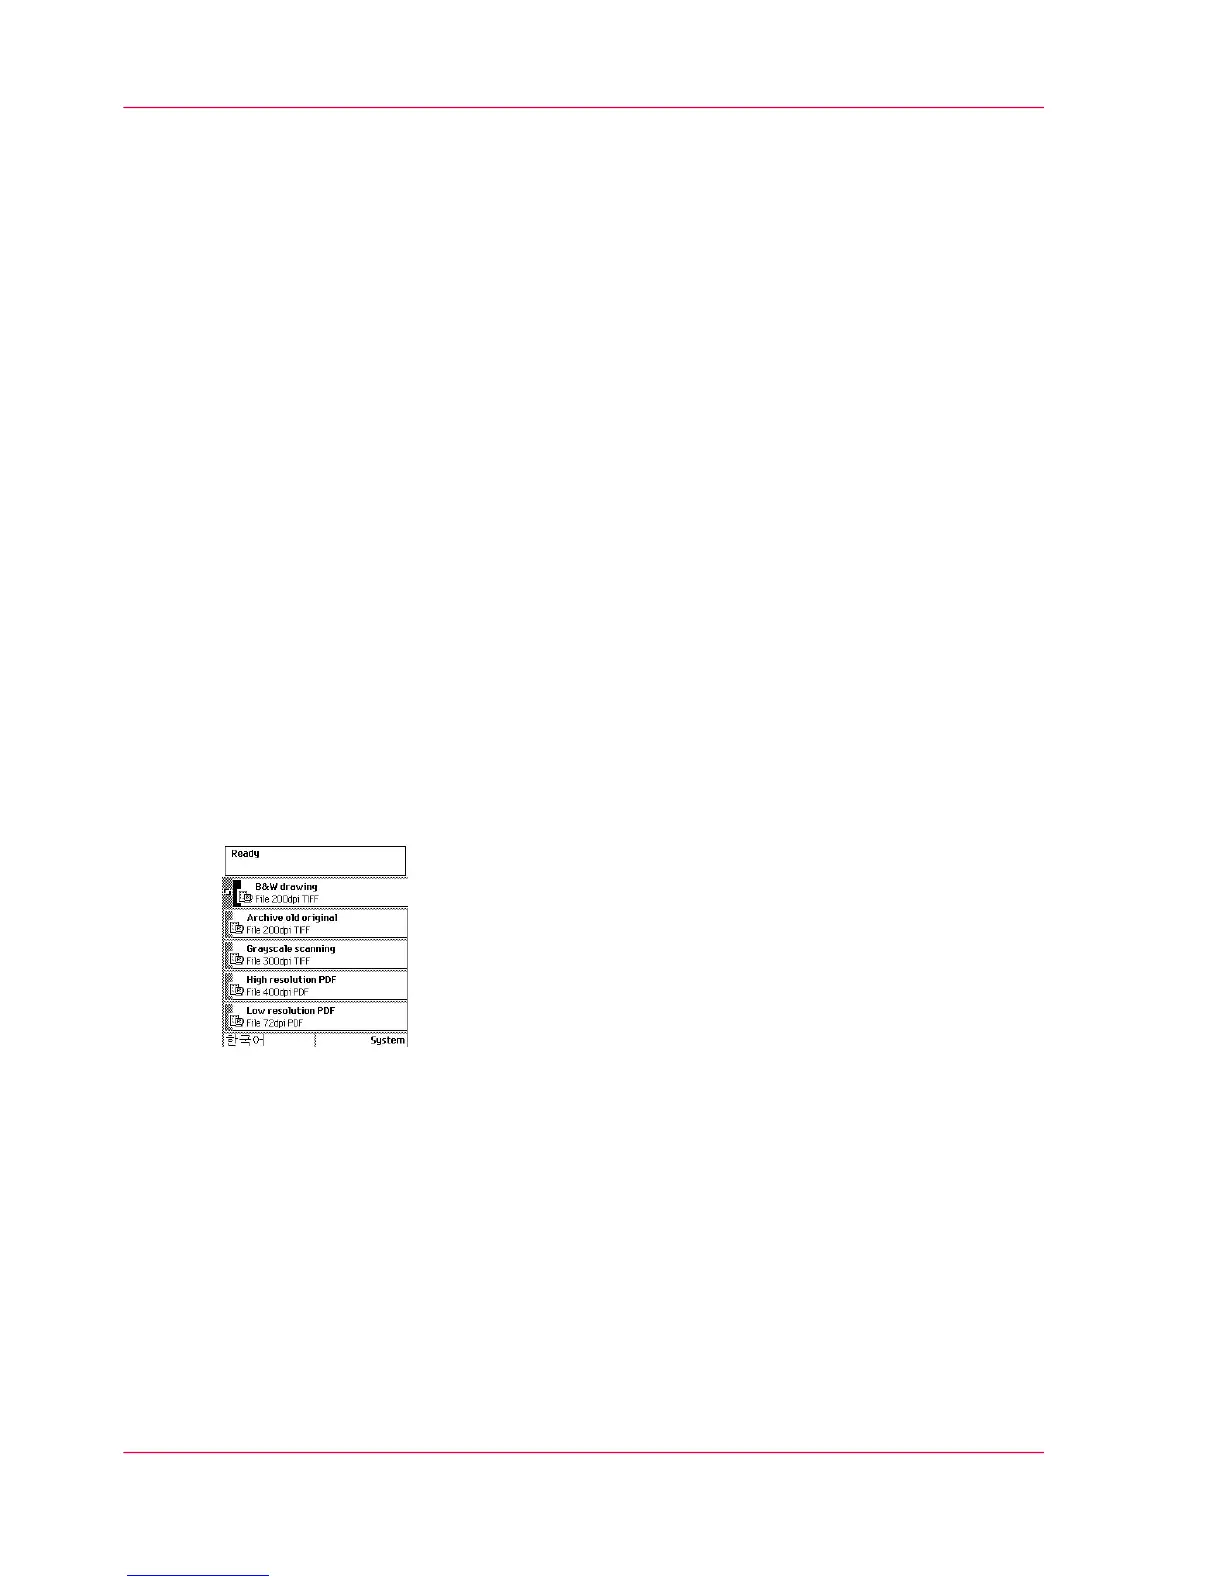
five scan-to-file job templates. The scan-to-file job templates provide access to the different
settings per scan-to-file job template. When you select a scan-to-file job template, the
scanner operator panel shows the top 5 settings of the selected scan-to-file job template.
The top 5 settings are the most often used settings. You can define the top 5 settings and
their values for each scan-to-file job template with the Océ TC4 Power Logic
®
controller
application. You can use the scroll wheel to see the other settings. After you start a scan-
to-file job, you can manage your jobs from the 'Scan jobs' workspace in the Océ TC4
Power Logic
®
controller application.
Illustration
[13] The scan-to-file job templates
Steps in a basic scan-to-file job
1.
Feed the original.
2.
Press the green start key.
Result
You get a digital file of your original.
Chapter 2 - Use the Océ TC432
Introduction to scan-to-file jobs