2021-03-23 / Rev. 10 VV016042 100
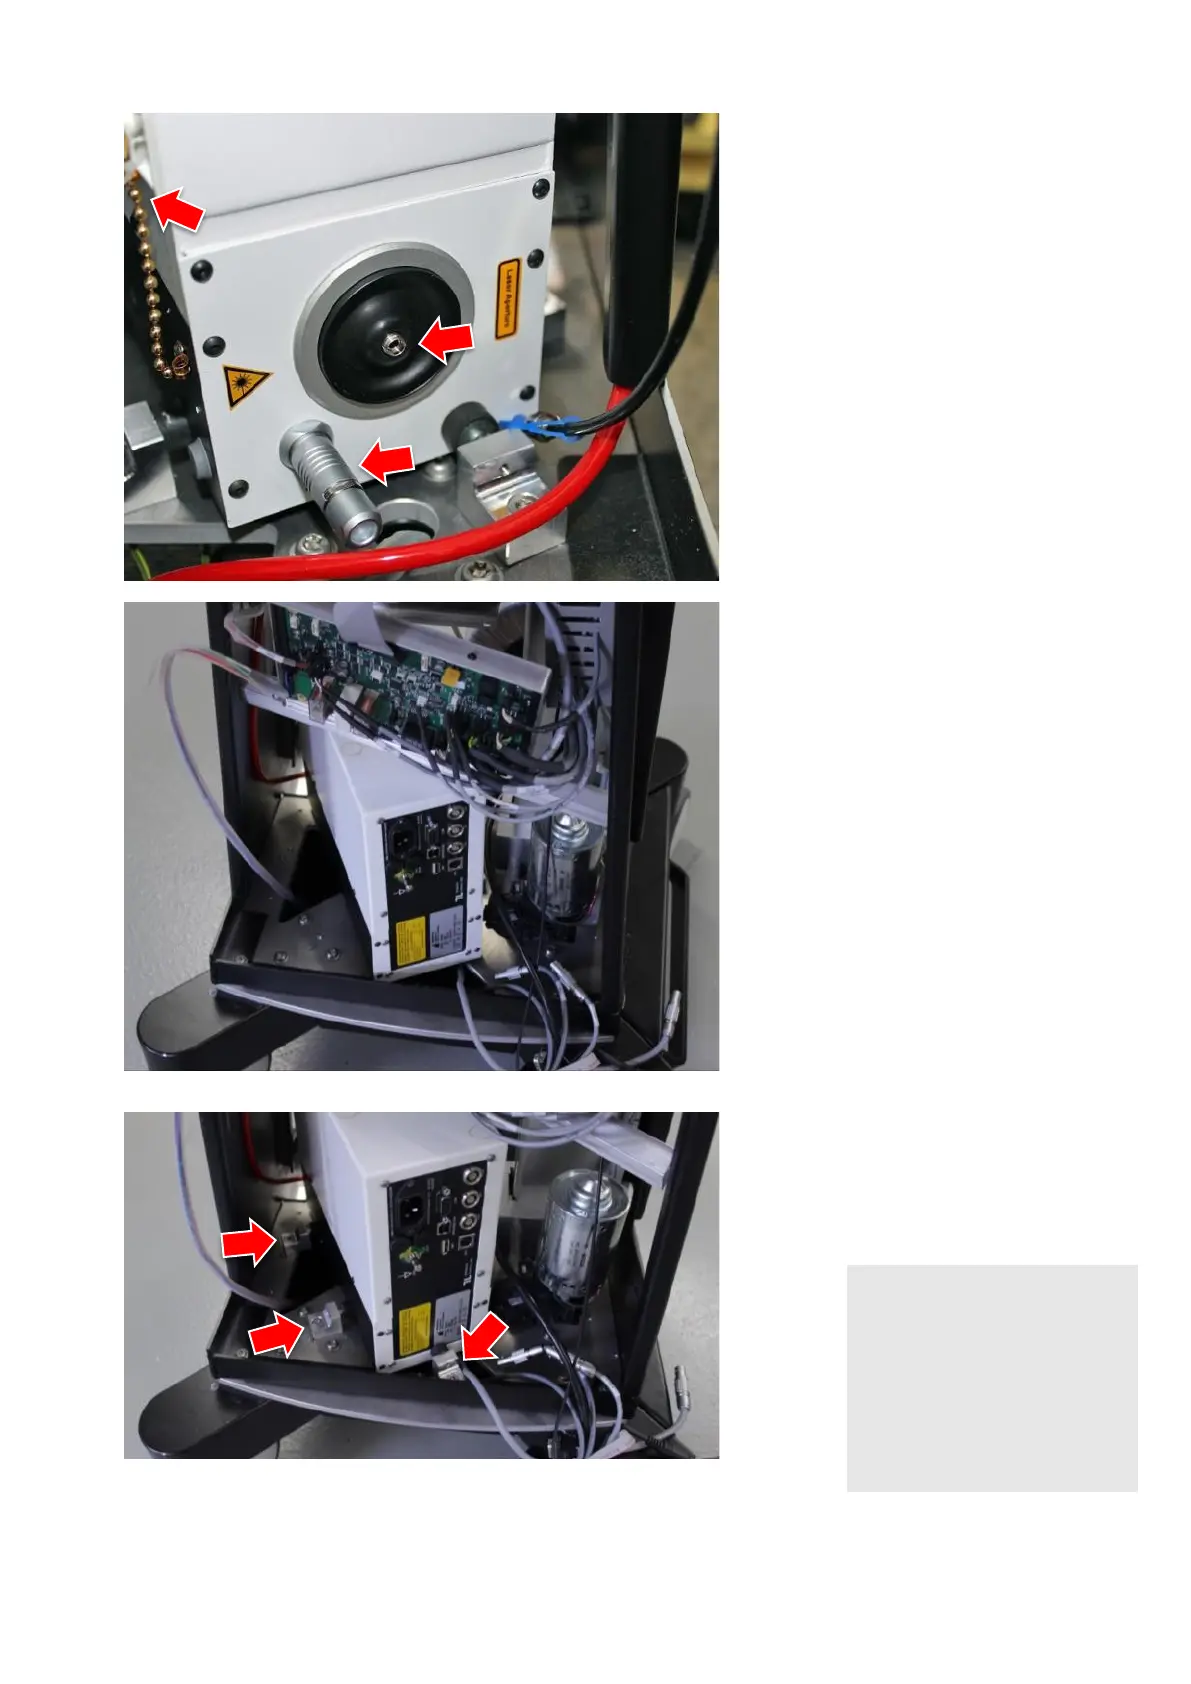
Unscrew light fibre at laser module.
Screw on protection cap on the la-
ser module. The cap is chained to
the laser module.
Remove dongle beside fibre attach-
ment.
Plug out all cables that connect the
laser module with the supply print at
the supply print.
Plug out all cables at the laser mod-
ule.
Loosen the screws (TX25) from the
three marked spacers so that the
module comes free and remember
the corresponding positions.
NOTE!
Laser module is not fixed in
the device
Laser module and device can
be damaged
► The force that holds the laser
module can be adjusted by
the rubber buffer. Screw in or
out for less or more force.