1-5 Window Descriptions
1-5-2 Main Window
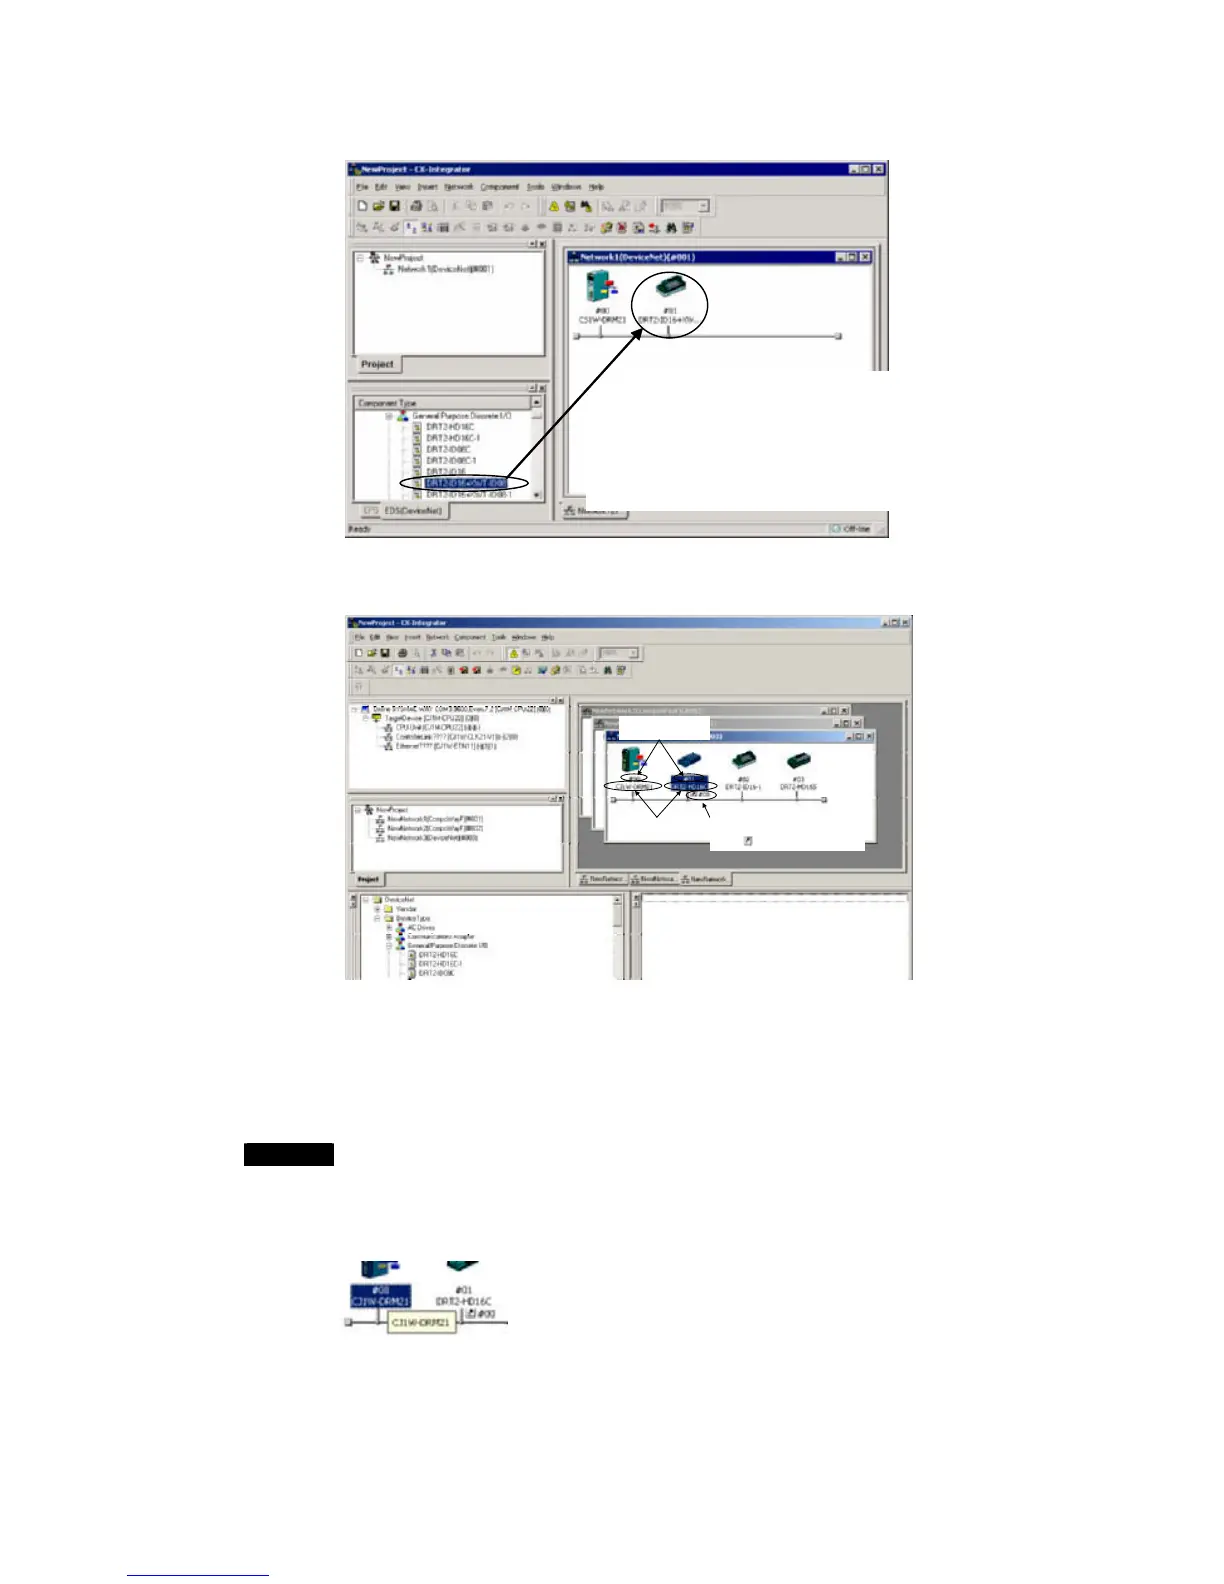
DeviceNet:
A Master or Slave can be selected from the EDS (DeviceNet) Tab
Page and then dragged and dropped in the Network Configuration
Window.
Other Device:
Other components can be selected from the CPS Tab Page and
then dragged and dropped in the Network Configuration Window.
With DeviceNet, the node address, product name, and slave allocation status in the master
will be displayed as shown below.
Node addresses are
displayed with a # prefix.
Product names are
displayed.
When slaves are registered with the master,
the node address of the master is displayed
after the
icon with a # prefix.
Later, the component parameters in the virtual network that was created can be downloaded
to the devices on the actual network online. Furthermore, the configuration of the virtual
network that was created (not including component parameters) or selected component
parameters can be compared to the actual network configuration or the parameters in the
actual component.
Note
The same functions can be performed by right-clicking in the window and selecting
from the Edit or Component Menu. If the mouse pointer is moved to a component, a
description of the component will be displayed in a pop-up.
For other than DeviceNet, the version of each component is also displayed (except for
version 0).
1-31
 Loading...