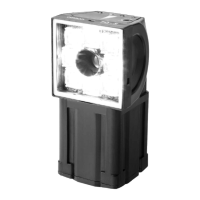
Beam (FHV series)
• The beam center may vary product by product. When mounting this module, be sure to confirm the
center position of the video on the monitor.
The beam center of this product may vary over a couple of pixels due to the variation of ambient
temperature because of the material characteristics.
• Select the model by confirming the field of view and camera installation distance on the optical dia-
gram. In addition, the field of view may vary product by product.
When mounting this product, be sure to confirm video using the monitor.
Others (FHV series)
• For better heat radiation, use the separately sold fitting (FHV-XMT-7) or mount the product to the
metal frame (recommended size: 100×110 mm or more and thickness: 10 mm or more).
• Do not assemble the lighting module or waterproof hood in a hot and humid environment. Other-
wise, condensation may occur. If it becomes cloudy, remove the lighting cover and wipe off the
moisture with an absorbent, but soft cloth so as not to damage the product.
• There are two types of polarizing filters: FHV-XPL (for visible light) and FHV-XPL-IR (for both visible
and infrared lights). Use the appropriate option according to the illumination light source.
• If switching the focus for a long period of time continuously except when installing and adjusting the
product, performance may be degraded due to heat generation or abrasion of inner parts.
• When the lens module is mounted to the product, the specificatins of vibration tolerance are
changed.
• Do not touch the lens module after it is mounted. Otherwise, it may be broken.
• If using this product without attaching the lighting module in an environment needing waterproof, use
waterproof hood FHV-XHD series.
• Operate the product by using Calculation and Branch processing items on the Smart Camera side
additionally and creating a check flow, for example, if the stage or robot is within a range of -xxxxx to
xxxxx from its movable range, data are not output to outside.
• The lighting module and lens module are fixed to the smart camera with dropout preventing screws.
Do not remve them from the product.
• When turning on the FHV series, the date/time settings always returns to the default. Therefore, you
need to re-set the date/time with an operation or a communication command every time at startup.
For details of communication commands, refer to each communication command in the Vision
System FH/FHV Series User's Manual for Communications Settings (Cat. No.Z342).
LED Safety (FHV series)
This product is classified into the following risk groups by IEC62471.
Model Color LED safety Display
FHV-LTM-W White Risk group 2 A
FHV-LTM-R Red Risk group 1 B
FHV-LTM-IR Infrared light Risk group 1 C
FHV-LTM-MC
Red Risk group 1 B
Green Risk group 2 A
Blue Risk group 2 A
Infrared light Risk group 1 C
Precautions for Correct Use
29
FH/FHV Series Vision System User’s Manual (Z365-E1)
 Loading...