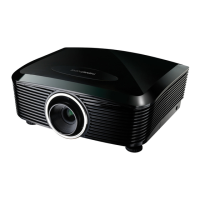
Do you have a question about the Optoma HD86 and is the answer not in the manual?
Detailed block diagrams illustrating the main system architecture.
Basic checks to perform before disassembling the projector for troubleshooting.
Diagnostic flowcharts for identifying and resolving projector errors and malfunctions.
Steps to diagnose and fix problems related to image display and projector output.
Guidance on resolving issues based on LED status, fan operation, and temperature.
Solutions for common image problems like streaking, flatness, color mismatch, and lamp issues.
Step-by-step guide for safely removing and inspecting the projector lens.
Instructions for disassembling the lamp cover and removing the lamp module.
Procedure for removing the lamp module and its associated filter component.
Guide on how to remove the projector's top case for internal access.
Steps for removing the top cover and accessing the keypad board assembly.
Procedure for removing the main chassis and the main board from the projector.
Guide on how to safely remove the projector's format board.
Steps for removing the format board and the projector's front case assembly.
Procedure for disassembling the front IR sensor and IO boards.
Instructions for removing the IO board and its associated case components.
Guide on how to remove the IO board and cooling fan assemblies.
Procedure for removing the DB and the projector's optical engine.
Instructions for removing the optical engine, thermostat, and color wheel.
Guide on how to remove the thermostat and color wheel (C/W) components.
Steps for disassembling and removing the index and IRIS boards.
Procedure for safely removing and replacing the Digital Micromirror Device (DMD) chip.
Instructions for removing the ballast assembly and cooling fans.
Guide on how to remove cooling fans and the projector's power board.
Steps for disassembling the thermal board and lamp module chassis.
Procedure for removing the lamp module chassis and the fan 3 assembly.
Procedure for upgrading projector firmware using the FlashUpgrader application.
Instructions on how to access the service mode for calibration procedures.
| Display Technology | DLP |
|---|---|
| Resolution | 1920 x 1080 |
| Lamp Life | 3000 hours |
| Zoom | 1.2x |
| Lens Shift | Vertical |
| Inputs | HDMI, VGA, Component, Composite |
| Projection Size | 30 - 300 inches |