Expansion Module Installation
3-18 StorageTek SL150 Modular Tape Library Installation Manual
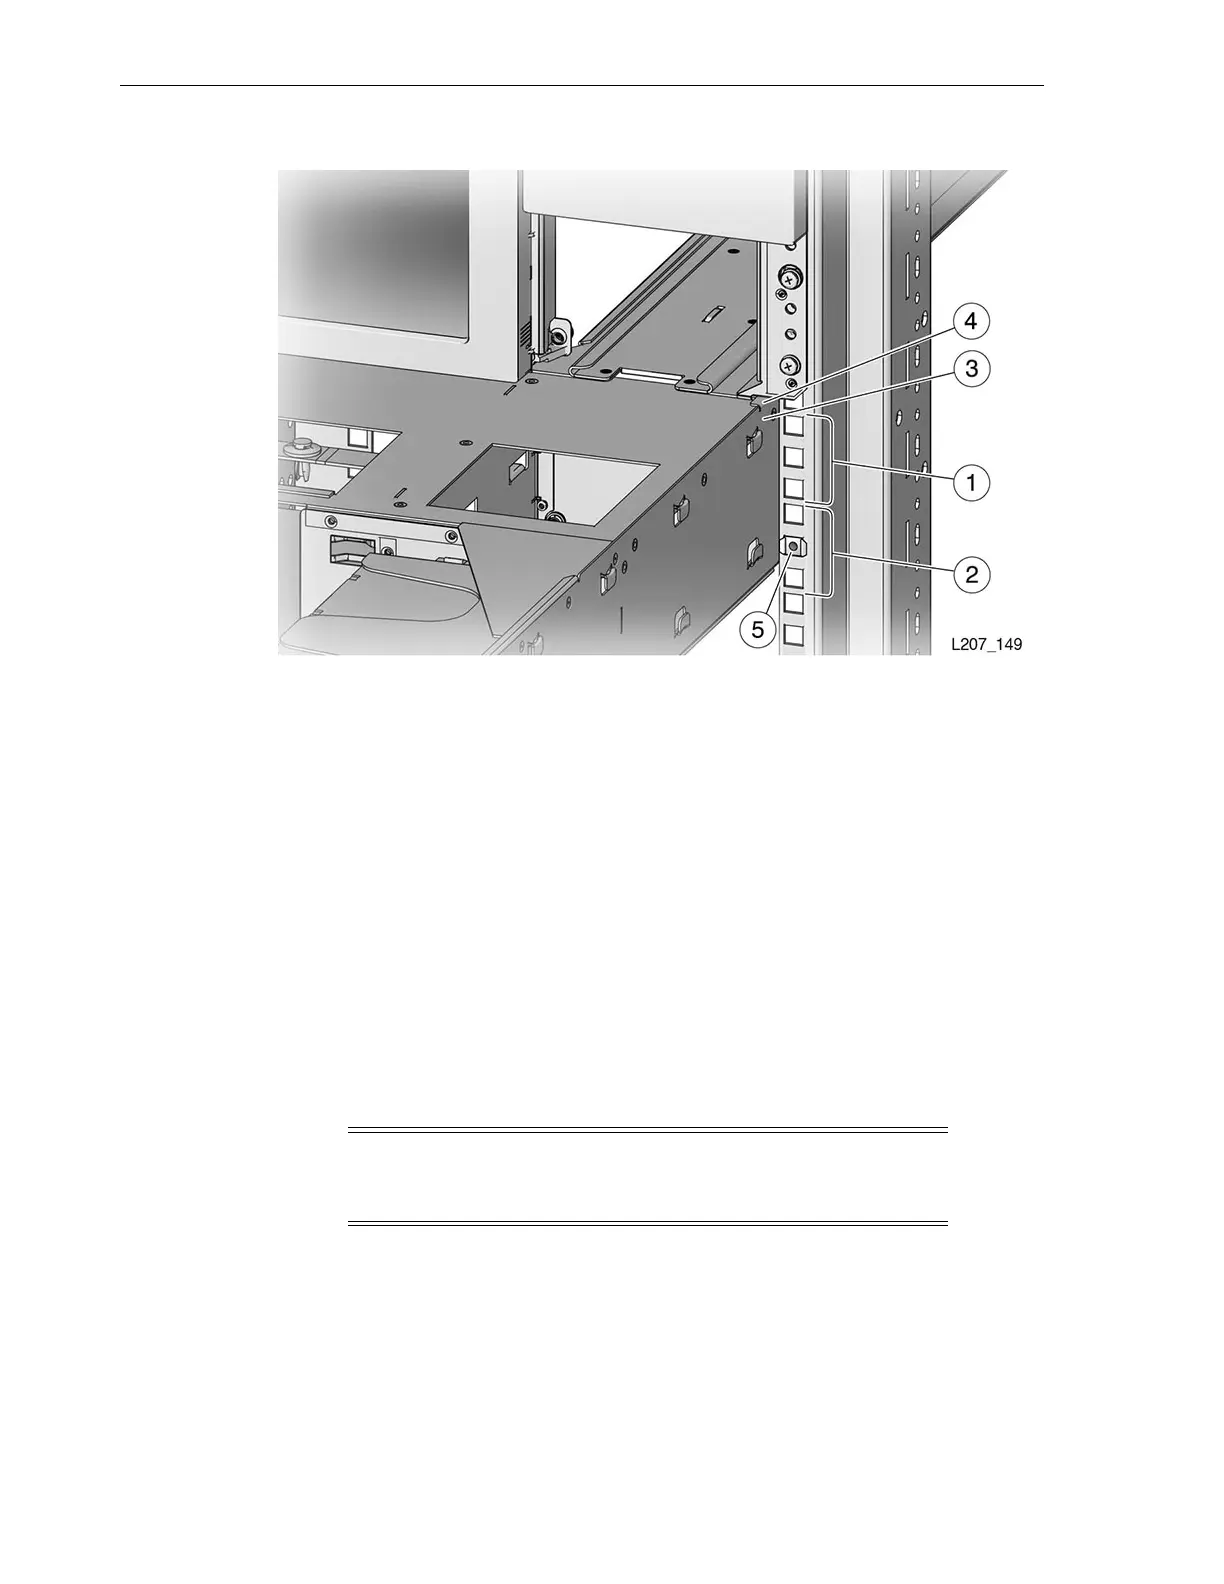
Figure 3–18 Expansion Module Installation
Illustration Legend:
1-FirstU
2 - Second U
3 - Module Flange
4 - Module Engagement
5 - Clip Nut Location (Second Hole of the Second U)
Task 2 Install Clip Nuts at the Back of the Rack
1. Locate the 2U space at the back of the rack immediately below the installed
module.
2. Insert a clip nut in the third hole down from the junction of the first U boundary
on both the left and right rail stiles.
3. Make sure the clip nuts are parallel (in the identical mounting hole).
Prepare the Expansion Module for Installation
Perform the following tasks to prepare the expansion module for installation.
Task 1 Remove the Cartridge Magazines
1. Reach behind the front panel and lift the latch to release the magazine (see
Figure 3–19).
The expansion module is open at the top, and the latches are located behind the
front face of the module.
Note: This step assumes that you have removed the expansion
module from the shipping container (see "Unpack and Acclimate
the SL150 Library").

 Loading...


