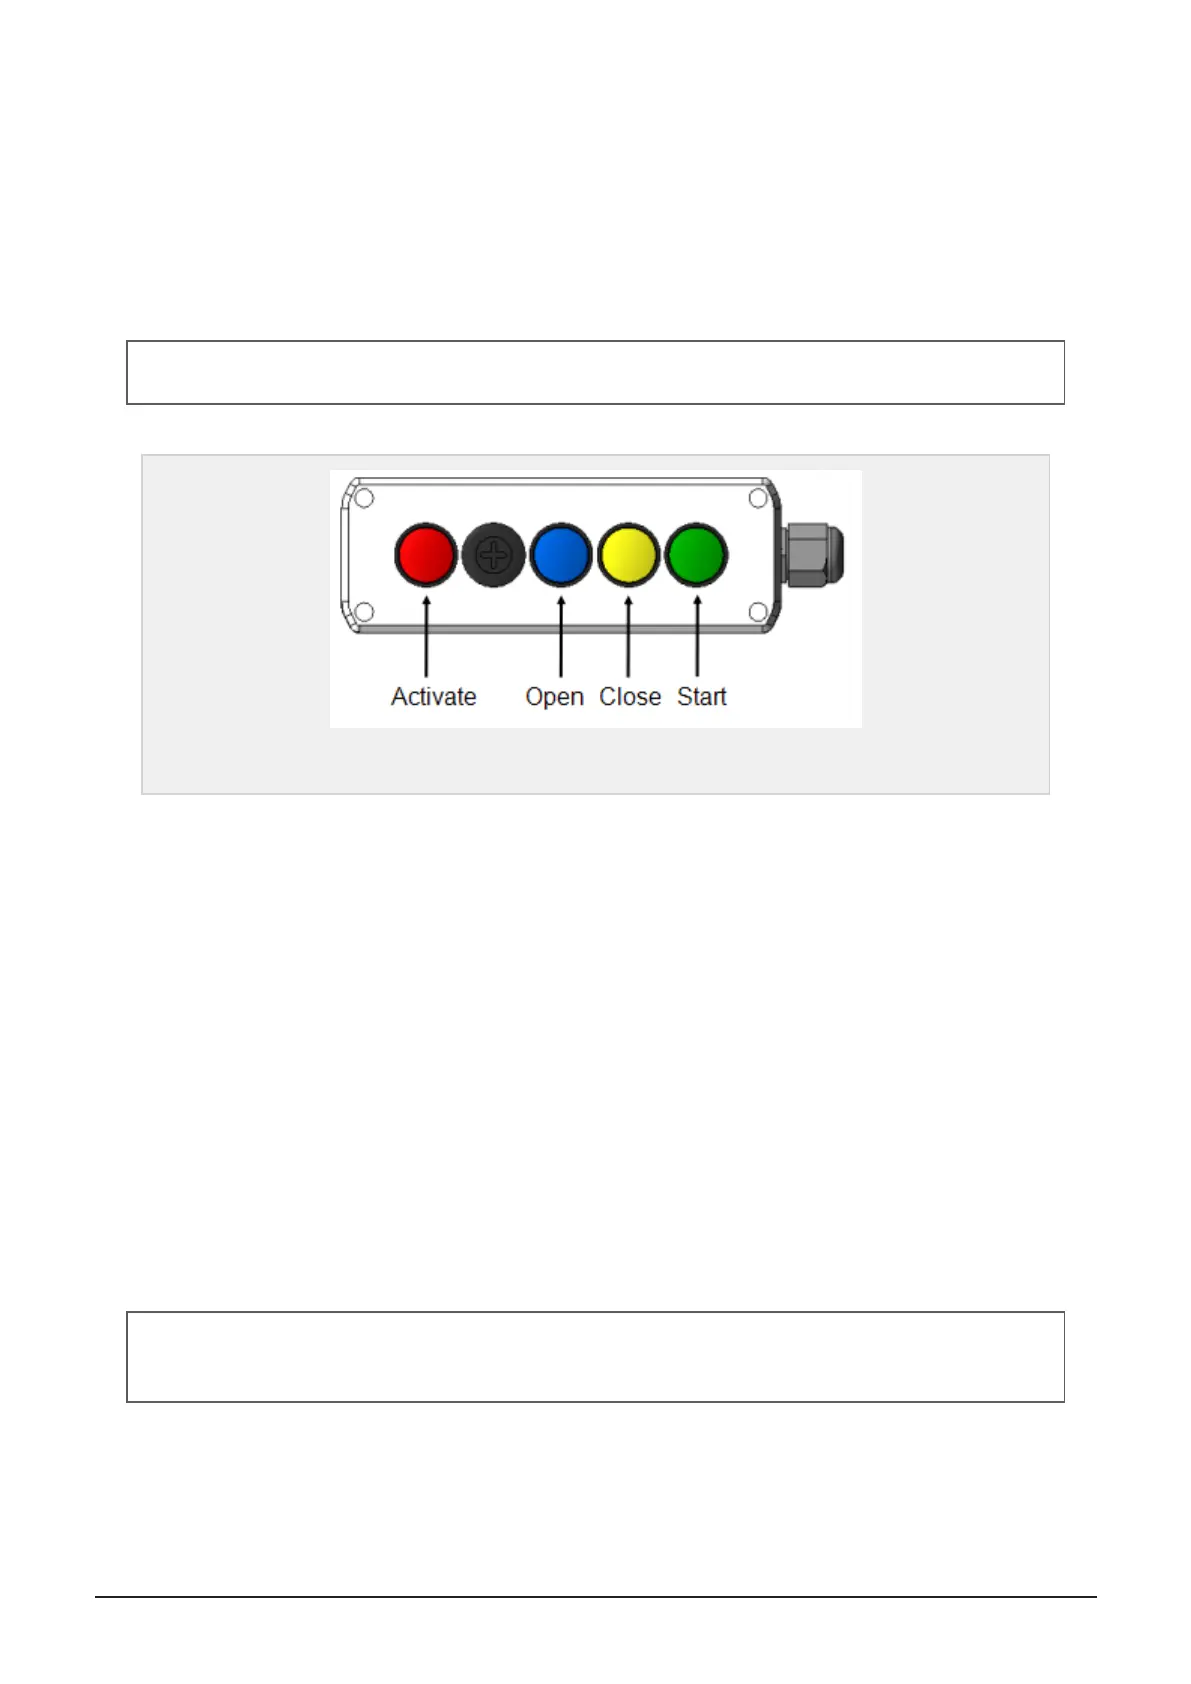
Start net/film system
Press and hold green button for at least 2 seconds until the net/film
system starts
Release brake: Press and hold red button and shortly tap blue button.
Engage brake: Press and hold red button and shortly tap yellow button.
The brake will automatically release and engage when the opening and closing sequences are engaged.
NOTE: When the net/film system is started from the remote control, the machine will continue in auto mode
when the sequence is completed.
Figure 3.5 :
Plastic tying unit control
3.7 WRAPPING TABLE
3.7.1 Principle of operation
The wrapping table rotates the bale so that the wrapping arms can wind even layers of plastic around the
bale, thus sealing the material, and making the bale ready for storage. After the wrapping is complete, the
wrapping table tilts forward, rolling the bale off so that it can be collected and stored.
3.7.2 Wrapping settings
Wrapping arms, high speed: Valve P1 regulates the oil flow to the wrapping arms. Turning it clockwise
increases the speed. Counterclockwise decreases the speed. Recommended wrapping arms speed is 27-28
rpm.
Perform adjustment as follows: Open valve P1 completely. Then close valve P1 gradually until the correct
speed is achieved. Check and reset the settings on the display unit in order to maintain the appropriate wrap-
ping belt rotation and hence wrap film overlap.
Wrapping arms, low speed: When the wrapping arms high speed is set, the low speed may be set using valve
P2. The low speed may not exceed 10 rpm.
NOTE: The wrapping arms low speed needs to be set correctly in order to ensure the correct orientation to the
film cutters. The wrapping arm speed may increase when the oil is warm. Therefore, closely monitor the wrap-
ping arm slow speed and readjust if needed. The position of sensor S5 may also need to be readjusted.
3 SETTINGS AND HYDRAULIC ADJUSTMENTS 26