7-50
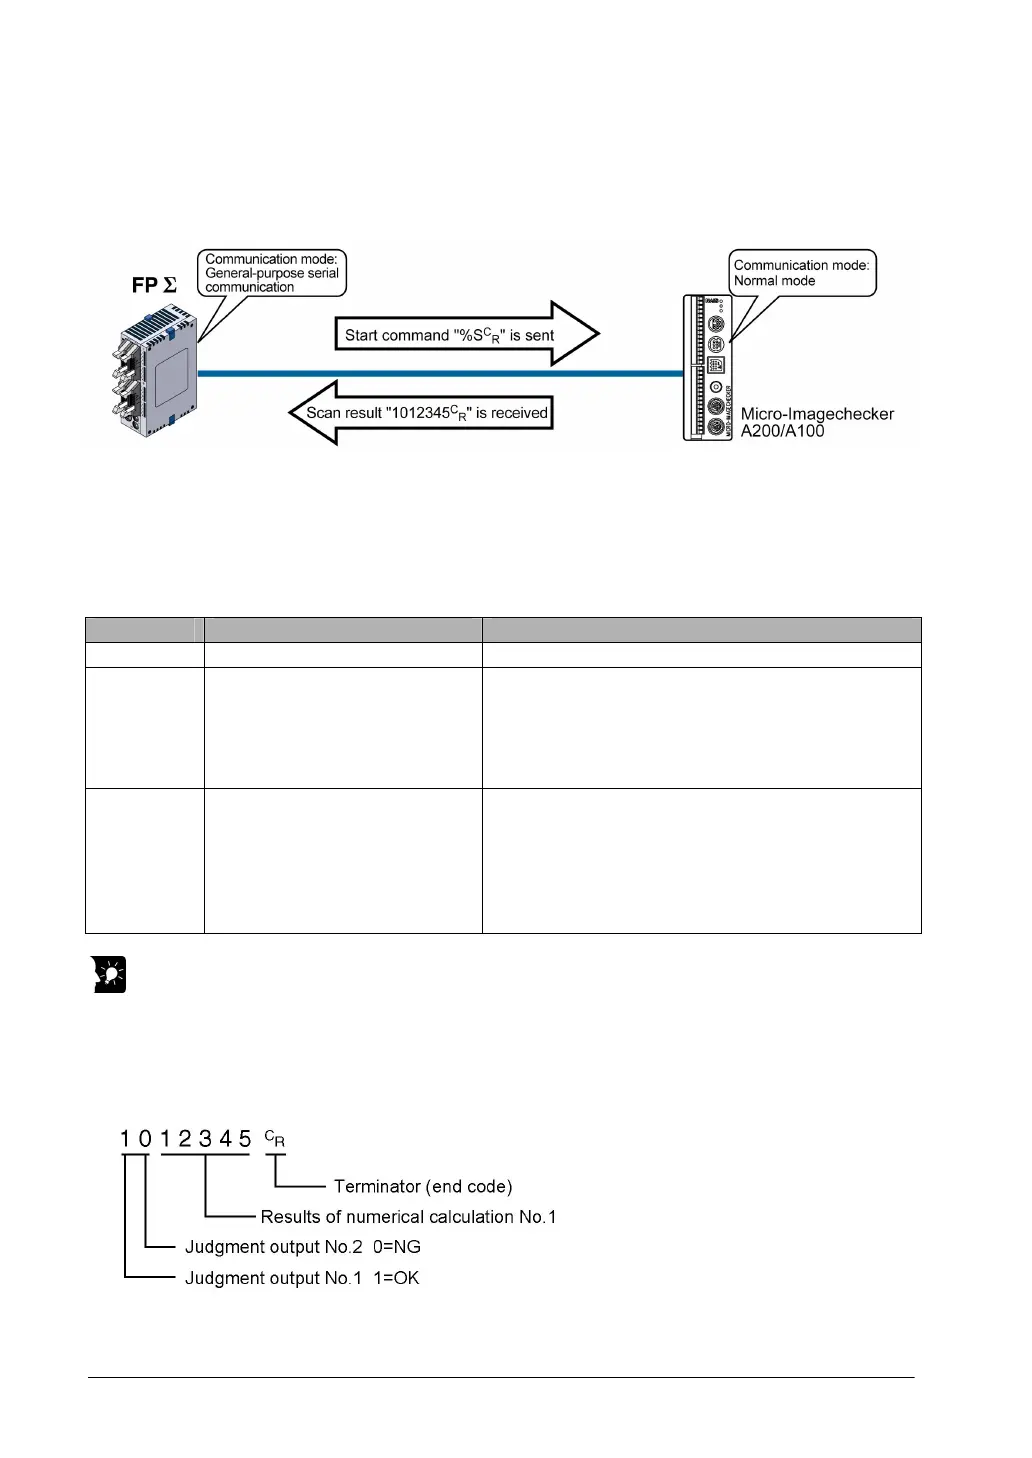
1:1 communication with Micro-Imagechecker
Overview
The FPΣ and Micro-Imagechecker A200/A100 are connected using an RS232C cable. The results of the
scan are stored in the data registers of the FPΣ.
• After the scan start code “%S
C
R
” has been sent from the FPΣ side, the scan result is returned from the
Micro-Imagechecker as the response.
Communication format settings for Micro-Imagechecker
To set the communication mode and communication format settings for the Micro-Imagechecker, select
“5: communication” under “5: ENVIRONMENT” on the main menu, and the set the following items.
No. Name Set Value
No. 51 Communication mode Normal mode
No. 52 Serial settings Baud rate: ………….
Bit length: …………..
Stop bit: ……………..
Parity : ………….…...
Flow control: ………..
9600 bps
8 bits
1 bit
None/Odd
None
No. 53 Serial output settings Output digit: …………
Invalid Digit: ……….
Read End: …..………
Process End: ……….
Numerical calculation:
Judgment: ………….
5 column
Repl. 0
None
None
Output
Output
Key Point:
• If “Del” is specified for the invalid processing parameter, zero suppression processing will be carried
out on the output data, and the output format will be changed. Always make sure “Repl. 0” is specified.
• When outputting data to an external device, numerical calculation is required, so “Out” should be
specified for the “Numerical calculation” parameter.
• With the above settings, the following data will be output from the Micro-Imagechecker.