52
9.4. Scanner Self-test
Without connecting the scanner to the PC, the following scanner self-tests can be performed. The following mechanical tests are
generally used after replacing or reassembling rollers (Conveyor Roller, Exit Roller) and other mechanical parts related to
feeding documents.
Note:
*: For LEDs (Red, Green) position shown in the following table, see Sec. 3.
**: It takes about 20 seconds until the LEDs change to match the status you want.
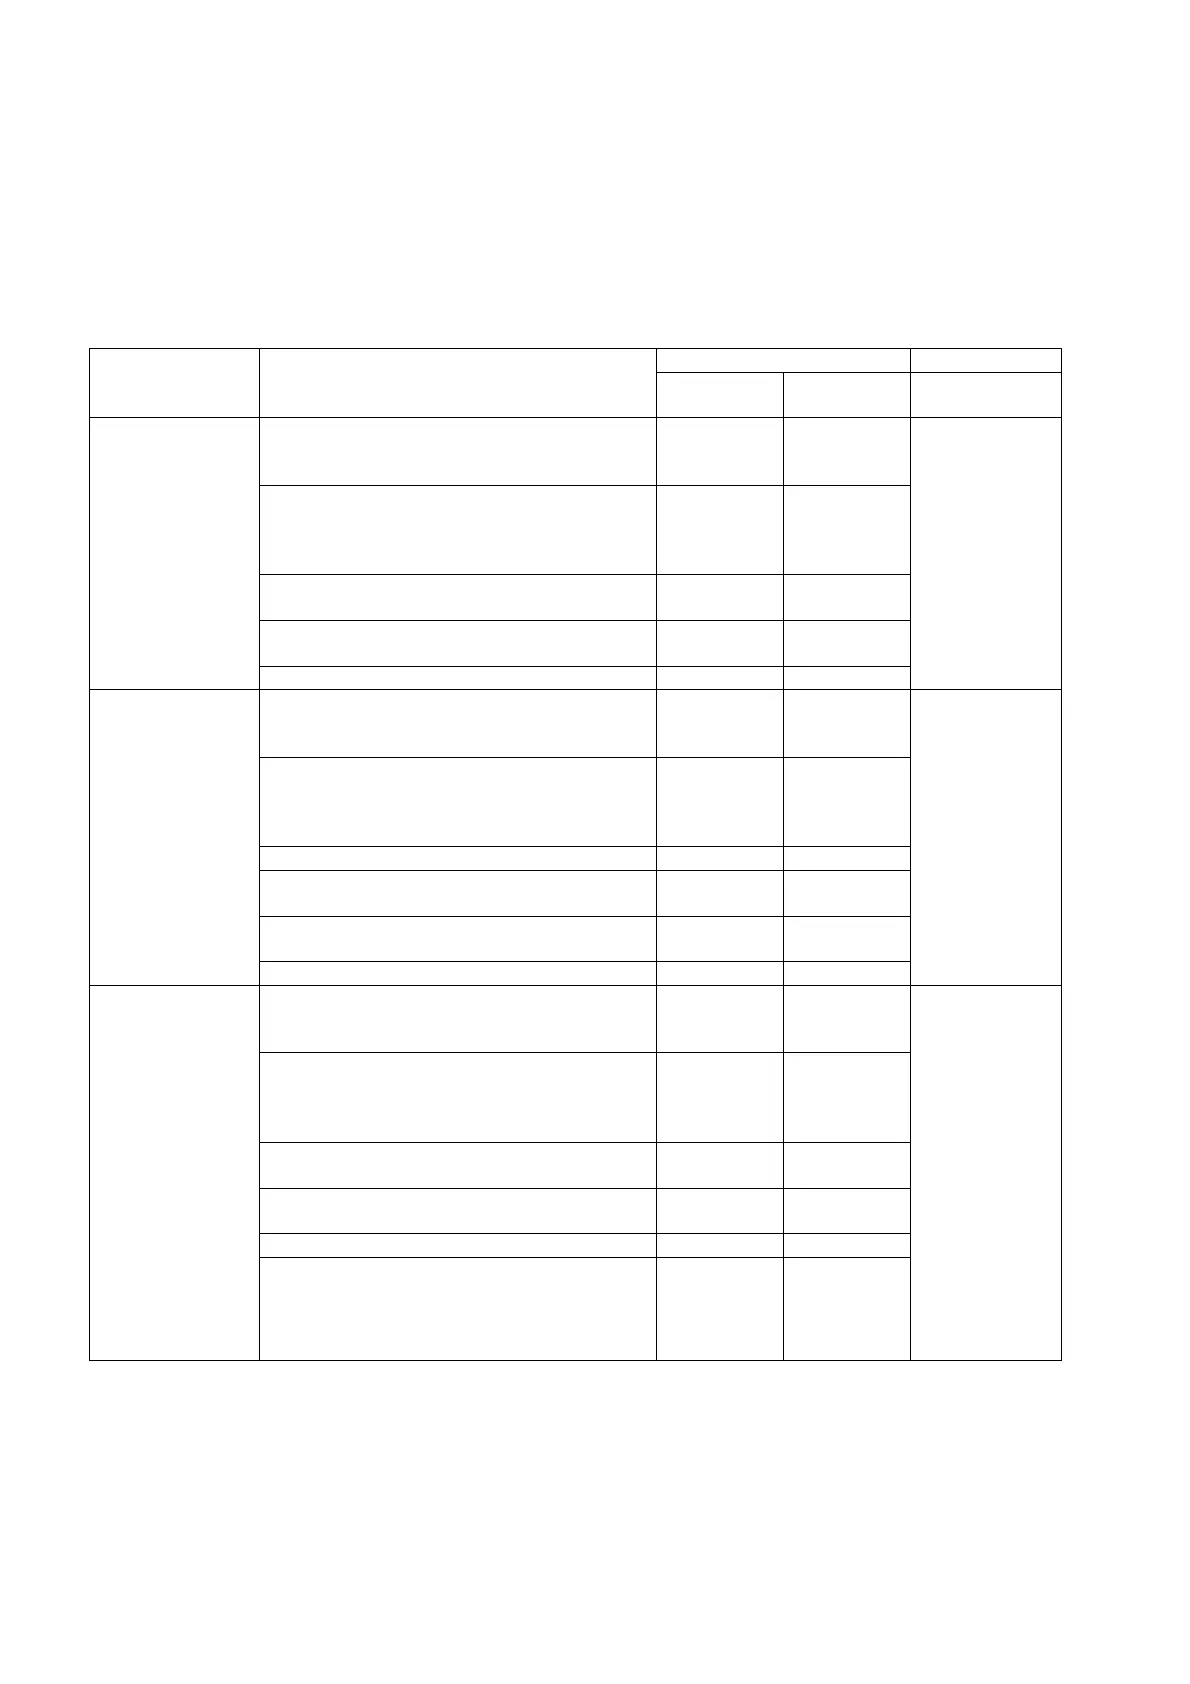
Test Item Operation LED Status Remarks
* LED
(Red)
* LED
(Green)
**1. Conveyor
Motor’s rotating
1. While holding down “START/STOP Button”
on the Top Cover, push the “Power Button” to
turn on the scanner.
——
2. Release the Buttons (“START/STOP Button”
and “Power Button”) when the LEDs change
to match the status in the right column.
(LED (Red): ON / LED (Green): OFF)
ON OFF
3. Push the “START/STOP Button” once to start
the test.
ON OFF
4. Push the “START/STOP Button” once to stop
the test.
ON OFF
5. Turn off the scanner to finish the test. ON OFF
**2. Feed 1. While holding down “START/STOP Button”
on the Top Cover, push the “Power Button” to
turn on the scanner.
——
2. Release the Buttons (“START/STOP Button”
and “Power Button”) when the LEDs change
to match the status in the right column.
(LED (Red): OFF / LED (Green): ON)
OFF ON
3. Set documents on the Feed Tray. OFF ON
4. Push the “START/STOP Button” once to
start the test.
OFF ON
5. Push the “START/STOP Button” once to stop
the test.
OFF ON
6. Turn off the scanner to finish the test.
——
**3. Shading 1. While holding down “START/STOP Button”
on the Top Cover, push the “Power Button” to
turn on the scanner.
——1. Before
executing the
shading function,
be sure to clean
the scanning
area, rollers, and
conveyors related
to conveying
documents
2. Until this
process is
completed, don’t
stop the process
by opening any
doors or turning
off the scanner.
2. Release the Buttons (“START/STOP Button”
and “Power Button”) when the LEDs change
to match the status in the right column.
(LED (Red): OFF / LED (Green): OFF)
OFF OFF
3. Set a piece of Shading Sheet (Part No.: See
14.5.) on the Feed Tray in portrait orientation.
OFF OFF
4. Hold down the “START/STOP Button” for 5
seconds or more to enter the shading test.
OFF ON
5. Paper feeding starts to execute the shading. OFF ON
6. After confirming the LED (green) turns OFF,
turn off the scanner to finish the test.
OFF OFF

 Loading...